GAI-TRONICS
VoIP Telephone Configuration Guide
Page 12 of 78
4.2
Quick Start
The factory defaults will generally be sufficient in most cases, but the following steps must be
taken as a minimum:
•
Provide an Ethernet connection and power (either 24-48Vdc or PoE)
•
Ensure that a DHCP server is available on the network, and that the IP address
allocated to the telephone can be discovered (DHCP is the normal factory default
provisioning method). If DHCP fails (or there is no DHCP server) the telephone will
revert to a default IP address of
192.168.1.2
after a few minutes
•
Using a web browser, browse to the IP address.
•
When prompted, enter the user name and password (Defaults:
user
&
password
)
•
From the Home Page, select the Configuration section, and from that the VoIP
Accounts main page
•
On the VoIP Account 1 Information sub-page, enter:
o
The user name (its extension number on the SIP server)
o
Domain name, Proxy domain name and Register domain name
– set all of
these to the IP address of the SIP server
o
Auth user password
– set to the authentication password for the extension on
the SIP server.
o
Ensure Provider enable and Register enable are both set to enabled.
o
Check that the registration state changes to “registered”
•
Program any speed dial memories using the User Configuration main page
4.3
Web Page Controls
The following controls appear on every web page:
•
Update
– commits any change to any parameters on the current page. Navigating to
a different page without clicking update will lose any changes made. Update will
usually change the parameter immediately, but it will not be permanently saved (ie
changes will be lost if the phone is rebooted or power-cycled. To make changes
permanent, use Save.
•
Save
– saves the current configuration to flash memory
•
Restore
– restores the telephone to its last saved configuration
•
Reboot
– performs a soft reboot of the telephone.
Note
- if any server address or domain name is changed via a web page, the telephone must
be rebooted (or power cycled) for the change to take effect.
4.4
Configuration Parameter Descriptions
All the available parameters are listed below, in the order in which they appear within the web
page structure, working through each main page and all its sub-pages in turn.
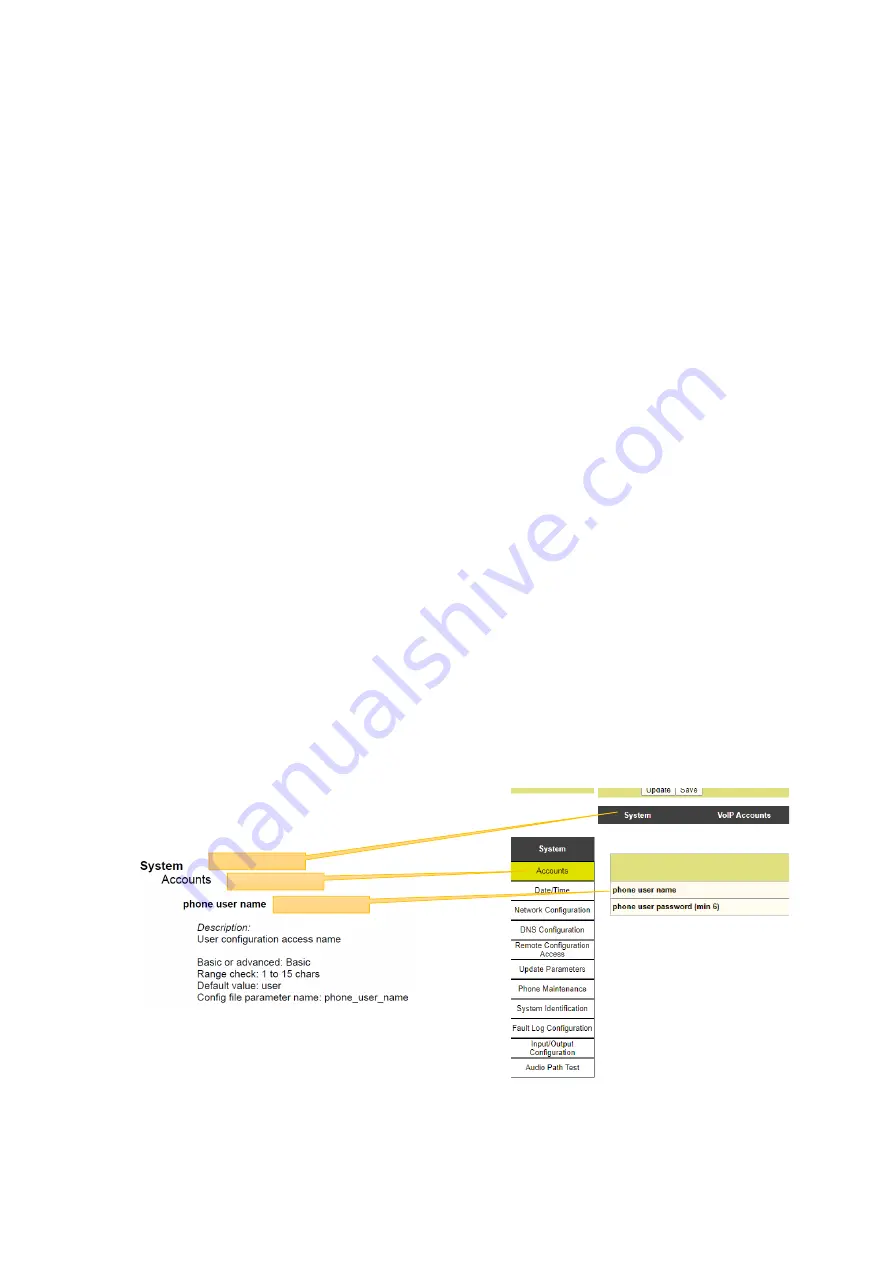
The information for each parameter is set out in a
standard layout, identifying the main web page and
sub page where it is located.
Note that the default values listed here relate to the
Titan 18 button product. Parameters may vary by
product model - refer to referenced sections for
details.
Main Page
Sub Page
Parameter


