background image

Device Connection

Use Bluetooth to Share Data

Connect your Phone to another device over Bluetooth to share data, import and export contacts, and
set up Internet tethering.

Use Bluetooth to send files: Ensure that your Phone is within Bluetooth range of the other device
(10 m or 32 ft). You can then establish a Bluetooth connection and share multimedia files, web pages,

contacts, documents, and apps between the two devices. Open 

Files, touch and hold the file that

you want to send, and then go to More > Share > Bluetooth. Follow the onscreen instructions to
enable Bluetooth. When the other device is detected (Bluetooth must be enabled and the device must
be visible), touch the name of the device to establish a connection and start sending files.

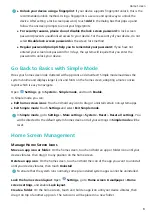
Receive files over Bluetooth: From the home screen, swipe down from the status bar, open the

shortcuts panel, and then touch 

 to enable Bluetooth. Touch Accept on the file transfer

notification to begin receiving the files. Received files are saved to the Bluetooth folder in Files by
default.

Import or export contacts over Bluetooth: Open 

Contacts and go to 

 > Settings >

Import/Export to perform the following:

l

Import contacts: Touch Import via Bluetooth and follow the onscreen instructions to establish a
Bluetooth connection with the other device. Contacts from the other device will then be imported
to your Phone automatically.

l

Export contacts: Touch Share contacts, select the contacts that you want to share, touch 
and select Bluetooth. Follow the onscreen instructions to establish a Bluetooth connection with the
other device. Those contacts selected will be exported from your Phone to the other device
automatically.

Transfer Data between Your Phone and Computer

Use a USB cable to connect your Phone to your computer and transfer data.

Select USB connection mode

Use a USB cable to connect your Phone to the computer, you can then select a default connection
method. You can transfer photos and files between your Phone and computer, or charge your Phone
through the USB connection to your computer.

Swipe down from the status bar to open the notification panel, then touch Settings > Touch for
more options
 and select a method for connecting your device and your computer.

l

Transfer photos: Transfer photos between your Phone and computer.

l

Transfer files: Transfer files between your Phone and computer.

16

Содержание Y5 2019

Страница 1: ...User Guide ...

Страница 2: ...anage Mobile Data Usage 13 Use Auto launch to Prevent Unwanted App Activities 13 Utilities Check Your Screen Time 14 Use Recorder to Make Audio Notes 14 Reset Your Phone 14 Device Connection Use Bluetooth to Share Data 16 Transfer Data between Your Phone and Computer 16 Security and Privacy Enable or Disable Location Services 18 Enable App Lock 18 Apps and Notifications Customise App Permissions t...

Страница 3: ...Enable Memory Cleanup 22 System General Settings 23 System Update Update the Device System Online 24 Legal Notice Legal Notice 25 Personal Information and Data Security 26 Obtaining help 27 Contents ii ...

Страница 4: ...pers Set a photo you like as your home screen wallpaper to personalise your home screen Open Settings and then go to Home screen wallpaper Wallpaper You can Set a picture as your home screen wallpaper Touch Gallery or select a preset wallpaper in your device and follow the onscreen instructions to select Lock screen Home screen or Both Set a photo as your wallpaper from Gallery Have a great photo ...

Страница 5: ...Want to store your apps in one location on your home screen to make your home screen look cleaner You can enable app drawer on your home screen to store all your apps and free up space on your home screen Open Settings go to Home screen wallpaper Home screen style and select Drawer If you want to switch back to a standard home screen select Standard Add an app icon from app drawer to the home scre...

Страница 6: ...cleanup to free up storage space improve system performance and keep your device running smoothly Open Optimiser then touch Cleanup to clean up memory and clear the cache to optimise performance If your storage space is still low perform a deep clean to free up additional storage space Exciting Features 3 ...

Страница 7: ...revious page or exit an app Touch to close the onscreen keyboard when inputting text l Home key Touch to return to the home screen l Recent key Touch to open a list of recently used apps Touch and hold to enable split screen mode l Downward swipe notification key Touch to open the notification panel Navigate with Gestures Navigate with gestures to quickly go back to the previous screen return to t...

Страница 8: ...the type of lock screen password you prefer l Set a PIN A PIN number is a sequence of digits Entering a PIN to unlock your Phone is quick and simple For better security use a long sequence of random numbers as your PIN Go to Set lock screen password follow the prompts to set up a PIN Alternatively touch Change unlock method and set 4 digit PIN or Custom PIN l Set a pattern Unlock your Phone by dra...

Страница 9: ...t which is easy to navigate Open Settings go to System Simple mode and touch Enable In Simple mode you can l Edit home screen icons Touch and hold any icon to drag or uninstall certain non system apps l Exit Simple mode Touch Settings and select Exit Simple mode In Simple mode go to Settings More settings System Reset Reset all settings You will be directed to the default system home screen and al...

Страница 10: ...to Home screen wallpaper Wallpaper You can Set a picture as your home screen wallpaper Touch Gallery or select a preset wallpaper in your device and follow the onscreen instructions to select Lock screen Home screen or Both Set a photo as your wallpaper from Gallery Have a great photo you want to set as your wallpaper In Gallery open the photo that you like go to Set as Wallpaper and follow the on...

Страница 11: ...ps Want to store your apps in one location on your home screen to make your home screen look cleaner You can enable app drawer on your home screen to store all your apps and free up space on your home screen Open Settings go to Home screen wallpaper Home screen style and select Drawer If you want to switch back to a standard home screen select Standard Add an app icon from app drawer to the home s...

Страница 12: ... Display contacts for different accounts From the contacts list screen go to Settings Display preferences and select the accounts for which you want to display contacts You can also l Enable Simple view Go to Settings Display preferences and enable Simple view l View contact storage space Go to Settings Display preferences The Accounts area displays the total and available storage space on your SI...

Страница 13: ...g service 2 Open Phone or Contacts and make a call VoLTE VoLTE Make Calls and Use Data at the Same Time VoLTE Voice over LTE allows both call and data services to be carried on the same 4G network which means you can use the Internet even while making calls VoLTE also provides you with shorter call connection times and higher quality voice and video calls Both of your Phone s SIM card slots suppor...

Страница 14: ...rted by your network provider you can l Enable 4G Turn on 4G The 4G switch may be unavailable for your device due to your network provider s settings This indicates that the 4G network is enabled by default l Enable VoLTE calling Turn on VoLTE calls l Enable Wi Fi calling Turn on Wi Fi calling Dialling 11 ...

Страница 15: ...want to add to the My favourites album then touch Favourited photos and videos will remain in their original albums and have a icon on their thumbnails Delete photos and videos Touch and hold a photo or album until the icon appears Select the items you want to delete then go to Delete Deleted photos and videos will remain for a time in the Recently deleted album before being permanently deleted Da...

Страница 16: ...secretly running occupying system resources and consuming power in the background Use Auto launch to help you identify and prohibit unwanted app activities Open Optimiser touch App launch and you can l Automatically manage apps Enable Manage all automatically or toggle on the switches for individual apps The system will automatically analyse app usage and prohibit apps from automatic launch second...

Страница 17: ...important points Touch to finish recording and save the audio file After the recording is completed you can l Play recording from tag In the recording file list touch a recording to go to the play screen On the play screen you can then touch a tag that you have added and play the recording from that point l Manage recordings Touch and hold a recording for options such as sharing or deleting the re...

Страница 18: ...Reset Reset all settings touch Reset all settings and follow the onscreen instructions to reset the settings Restore factory settings This will delete all data in your device s memory and storage including your account settings system settings app data installed apps music images and documents and restore your Phone to its original factory settings Back up your data before restoring your device to...

Страница 19: ...n Contacts and go to Settings Import Export to perform the following l Import contacts Touch Import via Bluetooth and follow the onscreen instructions to establish a Bluetooth connection with the other device Contacts from the other device will then be imported to your Phone automatically l Export contacts Touch Share contacts select the contacts that you want to share touch and select Bluetooth F...

Страница 20: ...es on your Phone You can use Windows Media Player to view the media files on your Phone l Transfer images Picture Transfer Protocol PTP is a protocol that allows you to transfer images You can upload and share photos between your Phone and computer using this connection method Swipe down from the status bar to open the notification panel and then set your USB connection method to Transfer photos Y...

Страница 21: ...u with necessary functions and services not for the purpose of identifying and collecting your private information Set indoor positioning assistance Open Settings go to Security privacy Location access Advanced settings and enable or disable Wi Fi and Bluetooth scanning Scanning Wi Fi networks and Bluetooth devices will improve the accuracy of indoor positioning Enable App Lock App lock allows you...

Страница 22: ...permission for a map app is disabled the app will be unable to provide you with location and navigation services Set app permissions Want to deny unwanted permissions Open Settings and go to Apps Apps select the app and touch Permissions on the App info screen and then enable or disable the unwanted permissions Check and modify permissions Want to check which apps are allowed important permissions...

Страница 23: ...ow messages from important contacts Messages Contacts only Favourites only Allow repeated calls to ring Repeated calls Enable Eye Comfort Mode to Prevent Eye Strain Enable Eye comfort mode Settings Display Eye comfort Enable Quickly enable or disable Eye comfort mode Enable Eye comfort mode at set times Settings Display Eye comfort Scheduled Start End Adjust Eye comfort mode colour temperature Ena...

Страница 24: ...est your eyes for 10 minutes l While you are resting look into the distance to adjust the focusing muscles of your eyes and avoid eye fatigue l Cultivating good eye care habits will protect your vision and prevent near sightedness Sound and Display 21 ...

Страница 25: ... Use Memory cleanup to free up storage space improve system performance and keep your device running smoothly Open Optimiser then touch Cleanup to clean up memory and clear the cache to optimise performance If your storage space is still low perform a deep clean to free up additional storage space 22 ...

Страница 26: ... region View Memory and Storage Status Unsure of how much memory and storage you have left after using your Phone for a long time You can view your Phone s memory and storage information to help you monitor your memory and storage use and decide whether to perform a cleanup Not all devices support microSD cards Open Settings and touch Storage to view the memory usage and free up more space in a ti...

Страница 27: ...r device and proof of purchase to an authorised Huawei Customer Service Centre for updates l Back up important data before updating your device l After the update certain third party apps such as e banking and game apps may be incompatible with the new system Regularly update such third party apps to fix compatibility issues 1 Open Settings 2 Go to System Software update When the system detects a ...

Страница 28: ...ribed herein rely on the software installed or the capacities and settings of the local network and therefore may not be activated or may be limited by local network operators or network service providers Therefore the descriptions herein may not exactly match the purchased product or its accessories Huawei reserves the right to change or modify any information or specifications contained in this ...

Страница 29: ...ANTIES OF MERCHANTABILITY AND FITNESS FOR A PARTICULAR PURPOSE ARE MADE IN RELATION TO THE ACCURACY RELIABILITY OR CONTENTS OF THIS DOCUMENT TO THE MAXIMUM EXTENT PERMITTED BY APPLICABLE LAW UNDER NO CIRCUMSTANCES SHALL HUAWEI BE LIABLE FOR ANY SPECIAL INCIDENTAL INDIRECT OR CONSEQUENTIAL DAMAGES OR LOSS OF PROFITS BUSINESS REVENUE DATA GOODWILL SAVINGS OR ANTICIPATED SAVINGS REGARDLESS OF WHETHER...

Страница 30: ...ns from a legitimate source Downloaded third party applications should be scanned for viruses l Install security software or patches released by Huawei or authorised third party application providers l Using unauthorised third party software to update your device may damage your device or put your personal information at risk It is recommended that you update through your device s online update fe...

Страница 31: ...ut may vary All statements information and recommendations in this guide do not constitute a warranty of any kind express or implied Please visit http consumer huawei com en support hotline for recently updated hotline and email address in your country or region AMN LX1 AMN LX2 AMN LX3 AMN LX9 Model EMUI 9 1_01 ...

Отзывы: