12
Installation Procedure
b
Phillips screwdriver
Flat-head screwdriver
2
2
1
1
4
4
3
3
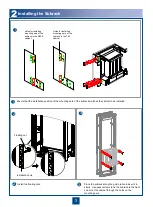
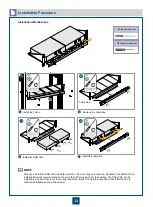
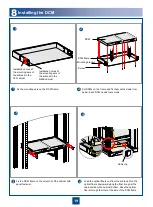
Install the holder.
Remove the cable tray.
Install the SS61COA.
Install the cable tray.
When you install the SS61COA inside the cabinet, 125 mm of space is required. By default, the SS61COA is
installed below the lower subrack and is more than 50 mm away from the subrack. The SS61COA can be
installed in a cabinet that is not fully configured with subracks, but future expansion will be affected due to
reduced installation space in the cabinet.
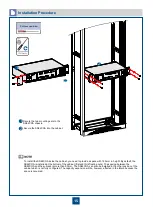
Cable tray
Installation effectiveness
Содержание OptiX OSN 2500
Страница 1: ...HUAWEI TECHNOLOGIES CO LTD OptiX OSN 2500 Quick Installation Guide Issue 12 Date 2017 09 30 ...
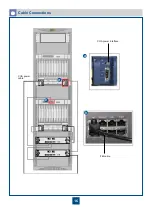
Страница 19: ...16 Cable Connections c COA power interface F f cable a b a b COA power cable ...
Страница 36: ...33 Upward Cabling c Cable distribution plate To the alarm monitor SEI board ...
Страница 37: ...34 Downward cabling d Cable distribution plate SEI board To the alarm monitor a a ...


