background image

18 

FM Radio 

The headset cable functions as an antenna as well. To 
ensure good reception of radio programs, do not 
disconnect the headset from the phone or severely bend 
the headset cable. 

1.


Connect a compatible headset to the phone. 

2.


Select 

Menu

 > 

Multimedia

 > 

FM radio

3.


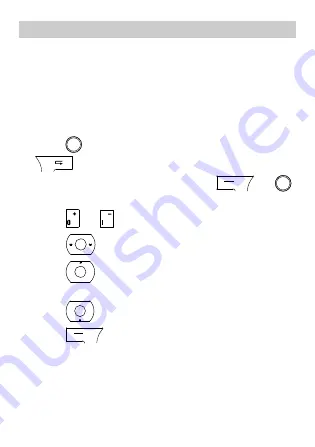
On the 

FM radio 

screen, you can do as follows: 


Press 

  to record the program, and then press 

  (

Stop

) to stop recording. 

During the recording, you can press 

  or 


to pause or continue. 


Press 

  or 

  to adjust the volume. 


Press 

  to change the channels. 


Press 

  to activate or deactivate the search 

mode. 


Press 

  to switch off the FM radio. 


Press 

  (

Options

) to set the speaker, view 

and set the channel list, adjust the frequency, or 
select other options. 

Содержание G6610V

Страница 1: ...G6610V GSM Mobile Phone User Guide ...

Страница 2: ...DED AS IS EXCEPT AS REQUIRED BY APPLICABLE LAWS NO WARRANTIES OF ANY KIND EITHER EXPRESS OR IMPLIED INCLUDING BUT NOT LIMITED TO THE IMPLIED WARRANTIES OF MERCHANTABILITY AND FITNESS FOR A PARTICULAR PURPOSE ARE MADE IN RELATION TO THE ACCURACY RELIABILITY OR CONTENTS OF THIS MANUAL TO THE MAXIMUM EXTENT PERMITTED BY APPLICABLE LAW IN NO CASE SHALL HUAWEI TECHNOLOGIES CO LTD BE LIABLE FOR ANY SPEC...

Страница 3: ...e Battery 5 Installing the microSD Card 5 Charging the Battery 6 Using Function Menus 6 Phone Lock 7 PIN and PUK 7 Locking the Keypad 8 3 Call Function 8 Making a Call 8 Answering a Call 9 4 Text Input 9 Changing the Text Input Mode 9 Entering a Word 10 Entering a Digit 10 Entering a Symbol 10 5 Messaging 11 Writing and Sending a Text Message 11 Writing and Sending a Multimedia Message 11 ...

Страница 4: ... a Contact 14 Searching for a Contact 14 8 Multimedia 15 Camera 15 Video Recorder 15 Video Player 16 Audio Player 17 Sound Recorder 17 FM Radio 18 Scheduling FM Program Recording 19 Slide Show 19 9 TV 19 TV 19 10 Bluetooth 20 Synchronizing Data 20 Using a Bluetooth Headset 21 Transferring Data 21 11 Fun Game 21 MSN 22 Nimbuzz 22 ...

Страница 5: ...iii 12 WAP 22 Network Settings 23 Connecting to the Network 24 13 Warnings and Precautions 24 ...

Страница 6: ...g figure shows the appearance of your phone and is provided only for your reference 1 Earpiece 7 Keypad 2 Screen 8 Charger Headset jack 3 Navigation keys 9 End Power key 4 Left soft key 10 TV key 5 MSN key 11 Right soft key 6 Call Answer key 12 Confirm key ...

Страница 7: ... call or reject an incoming call Return to the standby mode Display Menu in standby mode Select a highlighted item Display Phonebook list in standby mode Return to the previous menu Display Menu in standby mode Confirm a selection Scroll through the submenues on a menu screen or the options on an option screen Acess the functions assigned to the keys as shortcuts in standby mode ...

Страница 8: ...about 3s Select a submenu item labeled with the corresponding number Enable or disable the Silent mode in standby mode by pressing and holding the key for about 3s Shortcuts to MSN Shortcuts to TV Screen Icons Icon Indicates Signal strength GPRS signal The Ring only alert type is activated The Vib only alert type is activated The Vib and ring alert type is activated The Vib then ring alert type is...

Страница 9: ...ew email is received A new broadcast message is received A new push message is received An alarm or the schedule is activated The keypad is locked A microSD card is inserted into the phone Battery power level 2 Getting Started Installing the SIM Card and the Battery Ensure that the golden contact area on the SIM card is facing downwards and the beveled edge is properly aligned with that of the SIM...

Страница 10: ...You can insert a microSD card to expand the memory capacity of your phone Before removing a microSD card ensure that your phone is powered off When installing a microSD card ensure that the golden contact area on the microSD card is facing downwards and the beveled edge of the microSD card is properly aligned with that of the card slot ...

Страница 11: ...e 2 Connect the charger to an AC power socket 3 Wait until the battery is fully charged During charging the charging icon is displayed in animation When the charging icon becomes static it indicates that the battery is fully charged 4 Disconnect the charger from the phone 5 Disconnect the charger from the AC power socket Using Function Menus 1 In standby mode press Menu or ...

Страница 12: ... phone lock function is disabled You can change the default phone lock code 1234 into any string of 4 8 digits Do remember your phone lock code If you forget it contact the service center PIN and PUK The personal identification number PIN protects your SIM card from unauthorized use The PIN unblocking key PUK can unlock the blocked PIN Both the PIN and the PUK are delivered with the SIM card For d...

Страница 13: ...keypad lock function is enabled when the phone is idle for a preset period in standby mode the keypad is locked automatically When the keypad is locked you can press to answer an incoming call 3 Call Function Making a Call 1 In standby mode enter the phone number To make an international call enter the international long distance code country code or region code area code and phone number in seque...

Страница 14: ...ows Press to answer the call Press Options and then select Answer to answer the call Press or Reject to reject the call If the any key answer function is enabled you can press any key except and to answer an incoming call 4 Text Input Changing the Text Input Mode The indicator of the current text input mode is displayed in the upper left corner of the screen You can press or to change the text inp...

Страница 15: ...ng a Word To enter a word press the keys according to the spelling sequence of the word Entering a Digit In 123 input mode you can directly press a number key labeled with the desired digit In any text input mode except 123 press and then press the key labeled with the desired digit Entering a Symbol 1 Press to display the symbol list 2 Press to scroll to the desired symbol 3 Press to enter the sy...

Страница 16: ...ne for the following options Send only to enter a phone number or select a recipient from the contact list and then send the message Save and send to add a recipient and then send and save the message Send to many to add several recipients at a time and then send the message Send by group to add all members of a group as recipients and then send the message Writing and Sending a Multimedia Message...

Страница 17: ...g options Send only to send the multimedia message Save and send to send and save the multimedia message Contact your service provider for the availability of the Multimedia Messaging Service MMS and the procedure for subscribing to this service Open multimedia messages with caution Objects in multimedia messages may contain viruses such as malicious software that can damage your phone 6 Email Bef...

Страница 18: ...Select an email account 3 Press Options and then select Activate Writing and Sending an Email 1 Select Menu Email Write email 2 Select To Cc or Bcc to add the email address of a recipient 3 Select Subject to edit the email subject 4 Select Attachments to add an attachment A maximum of three attachments can be added to an email 5 Set the email priority 6 Select Content to edit the text content of t...

Страница 19: ...ne for saving the contact 3 Edit the contact 4 Press OK to save the contact Searching for a Contact 1 Select Menu Phonebook Search contact 2 Enter the contact name 3 Press Options and then select Search You can also select Menu Phonebook Quick search Then enter the first letter of the contact name and press to scroll to the desired contact ...

Страница 20: ...ress the 2 key to set the white balance Press the 4 key to set the self timer Press the 5 key to set the continue shot Press the 6 key to set the scene mode Press the 7 key to set the image quality Press the 8 key to set the image size Press or to take a picture Video Recorder 1 Select Menu Multimedia Video recorder 2 Press to set the relevant parameters 3 Press to start recording a video clip Dur...

Страница 21: ...ltimedia Video player 2 Press to scroll to the desired video clip 3 Press to play the video clip When the video is being played you can do as follows Press or to adjust the volume Press to fast forward or rewind Press to pause or continue Press to play the video in full screen and press again to exit full screen 4 Press to stop playing the video clip ...

Страница 22: ...layed you can do as follows Press or to adjust the volume Press to play the previous or next music Press to pause or continue Press to stop playing the music 4 Press to exit the screen of audio player Sound Recorder 1 Select Menu Multimedia Sound Recorder 2 Press Options and then select Record to record an audio clip During the recording you can press or to pause or continue 3 Press Stop to stop r...

Страница 23: ...nu Multimedia FM radio 3 On the FM radio screen you can do as follows Press to record the program and then press Stop to stop recording During the recording you can press or to pause or continue Press or to adjust the volume Press to change the channels Press to activate or deactivate the search mode Press to switch off the FM radio Press Options to set the speaker view and set the channel list ad...

Страница 24: ...e show 2 Select a folder which contains pictures displayed in a slide show 3 Perform the corresponding settings 4 Press Done to save the settings 9 TV TV Select Menu TV In TV mode press to view the list and you can do as follows Choose the right TV country or region Choose the TV search the channels will be automatically searched and saved in the TV channels list Press the 1 key to enter the Brigh...

Страница 25: ...tion Press or to adjust the volume 10 Bluetooth Through Bluetooth you can synchronize data between a PC and your phone exchange data with other Bluetooth devices or use a Bluetooth headset Synchronizing Data Before synchronizing data between a PC and your phone ensure that the PC supports the Bluetooth function 1 Select Menu Bluetooth Power Then select On to enable the Bluetooth function 2 Start t...

Страница 26: ... phone sets up a connection with the headset the headset icon is displayed on the standby screen and you can use the headset Transferring Data 1 Select Menu Bluetooth Power Then select On to enable the Bluetooth function 2 Select My device Inquiry new device to search for available Bluetooth devices and then pair the phone with the desired device When a Bluetooth device sets up a connection with t...

Страница 27: ...ct Menu Fun Games MSN Start 2 Press to select the username mailbox and the password to input 3 Press to enter the contents 4 Press Sign in to login in MSN Nimbuzz Start the Nimbuzz 1 Select Menu Fun Games Java Nimbuzz 2 Press to select the username mailbox and the password to input 3 Press to enter the contents 4 Press to login in 12 WAP ...

Страница 28: ... provider Network Settings To access the WAP sites through your phone you need to set the data account and WAP parameters on your phone Setting the Connection Profile 1 Select Menu Services Data account 2 Select the network type and then press OK 3 Select the service provider and then press Edit 4 Set the account information 5 Press Done to save the settings Setting the WAP 1 Select Menu Services ...

Страница 29: ... your device It also contains information about how to use the device safely Read this information carefully before using your device Electronic Device Power off your device if using the device is prohibited Do not use the device when it causes danger or interference with electronic devices Medical Device Power off your device and follow the rules and regulations set forth by the hospitals and hea...

Страница 30: ...as could cause an explosion or fire resulting in bodily injuries or even deaths Do not switch on the device at refueling points such as service stations Comply with restrictions on the use of radio equipment in fuel depots storage and distribution areas and chemical plants Also adhere to restrictions in areas where blasting operations are in progress Before using the device watch out for areas tha...

Страница 31: ...le do not place the device over the air bag or in the air bag deployment area Otherwise the device may hurt you owing to the strong force when the air bag inflates Do not use your device while flying in an aircraft Switch off your device before boarding an aircraft Using wireless devices in an aircraft may be dangerous to the operation of the aircraft disrupt the wireless telephone network and may...

Страница 32: ...aws and regulations and respect others privacy and legal rights Keep the ambient temperature between 0 and 45 while the device is being charged Keep the ambient temperature between 10 to 55 for using the device powered by battery Preventing Hearing Damage Listening to a headset at high volumes can damage your hearing Use only the minimum volume setting necessary to hear your conversation or music ...

Страница 33: ...d in the specifications of the charger An improper power voltage may cause fire or the charger may not function properly Do not connect two poles of the battery with conductors such as metal materials keys or jewelries Otherwise the battery may be short circuiting and may cause injuries and burns on your body Do not disassemble the battery or solder the battery poles Otherwise it may lead to elect...

Страница 34: ...arger from water or vapor Do not touch the device and charger with a wet hand Otherwise it may lead to short circuit or malfunction of the device and electric shock to the user Do not place your device battery or charger in places where it can get damaged because of collision Otherwise it may lead to battery leakage device malfunction overheating fire or explosion When the temperature is lower tha...

Страница 35: ...herwise manufacturer is not liable to pay for damages as the device and accessories are not covered by warranty Emergency Call You can use your device for emergency calls in the service area The connection however cannot be guaranteed in all conditions You should not rely solely on the device for essential communications Certification Information SAR This mobile device meets guidelines for exposur...

Страница 36: ... kilogram W kg averaged over one gram of tissue The highest SAR value reported to the FCC and IC for this device type when tested for use at the ear is 0 475 W kg and when properly worn on the body is 1 47 W kg For body worn operation this phone has been tested and meets the FCC RF exposure guidelines for use with an accessory that contains no metal and the positions the handset a minimum of 1 5 c...

Страница 37: ...e to radio communications However there is no guarantee that interference will not occur in a particular installation If this equipment does cause harmful interference to radio or television reception which can be determined by turning the equipment off and on the user is encouraged to try to correct the interference by one or more of the following measures Reorient or relocate the receiving anten...

Страница 38: ...received including interference that may cause undesired operation Warning Changes or modifications made to this device not expressly approved by manufacturer name Huawei Technologies Co Ltd may void the FCC authorization to operate this device The antenna s used for this transmitter must not be co located or operating in conjunction with any other antenna or transmitter Version V100R001_01 NO 601...

Отзывы: