


Removal and replacement procedures 55
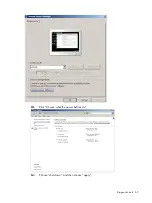
IMPORTANT:
If the battery socket you got is not as described as the one in the following figure, be
sure the positive side of the battery is facing the outside of the socket.
5.
Perform the post-installation procedure.
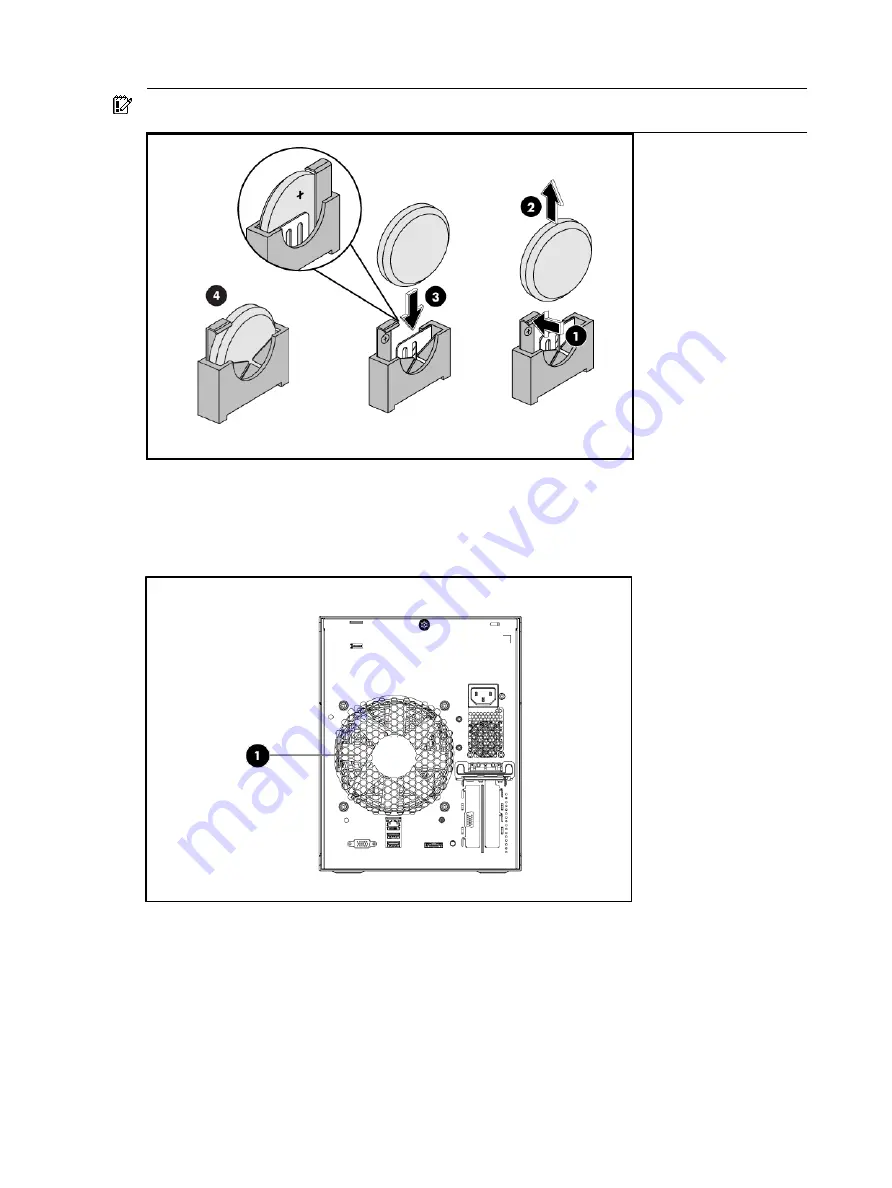
System fan
The server has one system fan located on the chassis back panel wall.
A new system fan can be installed to allow the server to operate properly in case the default system
fan becomes defective.
To replace a system fan:
1.
Perform the pre-installation procedure.
2.
Remove the defective system fan:
○
Disconnect the fan cable from its system board connector (1).
○
Unfasten the 4 screws on the rear panel (2)
Содержание ProLiant MicroServer
Страница 12: ...Customer self repair 12 ...
Страница 13: ...Customer self repair 13 ...
Страница 14: ...Customer self repair 14 ...
Страница 15: ...Customer self repair 15 ...
Страница 16: ...Illustrated parts catalog 16 Illustrated parts catalog Mechanical components ...
Страница 20: ...Illustrated parts catalog 20 ...
Страница 21: ...Illustrated parts catalog 21 System components ...
Страница 38: ...Removal and replacement procedures 38 6 Perform the post installation procedure ...
Страница 50: ...Removal and replacement procedures 50 5 Perform the post installation procedure ...
Страница 63: ...Diagnostic tools 63 iii Click Choose what the power buttons do iv Choose shut down and then choose apply ...
Страница 65: ...Diagnostic tools 65 3 Click Next 4 Select I accept the terms of the license agreement and click Next ...
Страница 66: ...Diagnostic tools 66 5 Click Browse to select folder and then click Next 6 Click Next ...
Страница 67: ...Diagnostic tools 67 7 Click Install 8 Click Finish ...
Страница 69: ...Diagnostic tools 69 11 Select if remember the passwords 12 Click in front of Physical Drive View ...
Страница 70: ...Diagnostic tools 70 13 Click options Enable or Disable to change Write cache and NCQ status ...