322
Configuring RADIUS
You can configure RADIUS through the Web interface.
Overview
Remote Authentication Dial-In User Service (RADIUS) protocol is a distributed information interaction
protocol that uses a client/server model to implement AAA. It can protect networks against unauthorized
access and is often used in network environments that require both high security and remote user access.
RADIUS uses UDP port 1812 for authentication and UDP port 1813 for accounting.
RADIUS was originally designed for dial-in user access. With the addition of new access methods,
RADIUS has been extended to support additional access methods, including Ethernet and ADSL.
RADIUS provides access authentication, authorization, and accounting services. The accounting function
collects and records network resource usage information.
For more information about RADIUS and AAA, see
HP MSR Router Series Configuration Guides (V5)
.
Configuring a RADIUS scheme
A RADIUS scheme defines a set of parameters that the device uses to exchange information with the
RADIUS servers. There might be authentication servers and accounting servers, or primary servers and
secondary servers. The parameters mainly include the IP addresses of the servers, the shared keys, and
the RADIUS server type. By default, no RADIUS scheme exists.
To configure a RADIUS scheme:
1.
Select
Advanced
>
RADIUS
from the navigation tree.
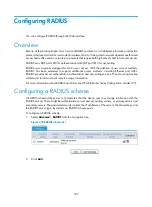
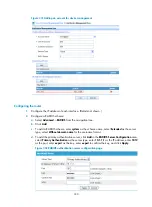
Figure 325
RADIUS scheme list
2.
Click
Add
.
Содержание MSR SERIES
Страница 17: ...xv Documents 835 Websites 835 Conventions 836 Index 838 ...
Страница 20: ...3 Figure 3 Initial page of the Web interface ...
Страница 42: ...25 Figure 13 Firefox Web browser setting ...
Страница 59: ...42 Figure 27 Checking the basic service configuration ...
Страница 73: ...56 Figure 35 Sample interface statistics ...
Страница 156: ...139 Figure 139 Rebooting the 3G modem ...
Страница 168: ...151 Figure 152 Configuring Web server 2 ...
Страница 174: ...157 Figure 158 Configure the URL filtering function ...
Страница 187: ...170 Upon detecting the Land or Smurf attack on Ethernet 0 2 Router outputs an alarm log and drops the attack packet ...
Страница 242: ...225 Figure 233 Enabling the DHCP client on interface Ethernet 0 1 ...
Страница 247: ...230 Figure 236 The page for configuring an advanced IPv4 ACL ...
Страница 255: ...238 Figure 241 Advanced limit setting ...
Страница 298: ...281 e Click Apply 2 Configure Router B in the same way Router A is configured ...
Страница 354: ...337 Figure 339 Configuring a login control rule so Host B cannot access Router through the Web ...
Страница 400: ...383 Figure 387 Verifying the configuration ...
Страница 405: ...388 ...
Страница 523: ...506 Figure 530 Ping configuration page ...
Страница 538: ...521 a Click Device A on the topology diagram b Click Ethernet 0 2 on the panel diagram c Click Port Guard ...
Страница 744: ...727 Verifying the configuration In the case that the IP network is unavailable calls can be made over PSTN ...
Страница 775: ...758 Figure 785 Configuring a jump node ...
Страница 791: ...774 Figure 801 Configuring a jump node ...

