


Installing CloudSystem 62
Provider
1.
Launch the CloudSystem Operations Console.
2.
Select Menu > Networking > Provider Networks and then Add Provider Network.
3.
Supply the network name (convention suggestions Provider<VLAN>) and Segmentation (VLAN) ID.
4.
Use the default demo project unless the customer has defined a different project.
5.
Add the subnet details (subnet name, CIDR, gateway, & IP range (Allocation Pools)).
External
CloudSystem 9.0 supports a single external network and the respective VLAN was used during the
csdeploy setup.
1.
Verify the external network is in the OneView CS9CloudData network set.
2.
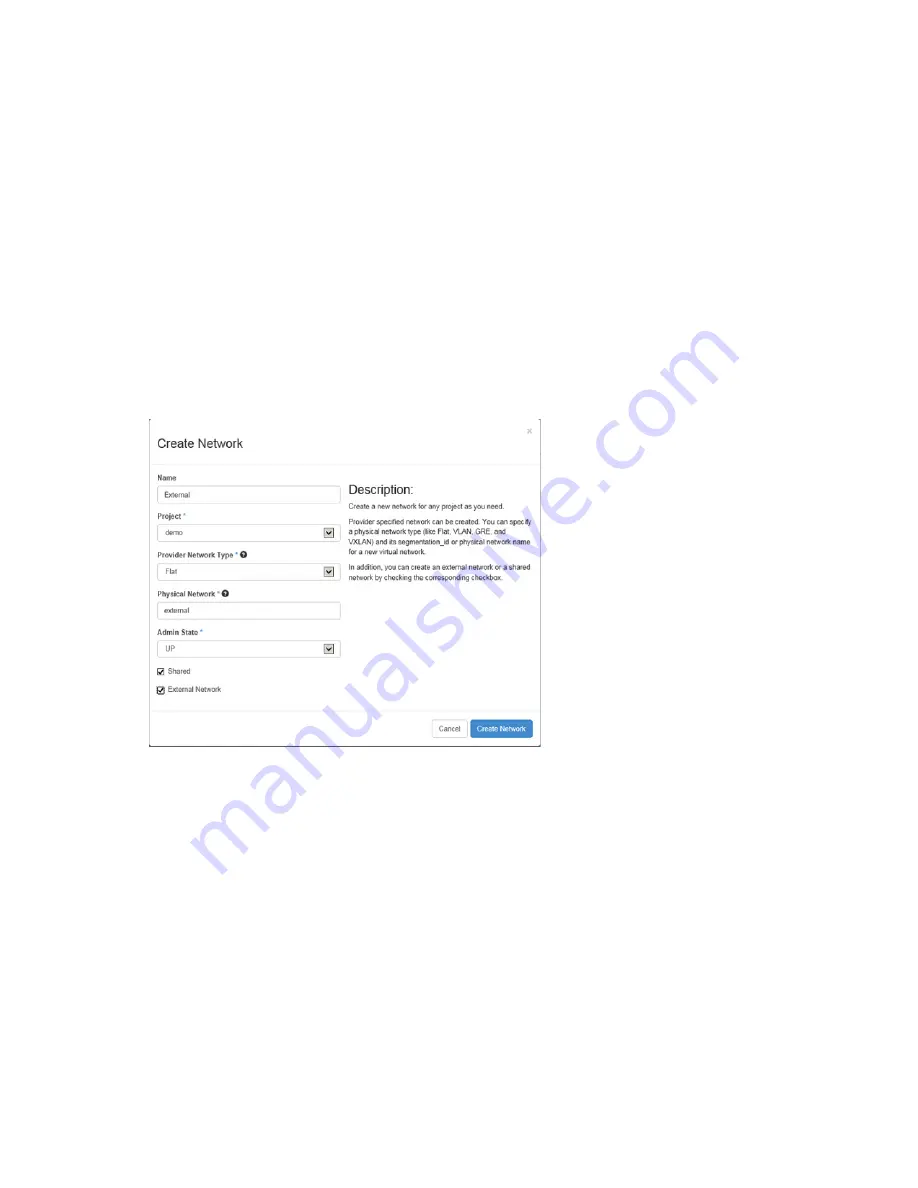
In the Horizon console:
a.
Select Admin > System > Networks and then + Create Network.
b.
Fill out the content similar to that shown below (Flat network type and external physical network).
c.
Click Create Network.
d.
Create the external subnet:
i.
Click on the hyperlink name of the newly created external network to open the network detail.
ii.
Click +Create Subnet.
iii.
Provide the External network subnet name, network address CIDR, and Gateway IP.
iv.
On the Subnet Detail, either enable or disable DHCP, and provide the Allocation pools, DNS
Name Server, and Host Routes.
v.
Click Create.
This step will fail if the External network has not been set up with at least one IP address that can be
used as a floating IP address.
3.
In the Horizon console:
a.
Select Project > Compute > Access & Security.
b.
Under the Floating IPs tab, click Allocate IP to Project button. This step assumes that a range of
IP addresses has already been allocated to the External network.
c.
Click Allocate IP.


