background image

USER MANUAL

21

Instructions

1.

  Place the liner into the hot tub. Check that the wall seam does not line up 

with any fitting holes.  

2.  

Pull the liner into place so that the liner overlaps the outside of the tub by 
about 3 inches. It is designed to be a tight fit.

3.

  Place the top band over the liner so that the lower edge is seated into the 

bead of the liner. Tap the band down into the bead and tighten the band so 
that the liner is held firmly in place.

4.

  Run 2 inches of water into the tub. The weight of the water will stretch the 

liner and ensure a good fit. Working inside the tub, use your feet to push the 
liner down and into the corners. The floor should be smooth and wrinkle free.

5. 

 If necessary, you can loosen the top band and ease the liner down enough  
to ensure a good fit at the bottom.

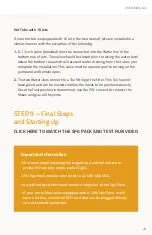
•  The Spa Pack needs to be located within 20 feet of the hot tub and protected 

from outside elements by an enclosure. If locating it within 40 inches (1 
metre) of the hot tub, a second enclosure or water shield is required to protect 
the Spa Pack from splash-overs from the hot tub. The Spa Pack can also be 
installed in a utility room or garage, provided that it is within 20 feet of the 
hot tub. To provide the best possible circulation and water action, run straight 
lines of hose, with as few bends as possible, to the Spa Pack.

•  The Suction fitting, Light fitting, and Bubbler fitting (if ordered) use a nut to 

secure the fitting to the tub. These nuts should be snug but not too tight. 

 •  You have been supplied with a 90-degree elbow with your Suction fitting. 

Depending on your setup, you may or may not use the elbow.

•  All fitting gaskets are ribbed on one side. 

The ribbed side faces the liner  

and will have silicone applied to it.

STEP 6 – Suction and Spa Pack Installation

Содержание Algonquin

Страница 1: ...User Manual SAFETY INSTALLATION MAINTENANCE ...

Страница 2: ...CANADIAN HOT TUBS INC 2 SECTION ONE Important Safety Information ...

Страница 3: ...ature in the hot tub does not exceed 38 C by using the up and down arrows on the controller keypad to regulate temperature Before entering the spa or hot tub measure the water temperature with an accurate thermometer Do not use a spa or hot tub immediately following strenuous exercise Prolonged immersion in a spa or hot tub can be injurious to your health Maintain water chemistry in accordance wit...

Страница 4: ...rs drains or other similar hardware within 3 metres of the spa or hot tub shall be bonded to the equipment grounding bus with copper conductors not smaller than No 6 AWG 4 WARNING To reduce the risk of injury do not permit children to use this product unless they are closely supervised at all times 5 A wire connector is provided on this unit to connect a minimum 8 AWG 8 4 mm2 solid copper conducto...

Страница 5: ...should limit spa water temperatures to 38 C 100 F c Before entering a spa or hot tub the user should measure the water temperature since the tolerance of water temperature regulating devices varies d The use of alcohol drugs or medication before or during spa or hot tub use may lead to unconsciousness with the possibility of drowning e Obese persons and persons with a history of heart disease low ...

Страница 6: ...ANT D UTILISER UNE CUVE DE RELAXATION NI QUAND ON S Y TROUVE AVERTISSEMENT LES FEMMES ENCEINTES QUE LEUR GROSSESSE SOIT CONFIRMÉE OU NON DEVRAIENT CONSULTER UN MÉDECIN AVANT D UTILISER UNE CUVE DE RELAXATION AVERTISSEMENT IL PEUT ÊTRE DANGEREUX POUR LA SANTÉ DE SE PLONGER DANS DE L EAU À PLUS DE 38 C AVERTISSEMENT AVANT D UTILISER UNE CUVE DE RELAXATION MESURER LA TEMPÉRATURE DE L EAU À L AIDE D U...

Страница 7: ...USER MANUAL 7 ...

Страница 8: ...CANADIAN HOT TUBS INC 8 SECTION TWO Hot Tub Installation Instructions ...

Страница 9: ... the seats to the supports 7 Foil reflecting insulation to fit between the liner and the cedar staves and floor and rolls of insulation to wrap the pipes once the installation is complete Tape is also provided 8 A roll of coping 9 One or two Suction fittings depending on your hot tub model and optional elbows that may be useful during setup 10 One Light fitting and nut 11 Jets 4 6 or 10 Jets depen...

Страница 10: ...ing thermal blanket 2 If you ordered the Bubbler you will have pipes fittings and a motor 3 If you ordered the Ionizer it has been partially assembled for you Required Tools 1 A white rubber mallet used for setting the staves to the floor 2 Adjustable wrench or ratchet set 3 3 8 electric drill 4 Screwdrivers 5 Carpenters square 6 Saw or flex pipe cutters 7 Pump pliers or pipe wrench 8 3 16 bit for...

Страница 11: ...ed as long as they are designed to support the weight of the filled hot tub While assembling the hot tub leave enough room to move around it easily Instructions CLICK HERE TO WATCH THE FLOOR STAVES AND BANDS VIDEO STEP 1 The Floor Floor Installation The floor for your hot tub comes in two pre built sections 1 Align the two halves of the floor together so that there s no gap 2 Place the 1 inch scre...

Страница 12: ...de of your hot tub As you plan the arrangement of your hot tub such as the placement of Jets make a mark on the floor to clearly identify where you need to add a certain pre cut stave Suctions should be located close to the Spa Pack to minimize plumbing If you have two Suction fittings to install space them at least 3 feet apart Allow a minimum of three staves between Jets to facilitate easy plumb...

Страница 13: ...r of the staves that have holes cut out are for your Jet fittings 3 Decide where the Spa Pack will be located and place the Suction stave s on that side of the hot tub 4 If you have a Bubbler the Bubbler stave should be the first stave attached and span the seam of the floor OVAL HOT TUBS Suction and Light staves should be placed in the side section of oval hot tubs Always use the spacer staves on...

Страница 14: ... inch if they are positioned square to the floor Use a Carpenter s Square when tapping staves onto the floor You can use the square in two ways Against the inner angle of the staves and the floor to make sure the staves are going on perfectly upright Against the side of each newly placed stave to make sure staves do not begin to lean sideways Note All the staves will be drawn tighter to the floor ...

Страница 15: ...out of view DO NOT put the top band on until after the liner is fitted into the hot tub When the installation is complete and the hot tub is filled with water check all bands to make sure they are tight OVAL HOT TUBS To keep the oval shape of your hot tub build wooden supports about halfway up the hot tub sides This will prevent your oval tub from changing shape over time due to water pressure Thi...

Страница 16: ...ark Line up the bottom of the band at this mark and tighten it just enough so that it does not slide down Note It is important that the bottom band covers the croze To double check that the band has covered the croze compare a leftover spacer stave by placing it against the wall The band should span the croze 3 Install the middle band s so they are evenly spaced in the centre of the tub Tighten th...

Страница 17: ... height for a 4 foot high tub If you have a Bubbler you must place the seats at this height If not you can adjust the seat height to your preference STEP 4 Marking Seat and Footrest Supports CLICK HERE TO WATCH THE SEAT SUPPORTS LINER AND SUCTIONS VIDEO Important Information At least 60 minutes before installing the seat supports put a generous amount of silicone on one side of the red silicone wa...

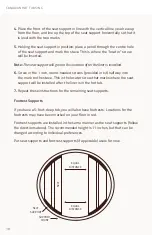
Страница 18: ...ws provided in kit halfway into the mark on the stave This is the locator screw that marks where the seat support will be installed after the liner is in the hot tub 7 Repeat these instructions for the remaining seat supports Footrest Supports If you have a 5 foot deep tub you will also have footrests Locations for the footrests may have been marked on your floor in red Footrest supports are insta...

Страница 19: ... tub and get in 1 With the foil side facing you place the edge of the Ayrfoil insulation on a stave that is at least two staves away from any Jet Suction Light or Bubbler 2 Using the foil tape tape the edge into place at the top and bottom of the wall 3 Work around the hot tub placing tape on the top and bottom every few feet to secure the insulation around the entire circumference of the hot tub ...

Страница 20: ...e edge of the coping down and tape it against the hot tub so that the end does not slip as you run it around the top of the staves Make sure that the coping is placed evenly in the centre 2 When you get to where you started cut the coping to create a tight seam and secure it in place with foil tape Liner Installation Important Information Make sure that the liner is warm before you install it This...

Страница 21: ...fit at the bottom The Spa Pack needs to be located within 20 feet of the hot tub and protected from outside elements by an enclosure If locating it within 40 inches 1 metre of the hot tub a second enclosure or water shield is required to protect the Spa Pack from splash overs from the hot tub The Spa Pack can also be installed in a utility room or garage provided that it is within 20 feet of the h...

Страница 22: ...pa Pack Installation 1 Make sure that your Spa Pack is located within 20 feet of your hot tub and below the water line It will need to be accessible for maintenance Note If the Spa Pack is located less than 40 inches 1 metre from the hot tub you need to protect it from getting splashed with a water shield or another type of enclosure 2 When the Spa Pack is in the desired location run the white fle...

Страница 23: ...n the ribbed side of the Bubbler fitting gasket and push it through the hole 4 As you did with the Suction have someone on the outside of the hot tub thread the nut and tighten it with a wrench STEP 7 Seats Bubbler and Light Installation CLICK HERE TO WATCH THE SEATS BUBBLER AND LIGHT VIDEO Important Information The top of the seat supports have the word Front written on them Front should be facin...

Страница 24: ...n the Bubbler do not need to be glued After the seats are installed you will install the Bubbler Seat Support Installation 1 Raise the water level up so that it is 2 to 3 inches below the level of the locator screws of the seat supports 2 With a sharp blade cut a small incision in the liner to expose the head of the locator screw Remove the locator screw 3 Put a generous amount of silicone on the ...

Страница 25: ...he middle seats then drill and countersink the holes Fasten the middle seats into place using the stainless steel bolts making sure to use the nut and lock washer for each bolt 8 Once the middle seats are installed finish securing the Bubbler under them by using the hangers and screws that are provided 9 Place your drill between the seats and drill 3 16 inch holes into the top of the Bubbler pipe ...

Страница 26: ...ach brown Jet thru wall comes with two silicone washers One washer goes on the inside of the hot tub with the ribbed surface against the liner The other goes on the outside of the hot tub with the white Jet body and the ribbed side faces the hot tub Every hot tub is supplied with two or four end Jets one for the right and one for the left ends of the plumbing These Jets have plugs on one side The ...

Страница 27: ...n the stave and put the outside gasket on 6 Put on the white Jet body on the outside of the hot tub While holding the brown thru wall on the inside of the tub tighten the body firmly from the outside Note The thru wall can be backed off turned a partial turn backwards or forwards so that the outside Jet body ends up in the proper horizontal position with the Air line at the top The Jet fittings ar...

Страница 28: ...inch Tee into the Water line with the opening facing downwards This will connect to the filter side of the Spa Pack If you have the optional Ionizer it is connected into this Water line Important Information When connecting the white flex hose to the Jet bodies put PVC cement on both sides of the joint This will ensure that no small leaks occur when the hose is under pressure The air intake hose w...

Страница 29: ...r lines connect to a Tee fitting at the filter This Tee has not been glued and can be moved to allow the hoses to be positioned easily Once the final position is determined use the PVC cement to connect the hoses and glue all the joints STEP 9 Final Steps and Starting Up CLICK HERE TO WATCH THE SPA PACK AND TEST RUN VIDEO Important Information We recommend installing the keypad on a vertical surfa...

Страница 30: ...for leaks 5 When everything is complete use the rolls of foil insulation and tape to wrap all the plumbing 6 The roll up cover has a tail which should be fastened to the surrounding decking by three screws through one of the boards of the tail A manual has been included for the keypad controller and any other peripheral equipment that has been provided Please consult and familiarize yourself with ...

Страница 31: ...USER MANUAL 31 ...

Страница 32: ...CANADIAN HOT TUBS INC 32 SECTION THREE Maintenance ...

Страница 33: ...bout the water in your area Total Alkalinity Total alkalinity should be maintained between 80 120 ppm parts per million Total alkalinity is an important factor in stabilizing pH and should therefore be adjusted prior to adjusting pH Use commercially available products to raise and lower alkalinity as required Follow the directions provided on the containers pH Balance Use commercially available pr...

Страница 34: ...er Filter Maintenance A clean filter cartridge is an important part of maintaining clean and safe water The filter should be cleaned once a month and replaced every 9 to 12 months The replacement filter cartridge is the Unicel C4326 or equivalent It is a good idea to have a second filter cartridge and alternate monthly Filter Cleaning Instructions 1 Turn off the power to your hot tub at the GFCI o...

Страница 35: ... with the hose 8 Open the air vent again to purge excess air from the system When water spurts from the air vent quickly tighten the screw 9 Turn the power on Liner Maintenance The liner is made from high quality vinyl Improper water chemistry is the main determinant of liner life span KEEP YOUR WATER BALANCED Improper levels of sanitizer pH and alkalinity will cause damage to the liner over time ...

Страница 36: ...fill your hot tub with water that has been treated by a residential water softener Most outdoor faucets bypass water softeners If you live in an area with very hard water we recommend using a Stain and Scale type of product to remove minerals and metals from your water There are also pre filters that attach to your hose to filter out minerals while you fill the hot tub Both of these are generally ...

Страница 37: ...nter If you are going away for a few weeks or longer or want to shut your hot tub down for the season it is best to empty your tub You can leave a few inches of water at the bottom as a little ice will not hurt your tub or liner However you need to make sure that you empty the water out of the lines by removing the drain plug at the bottom front of the pump and disconnecting the valves If possible...

Страница 38: ...CK CONFIGURATION ELECTRICAL CORD CONNECTION Integral ground fault circuit interrupter GFCI protection is provided for all electrical parts within unit TO 120V OUTLET ORANGE ORANGE PURPLE PUMP 1 TO K200 KEY PAD in xtend Optional TO INTOUCH WIFI Optional TO LIGHT TO PUMP PURPLE PUMP 2 BLUE BL BLOWER NOT USED DL DIRECT INTERFACE TO BLOWER MOTOR Optional TO IONIZER Optional NOT USED IN CHT CONFIGURATI...

Страница 39: ...R JOINT 3 2 1 1 2 3 ORANGE ORANGE PURPLE PUMP 1 TO K200 KEY PAD in xtend Optional TO 40 GFCI TO INTOUCH WIFI Optional TO LIGHT TO PUMP GREEN GROUND PURPLE PUMP 2 BLUE BL BLOWER NOT USED DL DIRECT INTERFACE TO BLOWER MOTOR Optional TO IONIZER Optional NOT USED IN CHT CONFIGURATION ORANGE YELLOW RED L2 WHITE NEUTRAL BLACK L1 CHT 240 VOLT GECKO IN XE SPA PACK CONFIGURATION ...

Страница 40: ...CANADIAN HOT TUBS INC 330 Gage Ave Unit 15 Kitchener ON N2M 5C6 519 745 1651 info canhottub com ...

Отзывы: