background image

55

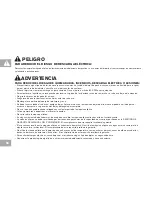
PRECAUCIONES IMPORTANTES

CONSERVE ESTAS INSTRUCCIONES

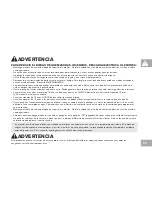
Lea la GUÍA DE LA MÁQUINA ELÍPTICA antes de utilizar este MANUAL DEL PROPIETARIO. Cuando se usa un producto eléctrico, 
se deben tener precauciones básicas, incluidas las siguientes: Lea las instrucciones antes de utilizar esta máquina elíptica. Es 
responsabilidad del propietario asegurarse de que todos los usuarios de esta máquina elíptica están informados adecuadamente de 
todas las advertencias y las precauciones. Si tiene preguntas, comuníquese con el Servicio de asistencia técnica a clientes al número 
indicado en la contratapa de este MANUAL DEL PROPIETARIO.

El uso convencional de esta máquina elíptica es únicamente doméstico. No utilice la máquina elíptica en ningún entorno comercial, de 
alquiler, escolar o institucional. El incumplimiento de este requisito invalidará la garantía.

Содержание CE4.3

Страница 1: ...DE L EXERCISEUR ELLIPTIQUE avant de se servir du pr sent MANUEL DU PROPRI TAIRE Lea la GU A DEL USUARIO DE LA M QUINA EL PTICA antes de usar este MANUAL DEL PROPIETARIO ELLIPTICAL OWNER S MANUAL MANU...

Страница 2: ...2 3 ENGLISH 28 FRAN AIS 54 ESPA OL...

Страница 3: ...his elliptical It is the responsibility of the owner to ensure that all users of this elliptical are adequately informed of all warnings and precautions If you have any questions contact Customer Tech...

Страница 4: ...Before mounting or dismounting move the pedal on the mounting or dismounting side to its lowest position and bring the machine to a complete stop Do not wear clothes that might catch on any part of t...

Страница 5: ...should children under the age of 13 use the elliptical Children over the age of 13 or disabled persons should not use the elliptical without adult supervision Never operate the elliptical if it has a...

Страница 6: ...6...

Страница 7: ...nd will seem loose and may cause irritating noises To prevent damage to the elliptical the assembly instructions must be reviewed and corrective actions should be taken Before proceeding find your ell...

Страница 8: ...PAS LAISSER CET QUIPEMENT LA PORT E DES ENFANTS POUR USAGE DOMESTIQUE UNIQUEMENT PRECAUCI N CONSULTAR CON UN MEDICO ANTES DE USAR ESTE EQUIPO POSIBILIDAD DE RESULTAR EN HERIDAS GRAVES SI EL EQUIPO ES...

Страница 9: ...NG Unpack the product where you will be using it Place the elliptical carton on a level flat surface It is recommended that you place a protective covering on your floor Never open box when it is on i...

Страница 10: ...ME using 2 BOLTS A 2 SPRING WASHERS B and 2 FLAT WASHERS C C Fit both END CAPS into REAR STABILIZER TUBE BOLT A 20 mm Qty 2 SPRING WASHER B 18 mm Qty 2 FLAT WASHER C 20 mm Qty 2 HARDWARE FOR STEP 1 FR...

Страница 11: ...FLAT WASHERS C D Attach the TOP FRONT COVER followed by the TOP REAR COVER and snap them together E Slide CONSOLE MAST BOOT down to seal the console mast hole HARDWARE FOR STEP 2 CONSOLE MAST MAIN FRA...

Страница 12: ...th the tube on the LEFT PEDAL ARM C Slide the SPACER D through the LINK ARM BRACKET and the PEDAL ARM so it can t rotate D Insert 2 TEFLON WASHERS E between the PEDAL ARM and the LINK ARM BRACKET E Se...

Страница 13: ...rting PRE INSTALLED BOLT WASHERS C Slide UPPER HANDLEBARS onto LOWER HANDLEBARS and align NOTCH with TAB making sure handlebars are joined together completely Secure UPPER HANDLEBARS to LOWER HANDLEBA...

Страница 14: ...e ELBOW COVER to elbow joint using 1 SCREW L F Snap the INSIDE ELBOW COVER onto the outside elbow cover Note the position of the snap tabs before snapping into position G Repeat on other side NUT K Qt...

Страница 15: ...B Remove the 4 PRE INSTALLED BOLTS from the back of the CONSOLE C Attach the CONSOLE CABLES to the CONSOLE D Carefully tuck the CONSOLE CABLES into the CONSOLE MAST before attaching the CONSOLE to th...

Страница 16: ...16...

Страница 17: ...tical s console and programming The BASIC OPERATION section in the ELLIPTICAL GUIDE has instructions for the following LOCATION OF THE ELLIPTICAL POWER GROUNDING INSTRUCTIONS FOOT POSITIONING MOVING T...

Страница 18: ...adjust To advance press ENTER I N S T R U C T I O N S 1 Select TERRAIN Use ARROWS to adjust 2 Press START to begin program 3 terrains hills reverse train weight loss 8 10 2 4 6 custom program enter di...

Страница 19: ...rain F CUSTOM PROGRAM press to select custom program G ENTER used to choose your program and confirm program settings H KEYS used to select adjust your program and program settings I QUICK KEYS used t...

Страница 20: ...g your workout DISTANCE Shown as miles Indicates distance traveled or distance remaining during your workout LEVEL Shows the current level of resistance HEART RATE Shown as BPM beats per minute Used t...

Страница 21: ...rking out The time will count up from 0 00 the resistance level will default to level 1 OR B SELECT A GOAL AND TERRAIN 1 Press one of the GOAL KEYS to select a GOAL and press ENTER 2 Adjust the GOAL s...

Страница 22: ...ork towards a calorie based goal 1 Press CALORIE key once 2 Use to select the desired caloric expenditure for the workout and press ENTER 3 Choose desired terrain by pressing HILLS WEIGHT LOSS or REVE...

Страница 23: ...s ENTER after each RESISTANCE SEGMENT is set to the desired level Repeat until all 15 segments are set NOTE If STOP key is pressed it will take you back to the previous segment 5 Press START to begin...

Страница 24: ...24...

Страница 25: ...25 LIMITED HOME USE WARRANTY...

Страница 26: ...lacement of a defective motor electronic component or defective part and is the sole remedy of the warranty What IS NOT covered Normal wear and tear improper assembly or maintenance or installation of...

Страница 27: ...but not limited to gym membership fees work time lost diagnostic visits maintenance visits or transportation Equipment used for commercial purposes or any use other than a single family or Household u...

Страница 28: ...28 FRAN AIS...

Страница 29: ...que Il incombe au propri taire de veiller ce que tous les utilisateurs de cet exerciseur elliptique soient ad quatement inform s de toutes les mises en garde et pr cautions Si vous avez des questions...

Страница 30: ...p dale correspondante sa position la plus basse et arr tez compl tement l appareil Ne portez pas de v tements qui pourraient se prendre dans un des composants de l exerciseur elliptique Portez toujou...

Страница 31: ...fants de moins de 13 ans ne devraient utiliser l exerciseur elliptique Les enfants de plus de 13 ans ou les personnes souffrant d un handicap ne doivent pas utiliser l exerciseur elliptique sans la su...

Страница 32: ...32...

Страница 33: ...tants Pour viter les dommages l exerciseur elliptique relisez les instructions d assemblage et prenez les mesures correctives qui s imposent Avant de continuer recherchez le num ro de s rie de votre e...

Страница 34: ...T FOR CONSUMER USE ONLY AVERTISSEMENT CONSULTER UN M DECIN AVANT D UTILISER CET QUIPEMENT POSSIBILIT DE BLESSURES S RIEUSES SI L QUIPEMENT EST UTILISE DE MANI RE INCORRECTE AVANT USAGE LIRE LE GUIDE D...

Страница 35: ...alimentation D BALLAGE D ballez l appareil l ou il sera utilis Placez l emballage de l exerciseur elliptique sur une surface plane Il est conseill de placer une toile de protection sur le sol N ouvrez...

Страница 36: ...S A 2 RONDELLES RESSORT B et 2 RONDELLES PLATES C C Placez les deux CAPUCHONS sur les TUBES DE STABILISATION ARRI RES BOULON A 20 mm Qt 2 RONDELLE RESSORT B 18 mm Qt 2 RONDELLE PLATE C 20 mm Qt 2 QUIN...

Страница 37: ...SUP RIEUR AVANT et le COUVERCLE SUP RIEUR ARRI RE et enclenchez les ensemble E Glissez LE CAPOT DU M T DE LA CONSOLE sur le m t pour sceller le trou dans le m t de la console QUINCAILLERIE POUR TAPE 2...

Страница 38: ...le tube sur la BARRE DE LA P DALE DE GAUCHE C Glissez la BAGUE D ESPACEMENT dans le SUPPORT DE LA BARRE DE LA P DALE et la BARRE DE LA P DALE pour emp cher la rotation D Ins rez les RONDELLES EN T FL...

Страница 39: ...LES PR INSTALL S C Glissez les GUIDONS SUP RIEURS sur les GUIDONS INF RIEURS et alignez la FENTE avec L ONGLET en assurant que les guidons sont compl tement joints ensembles Fixez les GUIDONS SUP RIEU...

Страница 40: ...joint du coude l aide de 1 VIS L F Enclenchez le COUVERCLE DU COUDE INT RIEUR sur le couvercle du coude ext rieur Remarquez les positions des onglets enclenchables sur les couvercles avant de les encl...

Страница 41: ...B Enlevez les 4 BOULONS PR INSTALL S de l arri re de la CONSOLE C Branchez les CABLES DE CONSOLE la CONSOLE D Ins rez soigneusement les C BLES DE LA CONSOLE dans les M TS DE LA CONSOLE avant de fixer...

Страница 42: ...42...

Страница 43: ...ection des FONCTIONNEMENTS DE BASE dans le GUIDE DE L EXERCISEUR ELLIPTIQUE comprend des directives sur les points suivants EMPLACEMENT DE L EXERCISEUR ELLIPTIQUE INSTRUCTIONS DE MISE LA TERRE POUR L...

Страница 44: ...adjust To advance press ENTER I N S T R U C T I O N S 1 Select TERRAIN Use ARROWS to adjust 2 Press START to begin program 3 terrains hills reverse train weight loss 8 10 2 4 6 custom program enter di...

Страница 45: ...s ance d entra nement personnalis e G ENTRER Entrer Utilis pour choisir votre programme et pour confirmer les param tres du programme H TOUCHES Utilis pour s lectionner ou ajuster votre programme et l...

Страница 46: ...E Shown as miles Indique la distance parcourue ou la distance restante de votre entra nement NIVEAU Affiche le niveau de r sistance actuel FR QUENCE CARDIAQUE Indiqu e en BPM battements par minute Uti...

Страница 47: ...de r sistance par d faut est 1 OU B S LECTIONNEZ UN OBJECTIF ET UN TERRAIN 1 Appuyez sur une des TOUCHES D OBJECTIF pour s lectionner un OBJECTIF et appuyez sur ENTER Entrer 2 Ajustez les param tres...

Страница 48: ...ois sur la touche CALORIE 2 Utilisez pour s lectionner la d pense calorique d sir e pour la s ance d entra nement et appuyez sur ENTER Entrer 3 Choisissez le terrain d sir en appuyant sur HILLS Collin...

Страница 49: ...Entrer une fois que chaque SEGMENT DE R SISTANCE est r gl au niveau d sir R p tez jusqu ce que les 15 segments soient r gl s REMARQUE Si vous appuyez sur la touche STOP Arr t vous retournerez au segm...

Страница 50: ...50...

Страница 51: ...51 GARANTIE LIMIT E D USAGE R SIDENTIEL...

Страница 52: ...ou de pi ces d fectueuses constituent les seuls correctifs au titre de la garantie Ce qui n est PAS couvert L usure normale l assemblage ou l entretien incorrects ou l installation de pi ces ou d acc...

Страница 53: ...compris notamment les cotisations d organismes sportifs pertes de temps de travail visites de diagnostic visites d entretien ou frais de transport Les quipements utilis s des fins commerciales ou tout...

Страница 54: ...54 ESPA OL...

Страница 55: ...propietario asegurarse de que todos los usuarios de esta m quina el ptica est n informados adecuadamente de todas las advertencias y las precauciones Si tiene preguntas comun quese con el Servicio de...

Страница 56: ...enso o descenso a su posici n m s baja y det ngala por completo No use ropa que pudiera quedar atrapada en cualquier parte de la m quina el ptica Utilice siempre tenis deportivos al utilizar este equi...

Страница 57: ...tilizar la m quina el ptica Los ni os mayores de 13 a os o las personas minusv lidas no deben utilizar la m quina el ptica sin la supervisi n de un adulto Nunca ponga en funcionamiento la m quina el p...

Страница 58: ...58...

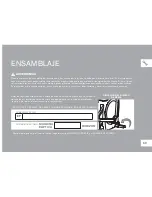
Страница 59: ...a la m quina el ptica es necesario repasar las instrucciones de ensamblaje y hacer las correcciones necesarias Antes de seguir adelante busque el n mero de serie de la m quina el ptica que se encuent...

Страница 60: ...PMENT FOR CONSUMER USE ONLY AVERTISSEMENT CONSULTER UN M DECIN AVANT D UTILISER CET QUIPEMENT POSSIBILIT DE BLESSURES S RIEUSES SI L QUIPEMENT EST UTILISE DE MANI RE INCORRECTE AVANT USAGE LIRE LE GUI...

Страница 61: ...1 adaptador de corriente DESEMPAQUE Extraiga el producto del paquete en el lugar donde lo utilizar Coloque la caja de la m quina el ptica sobre una superficie plana y nivelada Se recomienda que coloq...

Страница 62: ...B y 2 ARANDELAS PLANAS C C Encaje ambos CAPUCHONES DE LOS EXTREMOS en el TUBO DEL ESTABILIZADOR TRASERO PERNO A 20 mm Cant 2 ARANDELA EL STICA B 18 mm Cant 2 ARANDELA PLANA C 20 mm Cant 2 TORNILLER A...

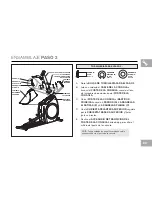
Страница 63: ...UBIERTA TRASERA SUPERIOR y f jelas juntas a presi n E Deslice el ACCESORIO DE TRANSICI N DEL POSTE DE LA CONSOLA hacia abajo para sellar el orificio del poste de la consola TORNILLER A PARA EL PASO 2...

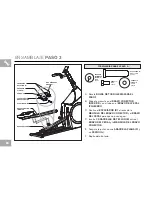
Страница 64: ...tubo en el BRAZO DEL PEDAL IZQUIERDO C Deslice el ESPACIADOR D a trav s de la M NSULA DEL BRAZO CONECTOR y el BRAZO DEL PEDAL para que no pueda girar D Inserte 2 ARANDELAS DE TEFL N E entre el BRAZO...

Страница 65: ...slice las BARRAS DE SUJECI N SUPERIORES en las BARRAS DE SUJECI N INFERIORES y alinee el EXTREMO MUESCADO con el EXTREMO DE INSERCI N asegur ndose de que las barras de sujeci n se unan entre s por com...

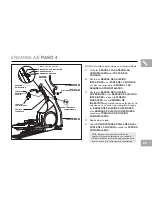
Страница 66: ...a junta de codo usando 1 TORNILLO L F Fije a presi n la CUBIERTA DE CODO INTERIOR en la cubierta de codo exterior Observe la posici n de las pesta as de fijaci n a presi n antes de fijarlas en su posi...

Страница 67: ...uite los 4 PERNOS PREINSTALADOS desde la parte trasera de la CONSOLA C Una los CABLES DE LA CONSOLA a la CONSOLA D Meta con cuidado los CABLES DE LA CONSOLA en el POSTE DE LA CONSOLA antes de unir la...

Страница 68: ...68...

Страница 69: ...na el ptica La secci n FUNCIONAMIENTO B SICO en la GU A DE LA M QUINA EL PTICA tiene instrucciones para lo siguiente UBICACI N DE LA M QUINA EL PTICA INSTRUCCIONES DE CORRIENTE CONEXI N A TIERRA POSIC...

Страница 70: ...adjust To advance press ENTER I N S T R U C T I O N S 1 Select TERRAIN Use ARROWS to adjust 2 Press START to begin program 3 terrains hills reverse train weight loss 8 10 2 4 6 custom program enter di...

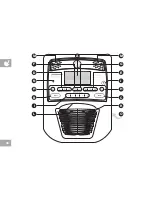
Страница 71: ...do opr malo para seleccionar un programa personalizado G ENTER Aceptar se utiliza para escoger su programa y confirmar los par metros del programa H TECLAS se utilizan para seleccionar ajustar su prog...

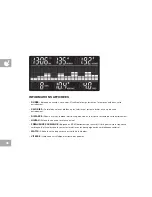
Страница 72: ...as Indica la distancia recorrida o la distancia por recorrer durante su sesi n de ejercicio LEVEL Nivel Muestra el nivel de resistencia actual HEART RATE Ritmo card aco Aparece como latidos minuto BPM...

Страница 73: ...e resistencia predeterminado es el nivel 1 O bien B SELECCIONE UN OBJETIVO Y EL TERRENO 1 Oprima una de las TECLAS DE OBJETIVOS Goals para seleccionar un OBJETIVO y oprima ENTER Aceptar 2 Ajuste los p...

Страница 74: ...calor as 1 Oprima la tecla CALORIE Calor a una vez 2 Use para seleccionar el gasto de calor as deseado de la sesi n de ejercicio y oprima ENTER Aceptar 3 Escoja el terreno deseado oprimiendo las tecla...

Страница 75: ...istencia usando y oprima ENTER Aceptar despu s de que se ajuste cada SEGMENTO DE RESISTENCIA Resistance segment al nivel deseado Repita hasta que se ajusten los 15 segmentos NOTA Si se oprime la tecla...

Страница 76: ...76...

Страница 77: ...77 GARANT A LIMITADA DE USO EN EL HOGAR...

Страница 78: ...motor componente electr nico defectuoso o pieza defectuosa y es el nico resarcimiento de la garant a Qu NO EST cubierto El desgaste normal por el uso el ensamblaje o el mantenimiento inadecuado la ins...

Страница 79: ...i n incluidos a t tulo enunciativo y no limitativo tarifas de membres a de gimnasio tiempo de trabajo perdido visitas de diagn stico visitas de mantenimiento o transporte El equipo utilizado para fine...

Страница 80: ...voulons savoir si vous avez un probl me et nous voulons avoir l occasion de le r soudre pour vous REMARQUE Lire la section D PANNAGE dans le GUIDE DE L EXERCISEUR ELLIPTIQUE avant de communiquer avec...

Отзывы: