


Rev. (a)
Using the AppLock Switchpad
Note:
The touch screen must be enabled. Select
Start > Settings > Control Panel > Options > Misc. tab
to verify touch
screen status.
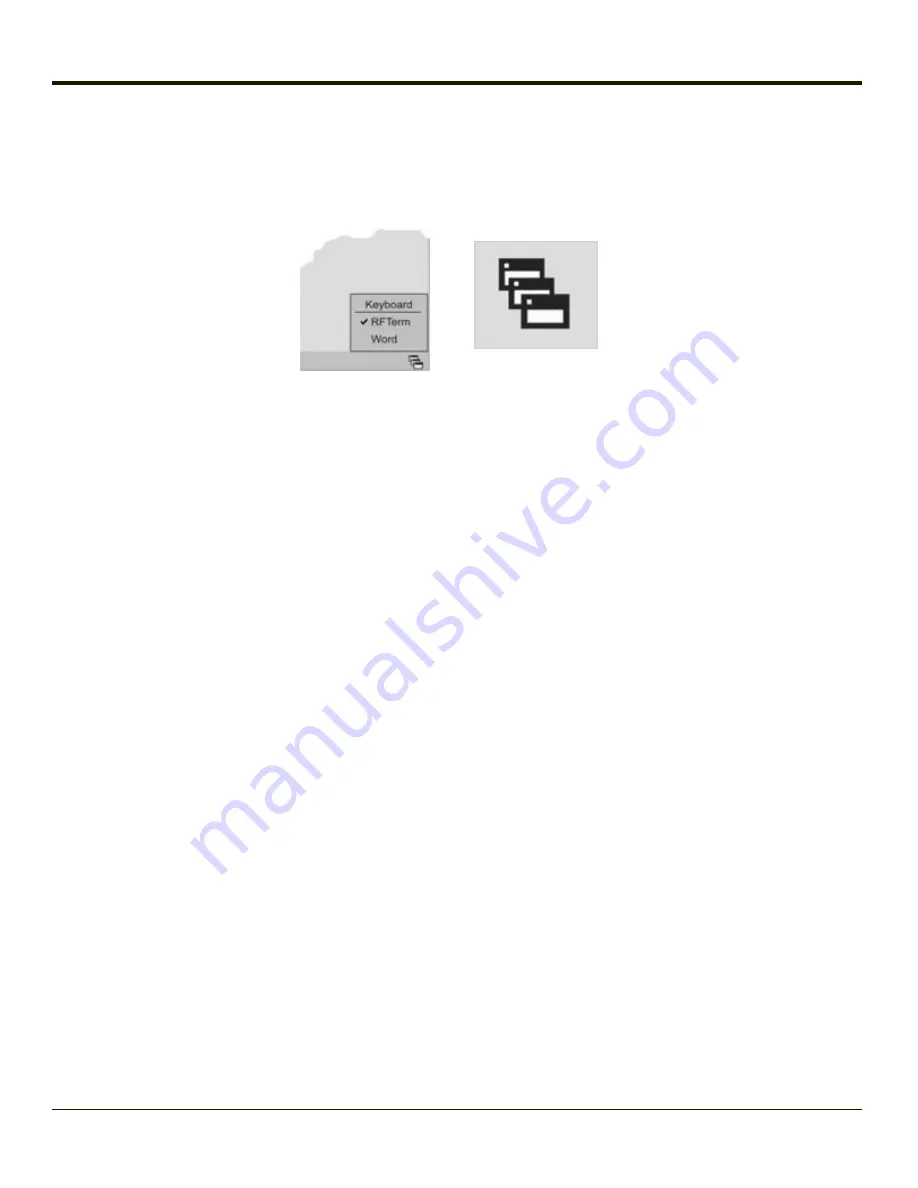
Click the switchpad icon in the taskbar.
A checkmark on the switchpad menu indicates applications currently active or available for Launching by the Thor VM2C user.
When Keyboard, on the Switchpad Menu, is selected, the default input method (Input Panel, Transcriber, or custom input
method) is activated.
Using the Keypad
One switch key sequence (or hotkey) is defined by the Administrator for the end-user to use when switching between locked
applications. This is known as the
Activation key
.
When the switch key sequence is pressed on the keypad, the next application in the AppLock configuration is moved to the
foreground and the previous application moves to the background. The previous application continues to run in the background.
Thor VM2C key presses affect the application in focus only.
Using the Touch Screen
The figure shown above is an example and is shown only to aid in describing how the user can switch between applications
using a stylus.
When the user taps the Switchpad icon with the stylus, a menu pops up listing the applications available to the user. The user
can tap an application name in the popup menu and the selected application is brought to the foreground. The previous
application continues to run in the background. Stylus taps affect the application in focus only. When the user needs to use the
Input Panel, they tap the Keyboard option. Input Panel taps affect the application in focus only.
2-21
Содержание Thor VM2C
Страница 1: ...Thor VM2C Vehicle Mount Computer Microsoft Windows Embedded CE 6 Operating System User s Guide ...
Страница 6: ...Rev 01 iv ...
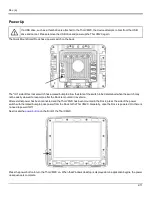
Страница 8: ...Rev a Components Front View 1 Power Button 2 Speakers 3 Microphone 1 2 ...
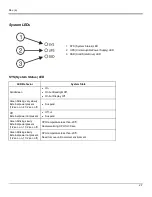
Страница 18: ...Rev a LED Functions 1 System LEDs 2 Connection LEDs 3 Blue LED 4 Orange LED 5 Programmable LED 2 6 ...
Страница 38: ...Rev 01 2 26 ...
Страница 57: ...Rev a 3 19 ...
Страница 58: ...Rev 01 3 20 ...
Страница 66: ...Rev 01 4 8 ...
Страница 69: ...Rev a 5 3 ...


