


NFN Gateway Configuration
NFN Gateway Configuration Procedure
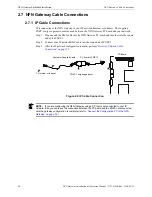
34
NFN Gateway Installation & Operation Manual - P/N: 52306:Rev: D 06/01/07
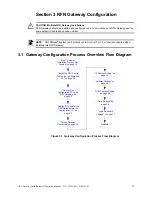
3.4 NFN Gateway Configuration Procedure
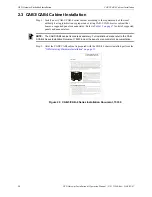
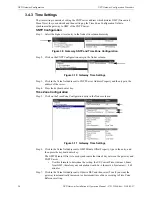
3.4.1 IP Address Setting
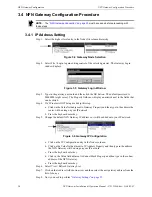
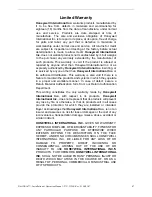
Step 1. Select the highest level entry in the Nodes list column hierarchy.
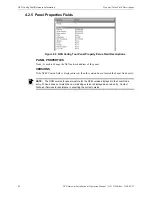
Figure 3.4 Gateway Node Selection
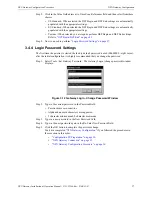
Step 2. Select File >Login to gain editing control of the selected gateway. The Gateway Login
window displays.
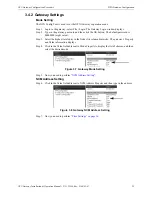
Figure 3.5 Gateway Login Window
Step 3. Type in the gateway password and then click the OK button. The default password is
00000000 (eight zeros). The Property fields now display an asterisk next to the fields that
can be edited.
Step 4. If a IP router is NOT being used skip this step.
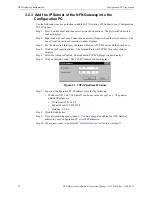
a. Click on the Value field adjacent to Gateway Property and then type in the address the
router will be using on your IP network.
b. Press the keyboard enter key.
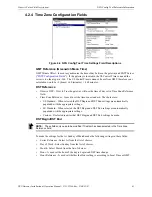
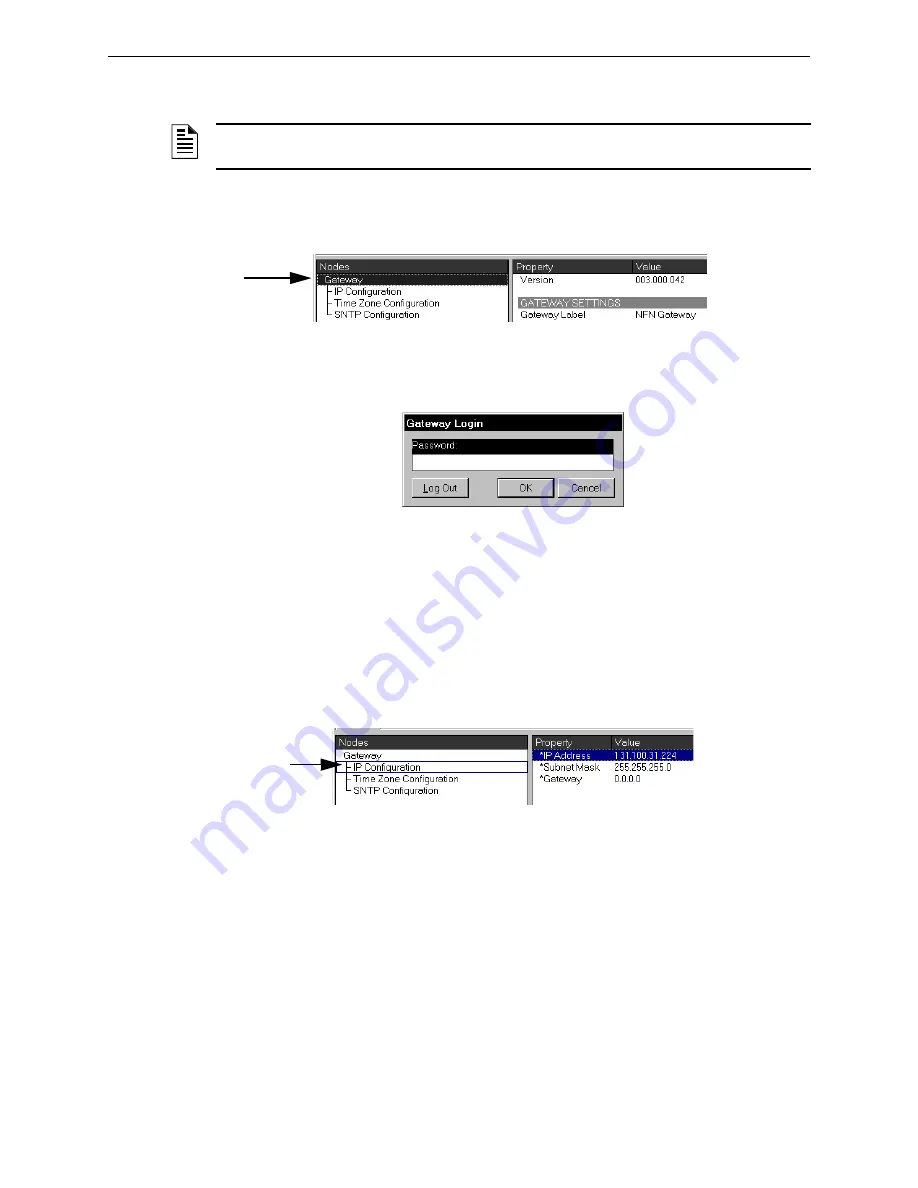
Step 5. Change the default NFN Gateway IP address so it will be added onto your IP network.
Figure 3.6 Gateway IP Configuration
a. Click on the IP Configuration entry in the Nodes column.
b. Click on the Value field adjacent to IP Address Property and then type in the address
the NFN Gateway will be using on your IP network.
c. Press the keyboard enter key.
d. Click in the Value field adjacent to Subnet Mask Property and then type in the subnet
address of the NFN Gateway.
e. Press the keyboard enter key.
Step 6. Select View >Refresh Gateway List.
Step 7. Click on the Address fields down arrow and then select the new gateway address from the
list of choices.
Step 8. Now you need to perform
NOTE:
The
“NFN Gateway Connection” on page 33
must have done before proceeding with
these steps.