Configuring with HSM Connect
HSM Connect allows a user to view the MX8 screen remotely from a PC using an ActiveSync connection:
Requirement
: ActiveSync (version 4.5 or higher for
Windows XP
desktop/laptop computers) must be resident on the host
(desktop/laptop) computer.
Windows Mobile Device Center
is required for a
Windows Vista/Windows 7
desktop/laptop
computer. ActiveSync and Windows Mobile Device Center for the PC are available from the Microsoft website. Follow their
instructions to locate, download and install ActiveSync or Windows Mobile Device Center on your desktop computer.
Note:
For readability in this section, ActiveSync will be used in instructions and explanations. If you have a Windows Vista
or Windows 7 operating system on your desktop/laptop, replace ActiveSync with Windows Mobile Device Center.
ActiveSync is already installed on the MX8. HSM Connect is available for download from the
Getting Started Disc
. The MX8 is
preconfigured to establish a USB ActiveSync connection to a PC when the proper cable is attached to the MX8 and the PC.
If the MX8 uses a serial port for ActiveSync, it will be necessary to configure the MX8 to use the serial port. Complete details
on the proper cables and port configuration are included in
Install HSM Connect
1. Install Microsoft ActiveSync on a PC with a USB port. For details, please see
2. Power up the MX8.
3. Connect the MX8 to the PC using the proper connection cable. Once connected, the ActiveSync dialog box appears. If
using the USB connection, the ActiveSync connection is automatically established. If using a serial connection, it is
necessary to initiate the connection from the MX8.
4. Select “No” for partnership when prompted. Dismiss any ActiveSync dialog boxes warning a partnership is not set up. It
is not necessary to establish a partnership to use HSM Connect. However, if a partnership is desired for other reasons,
one may be established now. More details on partnerships are included in ActiveSync Help.
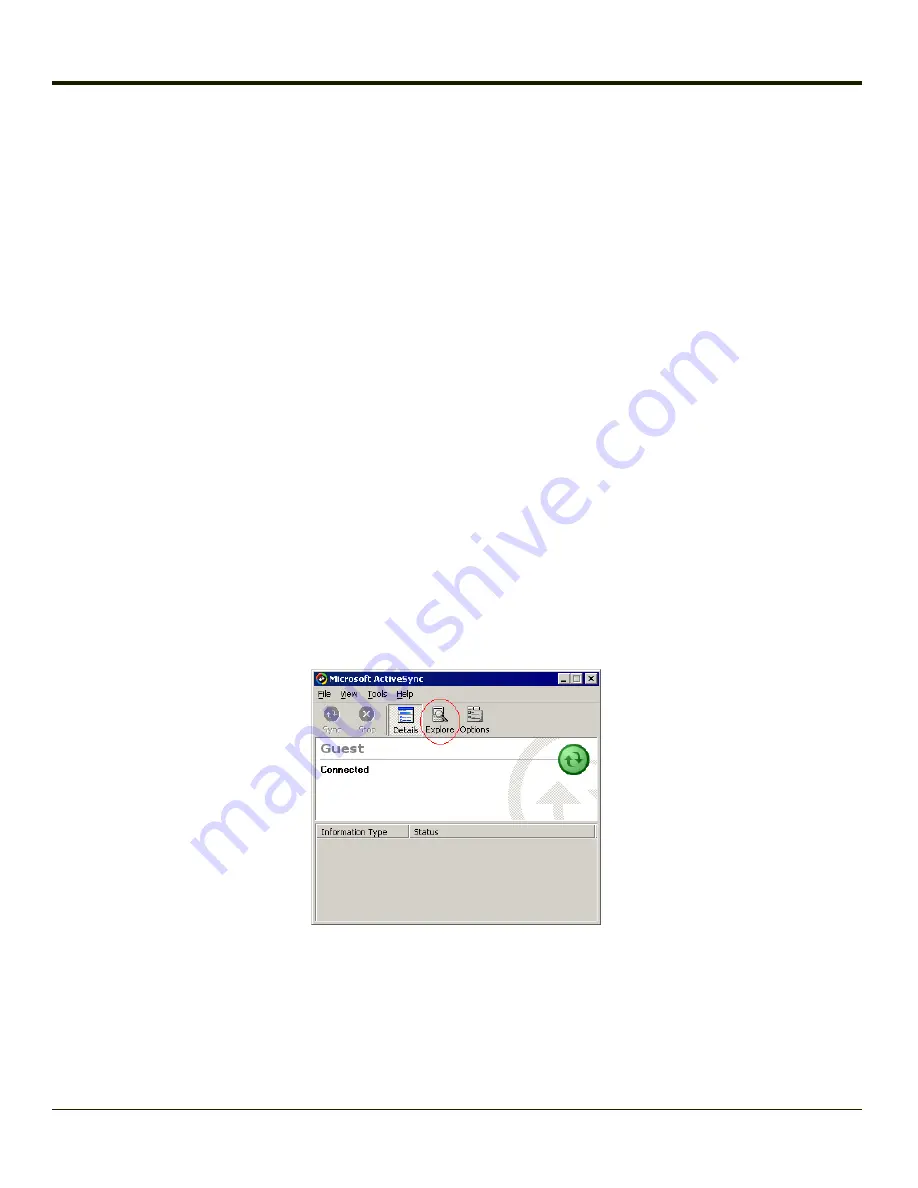
5. When the ActiveSync screen appears, select Explore.
6. An explorer window is displayed for the MX8. Browse to the \System\HSM Connect folder. HSM Connect is available
on the
Getting Started Disc
. Contact
for the files, if necessary.
4-128
Содержание MX8
Страница 1: ...MX8 Hand Held Computer Microsoft Windows Mobile 6 1 Operating System Reference Guide ...
Страница 12: ...Pinout I O Port 9 4 AC Wall Adapter 9 5 Chapter 10 Technical Assistance 10 1 x ...
Страница 22: ...1 10 ...
Страница 38: ...3 4 ...
Страница 56: ...Refer to Installing Applications Help if there is a problem with the package installation 4 18 ...
Страница 144: ...Regional Settings Start Settings System Regional Settings 4 106 ...
Страница 148: ...Clear Type Tap the Enable ClearType checkbox to enable this option The default setting is Disabled unchecked 4 110 ...
Страница 213: ...Hat Encoding Hat Encoded Characters Hex 00 through AD 5 45 ...
Страница 214: ...Hat Encoded Characters Hex AE through FF 5 46 ...
Страница 236: ...6 22 ...
Страница 287: ...7 51 ...
Страница 291: ...Click the Request a certificate link Click on the User Certificate link 7 55 ...
Страница 296: ...7 60 ...
Страница 314: ...9 6 ...
Страница 317: ...10 3 ...
Страница 318: ...Honeywell Scanning Mobility 9680 Old Bailes Road Fort Mill SC 29707 www honeywellaidc com E EQ MX8WMRG Rev J 10 12 ...


