


HTRD400 System Reference Guide
Rev 1.02
99
Document 900.0328
05/05
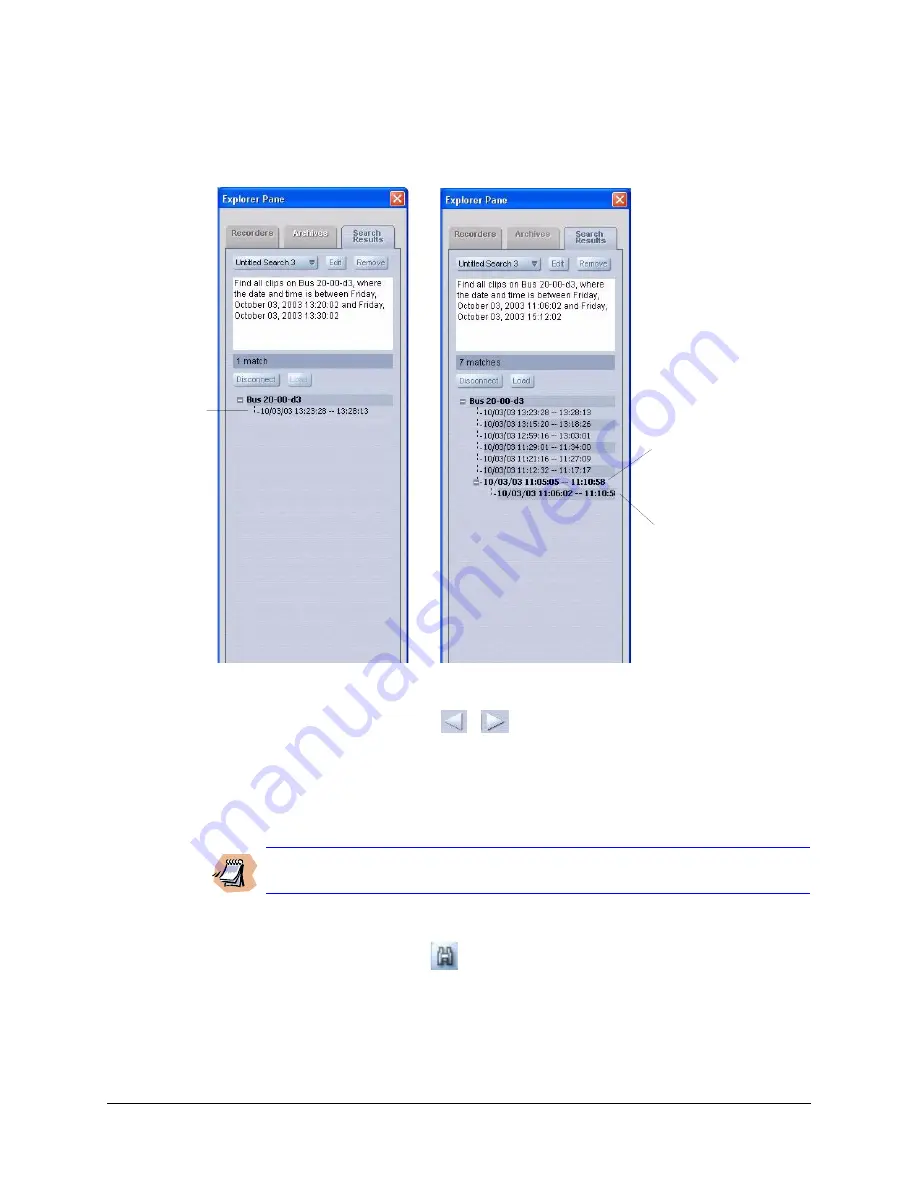
Figure 8-6
Search Result Examples
9.
Select the desired clip or search instance and then click Load (or double-click on the
desired clip) to load the clip into the Player quad screen.
10. Use the player controls
to start viewing the clip.
Searching for Archived Clips
Note
You do not need to be connected to a recorder to search for archived clips.
To search for audio and video clips that were previously archived to a PC:
1.
Click the Search icon
lower right-hand corner of the Player. The Search dialog
box displays.
2.
Select Archives from the combo button on the Source tab, then click Add. The
Archives button toggles between Archives and Recorders.
Search instance (1 match)
Clips (7 matches)
Click here to go to the clip
that matches your search
criteria. This clip contains
the video instance shown
below.
Click here to go to the
starting point (first image)
of the specific instance.
Click here to go to
the starting point
(first image) of the
search instance
that matches your
search criteria.
Содержание HTRD400
Страница 6: ...Rev 1 02 iv 900 0328 05 05 Contents ...
Страница 10: ...Rev 1 02 viii Document 900 0328 05 05 Tables ...
Страница 20: ...Rev 1 02 6 Document 900 0328 05 05 System Overview ...
Страница 86: ...Rev 1 02 72 Document 900 0328 05 05 System Configuration ...
Страница 96: ...Rev 1 02 82 Document 900 0328 05 05 System Maintenance ...
Страница 100: ...Rev 1 02 86 Document 900 0328 05 05 Operating Modes and Status Indicators ...
Страница 126: ...Rev 1 02 112 Document 900 0328 05 05 BusView Player Lite ...
Страница 128: ...Rev 1 02 114 Document 900 0328 05 05 Remote Desktop Operation ...
Страница 142: ...Rev 1 02 128 Document 900 0328 05 05 Factory Set Configurations ...
Страница 175: ......