


Document 800-04559
Rev D
81
11/09
Configuration
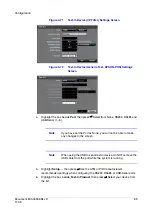
When the DVR is in the Time mode, the
icon displays at the top-left corner of
the screen. The DVR records and displays the
icon at the top-left corner of the
screen during the scheduled times.
When the DVR is in the Event mode, the red
icon displays at the top-left corner
of the screen. The DVR records and displays the
icon at the top-left corner of
the screen when any event occurs.
When the DVR is in the Pre-Event recording mode, the yellow
icon displays
when there is no event, and the DVR is not recording. When the DVR is in the
Pre-Event mode, the red
and
display when any event occurs and the DVR
starts recording.
When the DVR is in the Time & Event mode, the DVR follows the Time settings and
the
icon displays at the top-left corner of the screen. The DVR follows the Event
settings and the
icon displays.
8.
Highlight the box under the Channels heading, then press
#
to select which
cameras will be recorded.
9.
Highlight the box under the Settings heading, then press
#
to define the
recording settings. You can set the ips and Quality of the recording for any modes
you set up in the Mode column. If you do not set the ips and Quality in the
Settings column, the DVR will follow the default settings. See below for details.
10. Highlight the box under the
heading, then press
#
to delete the recording
settings. You are prompted to confirm that you want to delete the settings.
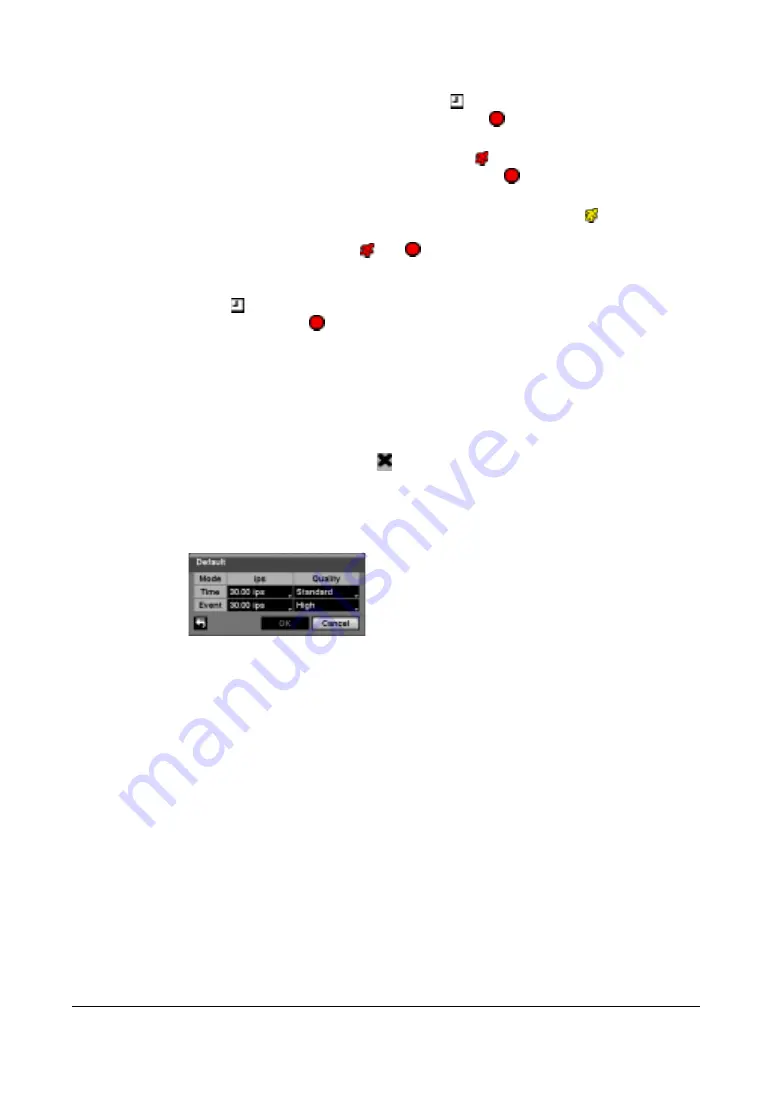
11. Highlight Default…, then press
#
. The Default screen appears.
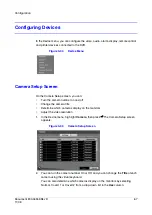
Figure 3-51
Default Setup Screen
12. Highlight a box under the ips column, then press
#
to set the images per second
for Time and Event recording, from 1.00 to 30.00 ips (25.00 ips PAL).
13. Highlight a box under Quality, then press
#
to set the recorded image quality for
Time and Event recording. You can select from: Very High, High, Standard and
Low.
14. To save your changes, highlight Save, then press
#
.
Select Cancel to exit the screen without saving the changes.
Pre-Event Screen
1.
In the Record menu (see
), highlight Pre-Event, then press
#
. The
Pre-Event setup screen appears (see
). If you do not have Event set up
in the Record Schedule, a message will display alerting you to this fact.
Содержание HRXDS16
Страница 1: ...Document 800 04559 Rev D 11 09 User Guide HRXDS8 HRXDS16 8 16 Channel Models Digital Video Recorder ...
Страница 8: ...8 ...
Страница 12: ...Contents 12 ...
Страница 18: ...Tables 18 ...
Страница 24: ...24 HRXDS Series DVR User Guide ...
Страница 102: ...102 HRXDS Series DVR User Guide ...
Страница 138: ...138 HRXDS Series DVR User Guide ...
Страница 152: ...152 HRXDS Series DVR User Guide ...
Страница 154: ...154 HRXDS Series DVR User Guide ...
Страница 156: ...156 HRXDS Series DVR User Guide ...
Страница 158: ...158 HRXDS Series DVR User Guide RS485 Connector Pin Outs Master Unit Slave Unit To TX To TX To RX To RX ...
Страница 160: ...160 HRXDS Series DVR User Guide ...
Страница 162: ...162 HRXDS Series DVR User Guide ...
Страница 164: ...164 HRXDS Series DVR User Guide ...
Страница 171: ......


