Configuring Camera Settings
61
b.
Click
Save
. The newly added camera appears in the
Added
Device
list.
c.
Click
Apply
to save your settings.
d.
If you want to save your settings and exit the
Settings
menu, click
OK
.
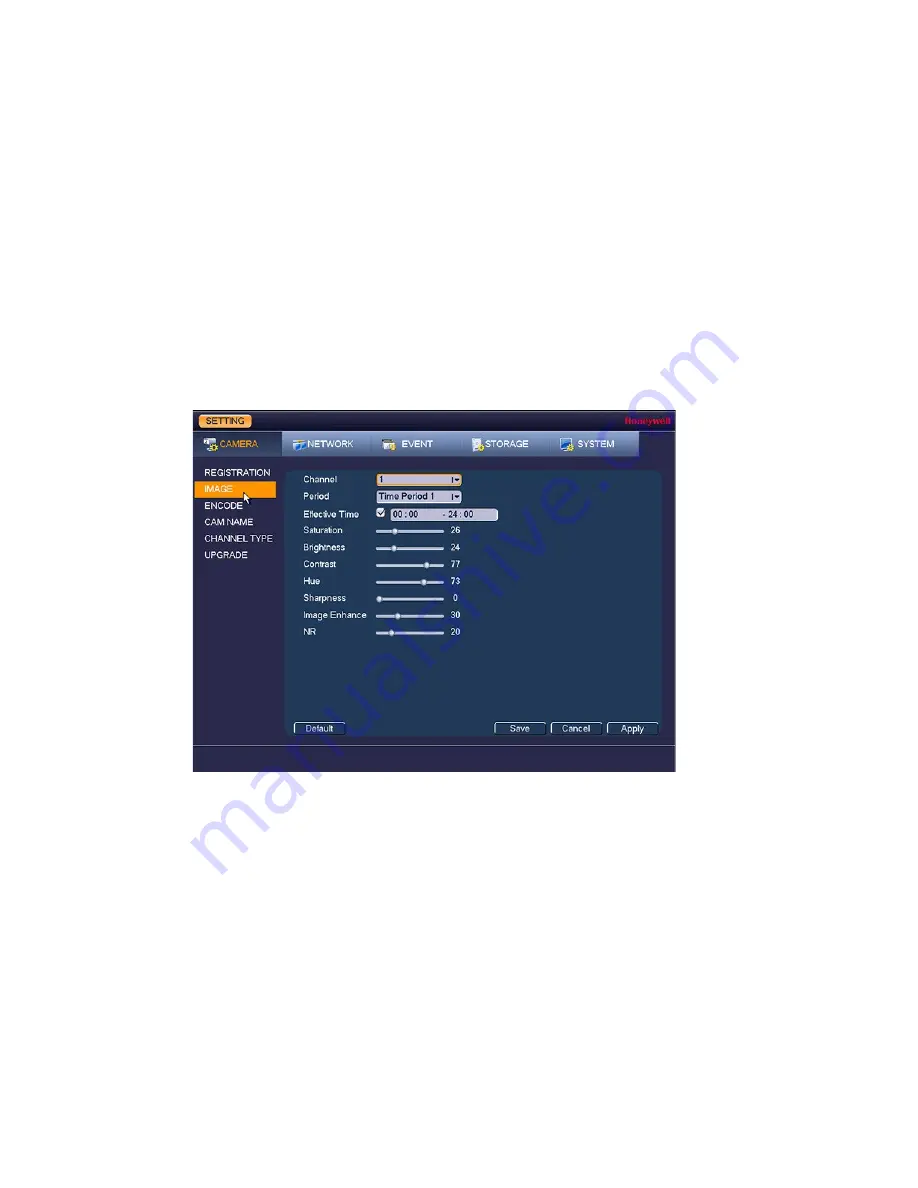
Configuring Image Settings
You can configure the image settings (saturation, brightness, contrast, sharpness) for each
connected camera.
To configure a camera’s image settings
1.
Go to
Main Menu
Setting
Camera
Image
.
Figure 8-2
2.
In the Channel box, select the camera that you want to configure.
3.
In the Period, box, select a time period for the image settings. These image settings will be
used only during this period.
4.
In the Effective Time box, click to enter the start and end times for the Period you selected.
5.
Configure the image saturation, brightness, contrast, and sharpness by moving the slider
to the desired value.
•
Saturation
Select a value between
0
and
100
. The default setting is
50
.
•
Brightness
Select a value between
0
and
100
. The default setting is
50
.
•
Contrast
Select a value between
0
and
100
. The default setting is
50
.
•
Hue
Select a value between
0
and
100
. The default setting is
50
.
•
Sharpness
Select a value between
0
and
15
. The default setting is
1
.
•
Image Enhance
Select a value between
0
and
100
. The default setting is
30
.
Содержание HRHT4041
Страница 2: ...Issue Date Revisions A 04 2018 New document ...
Страница 6: ......
Страница 23: ...Getting Started 11 Typical DVR Installation The following diagram shows a typical DVR installation Figure 2 1 ...
Страница 36: ...Performance Series HQA Digital Video Recorder Local User Guide 24 Figure 2 21 9 Click OK to close the wizard ...
Страница 96: ...Performance Series HQA Digital Video Recorder Local User Guide 84 Figure 9 13 ...
Страница 173: ......


