

Genesis DM Monitor Quick Setup Guide
Customer Service 24/7/365
1-888-353-5404
P4500EN.02 6-13-2014 ©2014 Honeywell
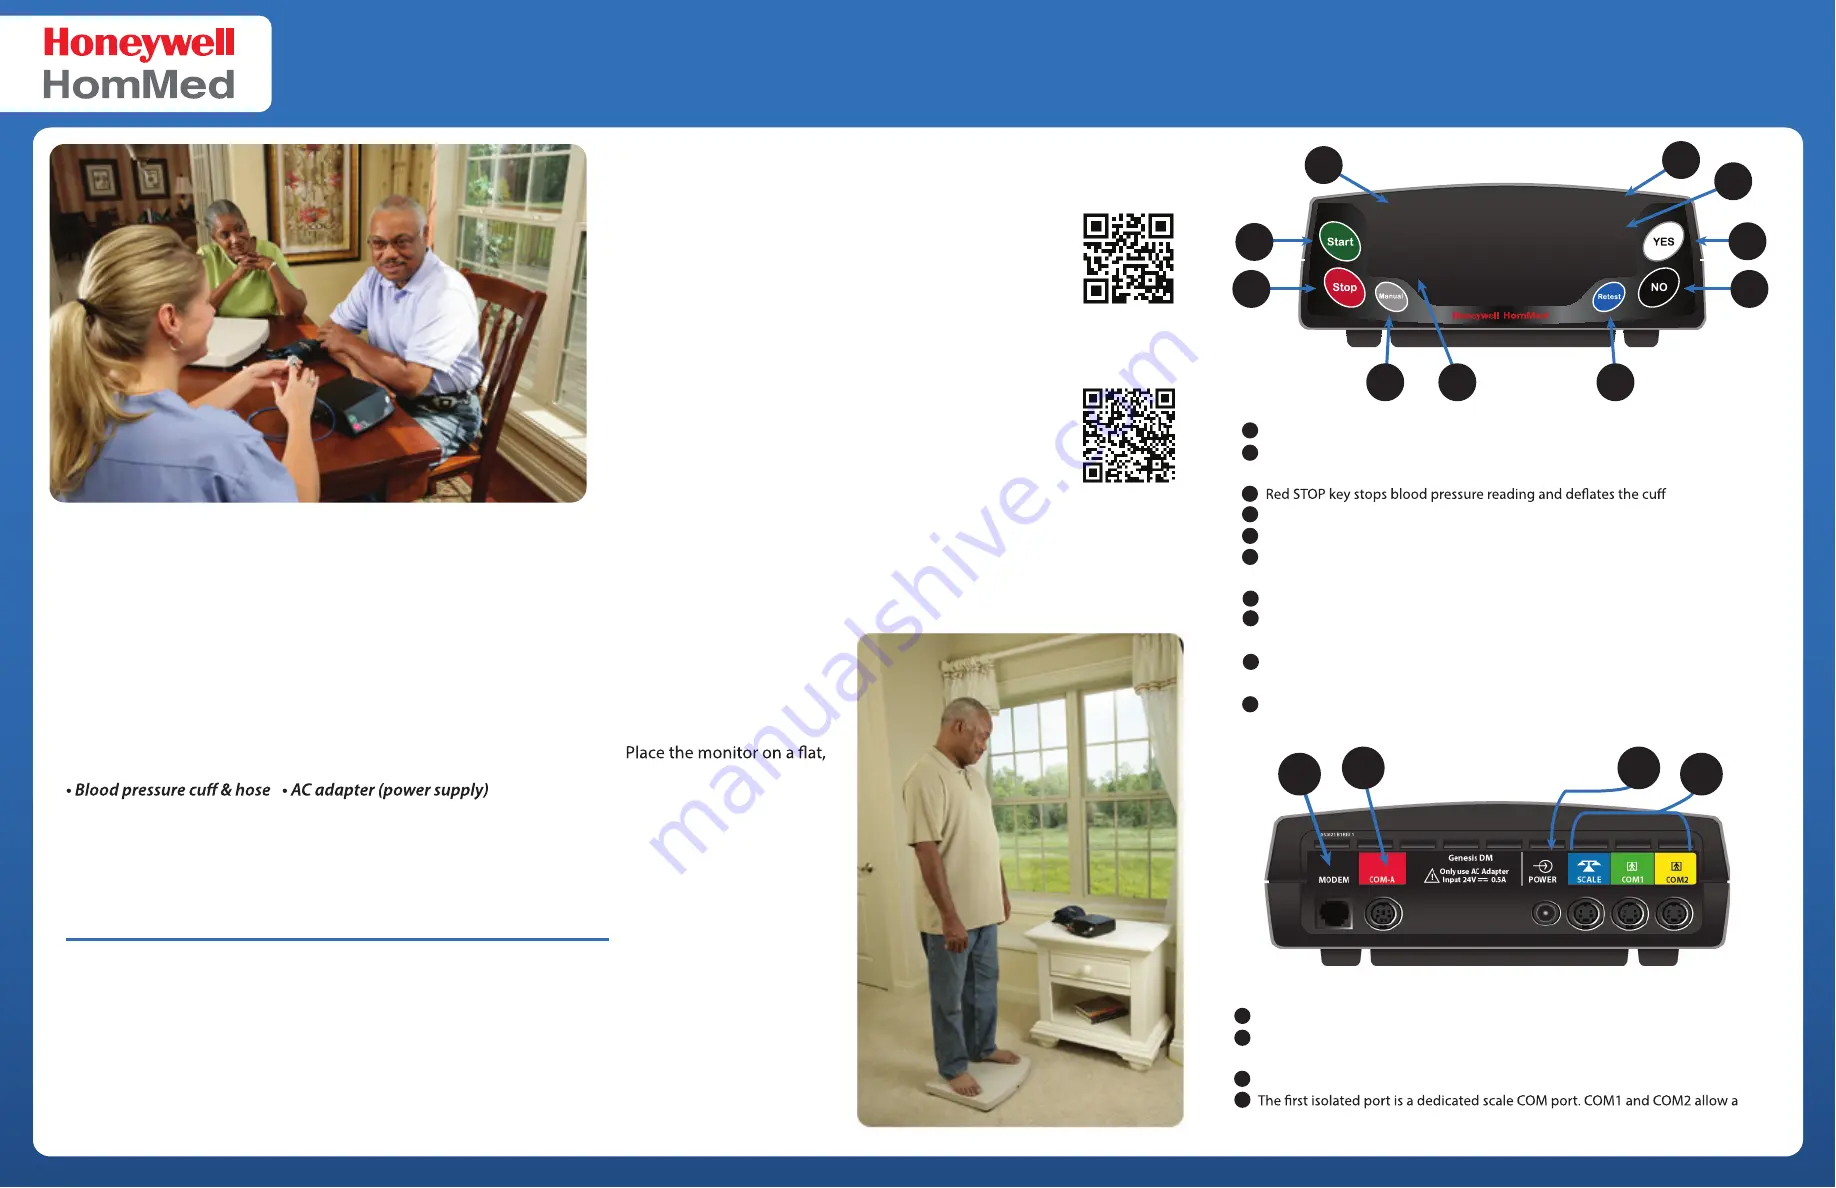
Genesis DM Rear Panel
1
2
3
4
Modem connection for a standard (RJ11) phone cord, or Wireless Bridge modem.
The COM-A port is for a Wireless GPRS modem or external devices that connect to
the Genesis DM monitor.
The power jack is for the AC adapter which powers the monitor.
patient to use an external device connected to the monitor.
1
2
3
4
1
2
3
4
5
6
7
8
9
10
Displays blood pressure as systolic and diastolic in mmHg
Green START key starts a blood pressure reading;
Enters/exits Setup Mode (pressed with YES key)
Gray MANUAL key enters Manual Mode; Exits a menu in Setup Mode
Scale displays weight
Blue RETEST key starts an unscheduled monitoring session;
Selects a menu option in Setup Mode
Black NO key records a “no” answer; DOWN scroll key in Setup Mode
White YES key records a “yes” answer; UP scroll key in Setup Mode
Enters/exits Setup Mode (pressed with START key)
BPM displays the pulse rate. If optional Sp02 is attached, a pulse strength bar
appears next to the pulse rate number during Sp02 collection.
SpO2 Displays oxygen saturation measurement
Genesis DM Front Panel
SPO2
BPM
WT
BP
1
2
3
4
5
6
7
8
9
10
for you to attach them with-
out any problems. To deter-
mine a suitable location,
consider the following:
stable and uncluttered
surface, near a closed
window on an outside wall.
Be certain the monitor is
easily accessible and that a
bed, chair or other type of
seating is available.
Make sure you can easily
attach any peripheral devices
to the back of the unit when
required.
If you are using a Cellular
Bridge Modem, ensure the
modem is at least six inches
away from the monitor.
Setting Up Your Genesis DM Monitor
It is important to set up the Genesis DM Monitor in an area where it can
successfully measure vital signs and/or transmit results. If you will be
using any accessory devices, make sure that there will be enough room
Installation Overview
When you receive your Genesis DM Monitor, carefully remove each
piece of equipment from the box. Save the carton and packing materi-
als in case you need to return any of the contents. As you inventory the
contents of the box, check each piece of equipment for damage.
Your package should include the following items:
• Genesis DM Moni
tor
•
Oximeter (SpO2) Finger Sensor (optional)
•
Scale and scale cable
•
Phone cord and duplex jack
• DSL
Filter
•
Power strip
Be sure to read the Genesis DM Clinician Guide before using your
monitor. The manual contains important instructions, warnings, and
cautions that should be reviewed before use.
Honeywell Customer Service
Toll-free: 888-353-5404
Phone:
262-252-5840
Web:
www.hommed.com
Genesis DM Manuals:
https://www.hommed.com/customer-service/genesis-dm-manuals/
Genesis DM Manual
Genesis DM Clinician Guide
Genesis DM Programming/Troubleshooting Guide
Genesis DM Patient Telemonitoring Guide
Cellular Modem Guide
Clinical Resources
Honeywell provides a variety of clinical resources
accessible via our web page, including webinars,
training videos, walkthroughs and more. In order to
ensure you have the most information you need,
please use these links to browse our online resources.
https://www.hommed.com/lifestream-services/clinical-support/


