background image

1 - 4

Step 3. Power On and Set Up the Terminal 

The first time you power up the Dolphin terminal, you have the option to set up your handheld using one of the following 
methods: 

• Use a custom provisioning file (Prov.xml) to configure the terminal on startup. 

Custom provisioning allows you to set up multiple devices with organization-specific settings so they are ready to use. 
To learn more about creating custom provisioning XML files, see the Administrator Guide for Windows Embedded 8.1 
Handheld, available from Microsoft at 

https://technet.microsoft.com

.

• Use the Quick Start bar code to bypass custom provisioning and go straight to the Windows Start screen.
• Use the Consumer setup wizard that steps you through configuring the terminal and setting up a Microsoft® account 

(optional). Once you add a Microsoft account, there is no way to change it without resetting the terminal.

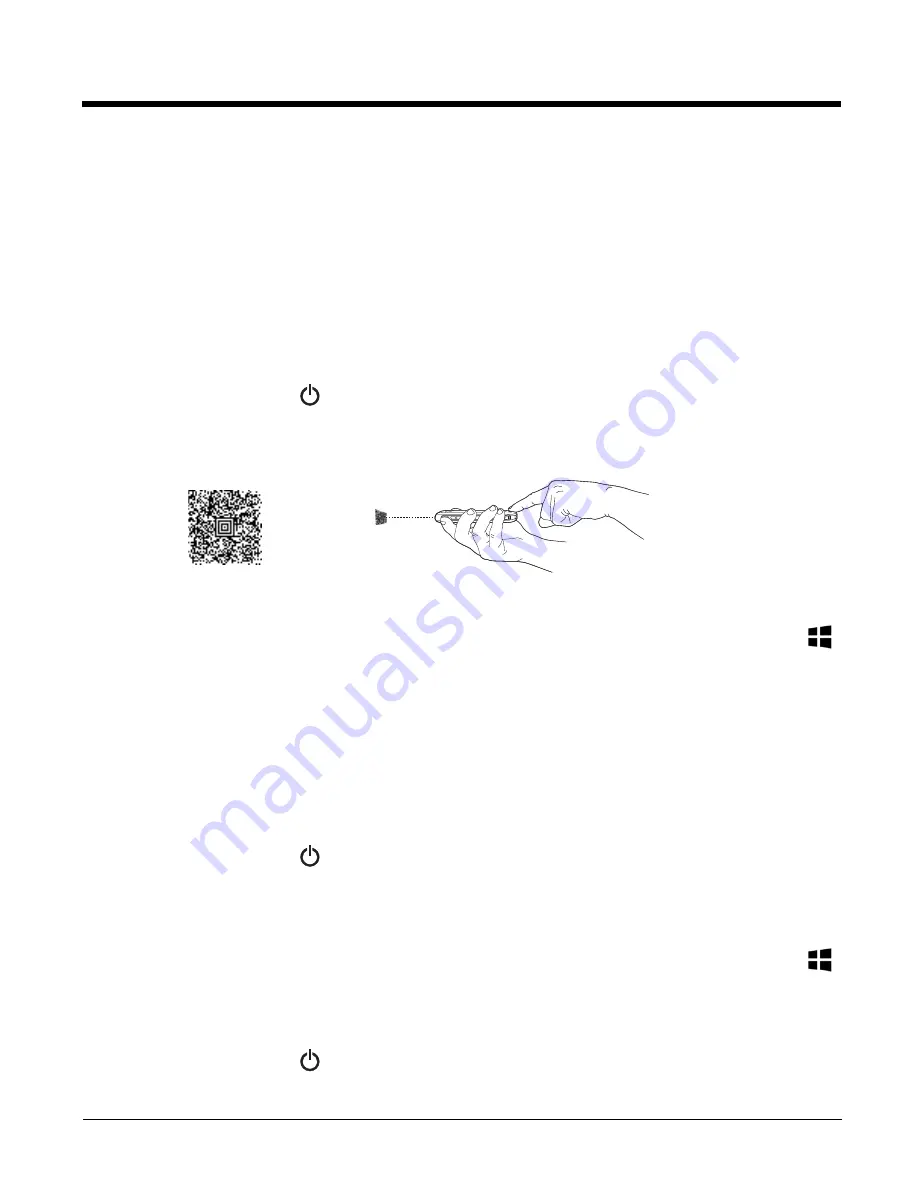
How to Use the Quick Start Bar Code or a Custom Provisional Bar Code

To use a provisioning bar code:

1. Press the 

Power

 button 

.

2. From the Welcome screen, select a language, and then 

next

3. Point the terminal at the Quick Start bar code (below) or a custom provisional bar code, and then 

press the 

Scan

 button. For optimum performance, avoid reflections by scanning the bar code at a slight angle.

On a successful scan, the terminal beeps twice and “configuration received” appears under the Barcode option on 
the screen. 

4. Touch 

next

. “Configuration in progress” appears on the screen. When the terminal is done booting, the 

Start  

screen appears.

How to Use a Custom Prov.xml file on an SD Card

To use a Prov.xml file saved to an SD Card:

1. Save the Prov.xml file to the root directory of the SD Card. 

 
When using the SD card for provisioning, the file must be named Prov.xml and must be located in the root path. 
The provisioning file should also be encoded as UTF-8 or UTF-16LE, including the byte order mark (BOM). 

2. Install the card in the terminal. 

For information on how to install the SD card, see 

Installing a Memory Card

 on page 

2-14.

3. Press the 

Power

 button 

.

4. From the Welcome screen, select a language, and then 

next

The terminal automatically starts searching for provisioning data sources. When the Prov.xml file is found, “configu-
ration received” appears under the SD Card option. 

5. Touch 

next

. “Configuration in progress” appears on the screen. When the terminal is done booting, the 

Start  

screen appears.

How to Use Near Field Communication (NFC) Technology

To use an NFC tag:

1. Press the 

Power

 button 

.

2. From the Welcome screen, select a language, and then 

next

Содержание Dolphin 75e

Страница 1: ...Dolphin 75e with Windows Embedded 8 1 Handheld User s Guide ...

Страница 2: ...ent contains proprietary information that is protected by copyright All rights are reserved No part of this document may be photocopied reproduced or translated into another language without the prior written consent of HII Web Address www honeywellaidc com Trademarks Microsoft Windows Windows Embedded Handheld Windows Phone Outlook Cortana OneDrive and the Windows logo are either registered trade...

Страница 3: ... Function Buttons 1 10 Remap a Button Function 1 10 Virtual Keyboard 1 10 Using the Virtual Keyboard 1 11 Turning Power On Off 1 11 Turning Sleep Mode Suspend Mode On Off 1 11 Turning Airplane Mode On Off 1 11 Replacing the Battery 1 12 Restarting the Terminal 1 13 Resetting the Terminal 1 13 Connecting the Terminal to a Computer PC via a USB Connection 1 14 Using the Windows Phone App to Connect ...

Страница 4: ...3 System Resets 2 14 Hardware Maintenance 2 14 Installing a Memory Card 2 14 Installation and or Replacement 2 14 Chapter 3 Using the Scan Image Engine Overview 3 1 Image Engine Specifications 3 1 Field of View 3 1 Depth of Field 3 1 Supported Bar Code Symbologies 3 2 Decoding 3 2 Using the Scan Demo to Decode a Bar Code 3 2 Configuring the Scan Demo Application 3 4 Aiming Beam 3 5 Chapter 4 Using...

Страница 5: ...istics and Managing Apps and Files 5 9 Changing the Battery Settings 5 10 Changing USB Settings 5 10 Using the SD card for Manual Flash 5 10 Time and Language Settings 5 11 Changing the Date Time or Time Zone 5 11 Changing the Terminal Language 5 12 Changing the Terminal Region 5 12 Adding and Modifying Keyboards 5 12 Input and Accessibility 5 13 Customizing Services and System Features for Access...

Страница 6: ... 6 Working with Certificates 6 6 Installing a Certificate via Internet Explorer 6 6 Installing a Certificate via email 6 6 Installing a Certificate via MDM 6 7 Removing Certificates 6 7 Ethernet Communication 6 7 Viewing Network Adapter Information and Renewing Releasing IP Addresses 6 7 Using the Ping App to Test a Network Connection 6 8 Changing How Data Packets are Routed 6 9 Chapter 7 Working ...

Страница 7: ... 8 6 Mounting the HomeBase 8 6 Optional DIN Rail Mount 8 6 Additional Hardware 8 6 Installing the DIN Rail 8 7 Chapter 9 Dolphin 70e Black eBase Model 70e EHB Overview 9 1 Unpacking the eBase 9 1 Optional Equipment 9 1 Charging Overview 9 1 Convenient Storage 9 1 Capacity 9 1 Dimensions 9 2 Weight 9 2 Parts and Functions 9 2 Front Panel 9 2 Back Panel 9 3 Bottom Panel 9 4 Power 9 4 Connecting Powe...

Страница 8: ...w 11 1 Unpacking the ChargeBase 11 1 Charging Overview 11 1 Convenient Storage 11 1 Capacity 11 1 Dimensions 11 2 Weight 11 2 Parts and Functions 11 2 Front Panel 11 2 Dock LEDs 11 2 Back Panel 11 3 Power Supply Connector 11 3 Bottom Panel 11 3 Power 11 3 Connecting Power to the ChargeBase 11 4 Charging the Main Battery 11 4 To Power a Terminal and Charge its Main Battery 11 4 Mounting the ChargeB...

Страница 9: ...Power a Terminal and Charge the Main Battery 12 4 Communication 12 5 Establishing Ethernet Communication 12 5 Bottom Panel 12 5 Optional DIN Rail Mount 12 6 Additional Hardware 12 6 Installing the DIN Rail 12 6 Appendix A Dolphin 75e Terminal Agency Information Label Locations A 1 Model Number and Serial Number A 1 RF Exposure Information SAR A 1 ...

Страница 10: ...x ...

Страница 11: ...ty for batteries is one year Use of any battery from a source other than Honeywell may result in damage not covered by the warranty Batteries returned to Honeywell International Inc in a reduced state may or not be replaced under this warranty Battery life will be greatly increased when following the battery instructions in this user s guide The duration of the limited warranty for the Dolphin 70e...

Страница 12: ...xii ...

Страница 13: ...tive for additional information on qualified memory card options Initial Setup for Dolphin 75e Terminal Step 1 Install the Battery Before installing the main battery read the Guidelines for Battery Pack Use and Disposal on page 2 13 The terminal is shipped with the battery packaged separate from the unit To install the battery follow the installation steps illustrated For information on how to rem...

Страница 14: ...Charge Communication cable to charge from a 500mA USB port on a host device charge the battery for a minimum of 6 hours for the standard battery and 8 hours for the extended battery Note Inadequate source current may interfere with effective battery charging see Important Charging Guidelines on page 2 10 for additional information Dolphin 75e model terminals are designed for use with the following...

Страница 15: ...ice PC Charging the battery through a USB port takes more time than direct charging using the provided power supply Inadequate source current may lengthen the charge time or prevent the battery from charging if the terminal is drawing more current than supplied by the USB port The maximum current supplied by a USB Host can vary from 100mA to 500mA Do not attempt to charge the terminal from a 100mA...

Страница 16: ...ess the Scan button For optimum performance avoid reflections by scanning the bar code at a slight angle On a successful scan the terminal beeps twice and configuration received appears under the Barcode option on the screen 4 Touch next Configuration in progress appears on the screen When the terminal is done booting the Start screen appears How to Use a Custom Prov xml file on an SD Card To use ...

Страница 17: ...language and then next 4 Touch NFC 5 On the sending device locate and select the prov xml file The maximum file size allowable is 128 KB 6 Touch Share 7 Hold the terminal back to back with the sending device When the entire Prov xml is received configuration received appears under the NFC option 8 Touch next Configuration in progress appears on the screen When the terminal is done booting the Star...

Страница 18: ...ch and hold a Tile and then Drag the Tile to a new location on the screen Touch Unpin to delete the Tile Touch the arrow to toggle through Tile sizes On Start swipe left to access the Apps list The Apps list contains a complete list of all the apps loaded on the terminal You can pin anything on the Apps list on Start Touch and hold an app and then select pin to start Touch the app icon name to ope...

Страница 19: ... settings Touch to access the Wi Fi settings screen where you can view available networks add a Wi Fi network or turn Wi Fi networking On or Off Touch to turn the Bluetooth technology on or off Touch AIRPLANE MODE to toggle Airplane Mode on or off Touch ROTATION LOCK to turn on or off automatic screen rotation when you rotate the terminal 90 degrees To close the action center swipe up from the bot...

Страница 20: ... you need an active Wi Fi connection and a Microsoft account Press the Search button or the touch the Cortana tile on the Start screen This feature is not available in all languages or regions For information on how to use Cortana or to view information on availability go to www windowsphone com If you do not want to use Cortana or it is not available in your country or region you can still use th...

Страница 21: ...rting data including recent contact names will be sent to Microsoft to provide and improve the service Some commands and searches require the Service be turned On You can turn the service On or Off from the speech settings screen To learn about adjusting the Speech feature see Configuring the Speech Feature on page 5 13 2 Do one of the following Say a command Ask a question Touch see more to selec...

Страница 22: ...nistrator or Developer Defined For information on how to define the button function for custom configurations see the Administrator Guide for Windows Embedded 8 1 Handheld available from Microsoft at https technet microsoft com Scan Press to trigger the scanner imager in the Scan Demo app The Scan button functions as a system wake up control if the terminal has entered Sleep mode Suspend mode Sear...

Страница 23: ... and swipe down toward the bottom of the screen You should always power off the terminal before removing the battery For information on removing the battery see Replacing the Battery Turning Sleep Mode Suspend Mode On Off Sleep mode automatically turns the touch panel display off and locks the terminal to save battery power when the terminal is inactive for a programmed period of time To wake the ...

Страница 24: ...minal 2 Unlock and remove the battery door 3 Pull the battery latch back and remove the battery RISK OF EXPLOSION IF BATTERY IS REPLACED BY AN INCORRECT TYPE The battery should be disposed of by a qualified re cycler or hazardous materials handler Do not incinerate the battery or dispose of the battery with general waste materials Ensure all components are dry prior to mating terminals batteries w...

Страница 25: ...rminal completely stops responding you may need to perform a Factory Reset Clean Boot Because resetting the terminal can result in data loss use this method only if all other recovery methods have failed When a reset is performed all personal content is erased e g emails pictures contacts and all factory default settings are restored on the terminal The reset discards any account information you a...

Страница 26: ... supplied If you are using Windows 8 the Windows Phone app automatically opens on the PC If you are using Windows 7 or Mac go to www windowsphone com to download and install the Windows Phone app for desktop or Mac 2 In the Windows Phone app set your phone name and sync preferences The default phone name is Windows Embedded Handheld You can always modify your preferences later by selecting Setting...

Страница 27: ...to enable check mark or disable no check mark Ask me before using USB to communicate with other devices Notify me when I connect to a slower charger The Dolphin 75e should only be connected via its microUSB connector to CTIA certified adapters products that bear the USB IF logo or products that have completed the USB IF compliance program ...

Страница 28: ...1 16 ...

Страница 29: ...th the majority of PC based enterprise systems This device also contains an auxiliary battery well that charges a spare Honeywell standard or extended battery pack For more information see Dolphin 70e Black eBase Model 70e EHB on page 9 1 Dolphin 70e Black Mobile Base Model 70e MB The Mobile Base is a charging cradle designed specifically for in premise and in transit data collection applications ...

Страница 30: ...r a cradle See Connecting the Terminal to a Computer PC via a USB Connection on page 1 14 Holsters Model HOLSTER 2 and 6000 HOLSTER A holster provides convenient storage for the Dolphin 75e terminal in mobile environments Long and short holster models with integrated belt clips and spare battery pouches are available Wrist Lanyard Model SL LANYARD 1 The black wrist lanyard attaches to the bottom c...

Страница 31: ...anel Display Scan Button Front Speaker Battery Charging Status and General Notification LED Back Button Front Digital Microphone Scan Status Notification LED USB Door Micro USB Port Administrator or Developer Defined Button Right Scan Image Button Start Button Bottom Speaker Fastener for an Optional Wrist Lanyard or Stylus Tether ...

Страница 32: ...For detailed information on settings and meanings see Understanding the Battery Charge Status LED Indicator on page 2 10 Start Button The Start button returns you to the Start screen see page 1 10 Administrator or Developer Defined Button By default this button is left unassigned open for administrator and developer customization To define the button function a provisional XML file Prov xml must b...

Страница 33: ...osest to the digital microphone The micro USB port in conjunction with the USB Charge Communication Cable Adapter Kit powers the terminal charges the main battery and facilitates communication The micro USB port supports low full and high speed USB v2 0 client communication with a maximum rate of 480 Mbps For additional information see Using the USB Charge Communication Cable Model 70e USB ADAPTER...

Страница 34: ... Window LED Aperture Camera Flash Color Camera Lens Battery Latch battery and battery door not shown Power Button Left Scan Image Button I O Connector see page 2 8 Audio Jack Volume Control Button Battery Door standard model shown Memory Retention Flap Memory Card Socket Battery Door Lock ...

Страница 35: ...page 1 12 Color Camera The 8 0 Megapixel Resolution color camera provides easy picture and video capture The camera lens and camera flash are located on the back panel of the terminal Camera Flash The camera flash is located on the back panel of the terminal When used as a Camera Flash with the integrated color camera the flash is controlled by the camera application Image Engine Window The image ...

Страница 36: ...rce for the Dolphin terminal is the 3 7V Li ion rechargeable battery located under the battery door on the back panel of the device Honeywell recommends you keep the battery in the terminal charged at all times to help prevent data loss Letting the battery become fully discharged causes the terminal to lose all data in RAM Note All data in RAM is cleared when the battery is removed Always power of...

Страница 37: ...o charge from a 500mA USB port on a host device charge the battery for a minimum of 6 hours for the standard battery and 8 hours for the extended battery When the main battery is installed in the terminal use one of the following Dolphin 70e Black HomeBase Model 70e HB see page 8 1 Dolphin 70e Black eBase Model 70e EHB see page 9 1 Dolphin 70e Black Mobile Base Model 70e MB see page 10 1 Dolphin 7...

Страница 38: ...ery charge is too low to boot Connect the terminal to an AC power source for charging When you first connect the terminal to the charger the battery charge status LED on the terminal briefly turns red then Off and back On to a steady amber As the battery charge reaches approximately 2 the a battery charging icon temporarily appears and flashes from to on the terminal screen Once the battery reache...

Страница 39: ...ed by the event type Events include TIME LOG BATT REMOVAL when AC is connected BATT PRESENT BATT CHANGE BATT CRITICAL BATT FULL POWER ON LINE for external VDC_IN POWER USB DCP for a dedicated charger connected POWER USB FULL for 500mA USB client connection POWER USB LIMITED for a USB power source is present but only available at 100m To enable the logging feature 1 Swipe left from the battery stat...

Страница 40: ...round consuming battery power This includes but is not limited to automatic updates to your email calendar and some Live Tiles that use a push notification for updates To turn the Battery Saver on or off and set when to conserve battery power 1 Select Battery Saver from the App list 2 Select one of the following options Off Turns the Battery Saver feature off When battery is under 20 Turns the Bat...

Страница 41: ...mpt to insert foreign objects into the battery immerse or expose to water or other liquids expose to fire explosion or other hazard Improper battery use may result in a fire explosion or other hazard We recommend use of Honeywell Li ion battery packs Use of any non Honeywell battery may pose a personal hazard to the user Only use the battery for the system for which it is specified Do not use a ba...

Страница 42: ...doors must be present undamaged and properly closed to maintain the environmental rating of the terminal Installing a Memory Card You can expand the terminal s memory capacity by installing a microSD or microSDHC card Honeywell recommends the use of Single Level Cell SLC industrial grade microSD or microSDHC memory cards with Dolphin terminals for maximum performance and durability Contact a Honey...

Страница 43: ...down into the socket and then close the retention flap 5 Install battery and battery door Apply pressure to the edges of the battery door to ensure the door is properly closed and then engage the door lock 6 Press the Power button Memory Card contacts facing down Memory Card Retention Flap ...

Страница 44: ...2 16 ...

Страница 45: ... of Field The depth of field measurements used the following parameters Distances are measured from the front of the engine 23 C 73 F 0 lux Photographic quality codes Symbology Distance in cm Near Distance in cm Far Delta in cm 3 mil C39 128 5 mil C39 128 2 25 5 7 4 35 11 049 2 1 5 3 7 5 mil C39 128 1 25 3 2 6 87 17 4 5 62 14 3 10 mil C39 128 0 67 1 7 9 93 25 2 9 26 23 5 15 mil C39 128 1 01 2 6 15...

Страница 46: ... not intended as a functional business solution 1 On the All Apps list select Scan Demo 2 Point the Dolphin terminal at the bar code For optimum performance avoid reflections by scanning the bar code at a slight angle Symbology Type Symbology Name 1D Symbologies Codabar Code 3 of 9 Code 11 Code 32 Pharmaceutical PARAF Code 93 Code 128 EAN with Add On EAN with Extended Coupon Code EAN 8 EAN 13 GS1 ...

Страница 47: ...n Mode to Automatic 4 Use the slider adjustment under Automatic Interval to set the number of seconds 0 to 30 between scan attempts 5 Press the Back button to return to the Scan screen 6 Touch Scan on the screen to activate the imaging engine Once activated the imager automatically scans and decodes bar codes presented in the field of view based on the Automatic Interval set To disable the feature...

Страница 48: ...s The built in Point of Service POS profiles are applied by the Scan Demo app using the Microsoft POS application program interface API ClaimedBarcodeScanner SetActiveProfileAsync which sets the active profile on the terminal bar code scanner The profile strings defined by the HoneywellDecoderSetttingsV2 exm file are returned to the app using BarcodeScanner GetSupportedProfiles which gets the list...

Страница 49: ...ssed the scanner driver starts scanning and sends the ClaimedBarcodeScanner TriggerPressed event When the scan button is released the scanner driver stops scanning and sends the ClaimedBarcodeScanner TriggerReleased event HON ScanButtonDisable Disables scanner driver handling when the scan button is pressed When using the Scan Demo this profile has no visible effect since the demo application hand...

Страница 50: ...3 6 ...

Страница 51: ...ngs for specific situations e g Portrait Sport Night Turn Focus Assist Light setting on to improve the auto focus results in low light situations Turn Antibanding on to avoid stripes appearing in the picture if you are capturing a computer or TV screen Turn the Tap to take photo option on or off Set the length of time to keep unsaved burst photos Video Settings Select Video settings to turn the Vi...

Страница 52: ...down appears on the screen as the photos are taken 5 Swipe right on the screen and touch Burst to see the series of photos taken 6 Swipe the filmstrip left or right to scroll through the photos 7 Touch the photos you want to keep A check mark in the filmstrip indicates the photo is selected 8 Touch Save By default the selected photos are saved to Camera Roll album Phone Pictures Camera Roll in the...

Страница 53: ...4 3 Uploading Pictures and Videos Picture and Video files can be uploaded to a computer using a USB connection For additional information see page 1 14 ...

Страница 54: ...4 4 ...

Страница 55: ...on page 6 1 For information on Bluetooth settings see Working with Bluetooth and NFC Technology beginning on page 7 1 For information on Ethernet settings see Establishing Ethernet Communication on page 9 6 Personalization Changing Start and the Screen Theme 1 In the Apps list touch Settings start theme under personalization 2 Select the screen setting you want to modify Background Change the scre...

Страница 56: ...he lock screen settings to adjust the screen lock time out limit or set up a password lock for added security against unauthorized access You can also customize what you want showing when the screen lock is active Select a special photo for the screen lock background or have your notifications and appointment reminders viewable without unlocking the screen Adding a Password Lock and Adjusting the ...

Страница 57: ...Under notifications modify the following options Choose an app to show detailed status Touch the box and select an app from the list or none to show no status Choose apps to show quick status You can show the quick status of up to five apps on the lock screen Touch a box to select and add an app Setting when the Screen Lock Activates To set the time limit of inactivity before the Screen Lock activ...

Страница 58: ... turn vibration notification On check or Off not checked 7 Touch the LED Notification check box to turn LED feedback On check or Off not checked When turned On left LED closest to the H in the Honeywell logo briefly blinks blue to indicate a new message has been received To learn more about how to customize the Action Center see page 1 7 Selecting What to Sync When you first set up the terminal an...

Страница 59: ... create one and follow on the on screen prompts 5 Enter the account email address and password and then touch next 6 You may need to validate your identity by entering a Microsoft code The code is sent to you using the contact information you provided when setting up your Microsoft account 7 Select yes or no to set the your cloud syncing and backup preferences Adding Additional Accounts Once your ...

Страница 60: ...y available if you selected Internet email for the account type 8 Touch sign in Adding an Exchange Account 1 In the Apps list touch Settings 2 Touch email accounts 3 Touch add an account and then Exchange 4 Enter the account email address and password and then touch sign in If the terminal does not automatically connect to your account try the following in the order shown To verify you did not mis...

Страница 61: ...ssword if prompted and follow the instructions on the screen The process for adding a workplace account varies depending on the organization Note If a workplace account is not available and you want to learn how to manually add virtual private network profile to the terminal see Virtual Private Networks VPN on page 6 4 Deleting a Workplace Account Note This option may not be available if your orga...

Страница 62: ...he diagnostic information to a text file touch Save 4 Select a folder location and then touch Save 5 Select ok to return to the diagnostic info screen Performing a Factory Reset Clean Boot To learn how to perform a Factory Reset Clean Boot see Resetting the Terminal on page 1 13 Changing the Display Settings Brightness You can either set the screen brightness level to automatically adjust or stay ...

Страница 63: ...lt Storage Location for New Media Apps and Downloads If you have installed a memory card in the terminal you can change the default storage location for new media e g music videos apps or downloads from the Phone internal storage to the SD card 1 In the Apps list touch Storage Sense 2 Swipe up until you see the options under Change where store your music photos apps and more 3 Select the box under...

Страница 64: ...ection Touch documents manage to open the Office Hub to manage your Microsoft Office files Touch emails messaging Select manage accounts to open your email account settings Touch maps manage to open your Maps settings Touch temporary files Internet Explorer settings to open your browser settings Changing the Battery Settings See Managing Battery Power on page 2 11 Changing USB Settings See Changin...

Страница 65: ...shed onto the terminal The flash process takes several minutes without a progress indicator When the process is finished the terminal boots into out of box experience OOBE mode A language selection screen appears For information on how to set up the unit from the OOBE mode see Power On and Set Up the Terminal on page 1 4 Time and Language Settings By default the terminal is set to automatically up...

Страница 66: ...d hold the language and then select move up Repeat moving the language up until it is the first language on the list and then touch restart phone Changing the Terminal Region You can change terminal Country Region and set the Regional format from the Settings region screen Adding and Modifying Keyboards You can activate more than one keyboard language and then switch between the languages using th...

Страница 67: ... and adjust custom fonts and colors used for captions in videos in Internet Explorer and apps that use the browser display content You can also turn the following options On or Off from the ease of access screen Text size High contrast Narrator Narrator quick launch Screen magnifier Allow zooming on all web content Speech for phone accessibility caller ID For more information on these features go ...

Страница 68: ... Location Request Indicator On or Off 1 In the Apps list touch Settings 2 Select location 3 Select the Show icon check box to turn the location request notification On checked or Off not checked When this option is turned On shows on the notification status bar at the top of the screen when an app is requesting location data Modifying and Viewing App Permissions You can control whether all apps or...

Страница 69: ...source A reminder to create a new backup appears if the terminal has not been able to create a recent backup after three weeks due to the lack of a network connection and power source connection To enable automatic backups and select what you want saved 1 In the Apps list touch Settings 2 Select backup apps settings 3 To back up your settings turn Settings backup On 4 To include apps in the back u...

Страница 70: ...You can set the threshold to be between 0 and 999 Modifying the Smart Sensors To configure the integrated motion detection sensors for advanced power management 1 In the Apps list touch Settings 2 Select sensor settings 3 Check the box for one or more of the following options Low power mode on face down When selected the terminal automatically enters Sleep mode Suspend mode when placed face down o...

Страница 71: ...en the terminal display going off and entering sleep mode By default this option is disabled Modifying Wi Fi Radio Settings For information on setting up and changing the Wi Fi settings see Wireless Network Settings beginning on page 6 1 ...

Страница 72: ...5 18 ...

Страница 73: ...twork infrastructure so you may need to consult your network administrator before attempting a connection WLAN 802 11a b g n ac The Dolphin 75e has a 802 11a b g n ac WLAN Wireless Local Area Network radio The radio is interoperable with other 802 11a b g n ac Wi Fi compliant products including access points APs workstations via PC card adapters and other wireless portable devices Bluetooth See Wo...

Страница 74: ...ting to a Hidden Wi Fi Network For security reasons some networks do not broadcasted the network name and do not appear on the available network list even if you are in range To connect to a hidden network 1 In the Apps list touch Settings Wi Fi 2 Verify the Wi Fi networking is turned On 3 Select manage and then touch Add 4 Input the network name in the Network name box and then tap add The networ...

Страница 75: ...nal Modifying the Channel Settings If you want to manually select the channel s the 802 11 radio uses 1 In the Apps list touch Settings 2 Select Wi Fi Radio Settings under the extras heading 3 Touch Channel Settings and then swipe left or right to view the channels available under the 2 5GHz 5GHz and DFS bands 4 Select the box next to a channel to enable check or disable no check the channel for W...

Страница 76: ...tion you must first create a VPN profile on the terminal either by setting up a workplace account see page 5 7 using a profile supplied by your organization or by manually creating a profile To manually set up a VPN profile you may need to do one of the following first Ask your ISP or network administrator for the VPN connection settings for your organization e g proxy server name server type port...

Страница 77: ...a you send and receive goes over the VPN when the connection active You can limit traffic over the VPN to only data sent and received from protected domains or IP addresses To specify data traffic restrictions over the VPN Turn Off Send all traffic Touch domains or IP ranges and then select add Enter the protected domain name or IP range or addresses and then select add Press the Back button 10 In...

Страница 78: ...pany policy and any connection error codes 1 In the Apps list touch Settings VPN 2 Touch and hold the name of the VPN profile 3 Select details Working with Certificates The Windows Embedded 8 1 Handheld allows you to install digital certificates for secure client communications with websites and services via three methods Internet Explorer email or mobile device management MDM Once a certificate i...

Страница 79: ... The IPConfig app displays releases and renews IP parameters for on board network adapters 1 In the Apps list touch IPConfig 2 From the AdapterInfo screen touch the box under Adapter 3 Select one of the integrated network adapters installed in the terminal from the drop down menu Bluetooth Device Personal Area Network Adapter Qualcomm Atheros Wireless LAN Adapter Microsoft Wi Fi Direct Virtual Ada...

Страница 80: ...nfigure the parameters of the ping being sent from the Settings screen Note You do not need to complete all the fields on Settings screen to successfully execute a Ping Just enter the Destination IP address on the Ping screen Configuring the Ping App Swipe left to access the Settings screen and then modify one or more of the following fields Timeout Enter the timeout time in millisecond intervals ...

Страница 81: ... a given interface s subnet may be used to route packets to hosts on other subnets In the Apps list touch Route The Route screen opens to the Input screen Route is organized into three screens Input Output and About Enter and execute a command on the Input screen and review the results on the Output screen Using the Command Options in the Route App On the Input screen touch the box next to access ...

Страница 82: ...drop down list 2 Touch Execute The system processes your request and the number of entries deleted appears on the Output screen To print network routing tables to the Output screen 1 On the Input tab select Print from the Commands drop down list 2 Touch Execute The Output tab displays the network routing table ...

Страница 83: ...oth devices you need to perform a device search select a discovered device and then connect to the selected device Pairing happens as part of the connection process After paired with a device the terminal automatically connects whenever the device is in range the terminal Bluetooth radio is turned On and the terminal is not locked or in sleep mode 1 Make sure the Bluetooth device you are attemptin...

Страница 84: ...ollowing To share a photo browse to and select the photo Touch share To share a video select albums Camera Roll Select the video you want to share and then touch share 5 Touch Bluetooth 6 On Choose Bluetooth device screen touch the name of the receiving device from the paired device list A message at the top of the screen notifies you the file is Sharing with a progress indicator 7 Accept the file...

Страница 85: ... both the terminal and the other device Depending on the OS of the other device you may also need to enable other options Consult the user documentation for the device NFC functionality must be enabled on both devices On the Dolphin 75e Tap to share must be turned On under NFC settings Depending on the OS of the other device you may also need to enable other options Consult the user documentation ...

Страница 86: ...ters When the tag is read by the terminal the information contained on the tag can be quickly saved for example a person s contact information The tag might also include a URL opens a coupon additional product information or a company Web site To read an NFC tag 1 Hold the NFC tag close to the back of the terminal 2 When an NFC tag is recognized touch Accept to open the contact or website Note The...

Страница 87: ...iew The base provides power to the intelligent battery charging system in all Dolphin terminals that senses when a full charge has been achieved and switches to a trickle charge to maintain the full charge The base completes a full charge of the main battery installed in the terminal seated in the terminal well in 4 hours for the standard battery or 6 hours for the extended battery The base comple...

Страница 88: ...two battery packs the one installed in the terminal and a spare Dimensions Weight HomeBase weight 303g 668 lbs Note Weight excludes packaging cables and power supply We recommend use of Honeywell peripherals power cables and power adapters Use of any non Honeywell peripherals cables or power adapters may cause damage not covered by the warranty 129 3 mm 5 09 inches 116 3 mm 4 58 inches 65 6 mm 2 5...

Страница 89: ...f the battery charging in the auxiliary battery well see Back Panel on page 8 4 For information about charging a battery in the auxiliary battery well see page 8 5 Dock LED Indicates if a terminal is docked properly in the base COMM LED This is the communication LED It indicates the status of data transfer between the Dolphin terminal and the host device This color means Orange The auxiliary batte...

Страница 90: ...ottom Panel For details on how to mount the HomeBase see Mounting the HomeBase on page 8 6 Power The base requires 12 Volts DC input for communications battery charging and power output to the terminal The power adapter included with the base converts the voltage from the AC power source to 12 Volts DC Use only a UL listed power supply which has been qualified by Honeywell with output rated at 12V...

Страница 91: ...tery Icon changes from to indicating the terminal is running on external power Battery charging occurs in the background When the Dolphin is removed from the base the battery icon indicates the charge level of the battery see Common Status and Notification Icons on page 1 8 Charging a Spare Battery in the Auxiliary Battery Well The auxiliary battery well located on the back of the base charges a s...

Страница 92: ...ces The default phone name is Windows Embedded Handheld You can always modify your preferences later by selecting Settings in the upper right corner of the app screen If you want to use File Explorer or Windows Explorer to transfer files between your Dolphin terminal and PC without using the Windows Phone app see Using File Explorer or Windows Explorer to Transfer Files on page 1 14 Note The Dolph...

Страница 93: ...8 7 Installing the DIN Rail 1 Slide the DIN rail into the slot along the bottom panel of the base 2 Use the appropriate hardware to secure the DIN rail to the desk or flat surface DIN Rail Slot ...

Страница 94: ...8 8 ...

Страница 95: ... to a trickle charge to maintain the full charge The base completes a full charge of the main battery pack installed in the terminal seated in the terminal well in 4 hours for the standard battery or 6 hours for the extended battery The base completes a full charge of the battery pack in the Auxiliary Battery Well see page 9 3 in 4 hours for the standard battery or 6 hours for the extended battery...

Страница 96: ...his well to communicate with a host device power the terminal and charge the installed battery pack The eBase completely charges the main battery in a Dolphin terminal in 4 hours for the standard battery or 6 hours for the extended battery 129 3 mm 5 09 inches 116 3 mm 4 58 inches 65 6 mm 2 58 inches 2 Dock LED Auxiliary Battery Well AUX Battery LED COMM LED Terminal Well ...

Страница 97: ...egrated LED on the back panel of the base Back Panel Auxiliary Battery Well The eBase enables you to charge an additional battery pack independently of the terminal well in 4 hours for the standard battery or 6 hours for the extended battery This feature ensures that you can always have a fully charged battery for your terminal This color means Orange The auxiliary battery is charging Green The au...

Страница 98: ...Power The base requires 12 Volts DC input for communications battery charging and power output to the terminal the power adapter included with the base converts the voltage from the AC power source to 12 Volts DC Use only a UL listed power supply which has been qualified by Honeywell with output rated at 12VDC and 3 amps with the device The operating temperature range is 10 to 50 C 14 to 122 F Hon...

Страница 99: ...to indicating the terminal is running on external power Battery charging occurs in the background When the Dolphin is removed from the base the battery icon indicates the charge level of the battery see Common Status and Notification Icons on page 1 8 Charging a Spare Battery in the Auxiliary Battery Well The auxiliary battery well located on the back of the base charges a spare battery independen...

Страница 100: ...olphin terminal to communicate with a workstation Note This base cannot be daisy chained Requirements A base powered by a power cable and power adapter cable A standard USB Type A to B communication cable A work station running Windows XP Windows Vista Windows 8 or Windows 7 Setting Up and Connecting the Dolphin Terminal to an eBase 1 Connect power to the HomeBase see Power on page 9 4 2 Plug the ...

Страница 101: ...al DIN Rail Mount A DIN rail 7 5 X 35 mm may be installed on the bottom of the base to provide the optional security of mounting the base to a flat horizontal surface with hardware Additional Hardware DIN Rail Qty 1 3 16 in dia x 5 8 in long pan head screw Qty 2 1 2 in OD x 7 32 in ID x 3 64 in thick washer Qty 4 3 16 in dia nut Qty 2 Note The items listed above are for reference only Final hardwa...

Страница 102: ...9 8 ...

Страница 103: ...ded battery pack Note Before attempting to use charge or replace the battery in the terminal you should read the Guidelines for Battery Pack Use and Disposal on page 2 13 We recommend use of Honeywell Li Ion battery packs Use of any non Honeywell battery may result in damage not covered by the warranty Convenient Storage Intelligent battery charging makes the base a safe and convenient storage rec...

Страница 104: ... integrated speaker amplifies the Dolphin terminal s audio signals and the speaker volume is adjusted using the dial located on the side of the base Spring Latch The spring latch secures the terminal in the Mobile Base charging well Terminal Charging Well Place the terminal in this well to charge the battery Verify that the power source is always within the specified range and observe correct inpu...

Страница 105: ... prevents safe operation of the vehicle and or impedes the vehicle operator s field of view Do not mount the base in a location where the connectors on the bottom panel of the base are not easily accessible Be sure to leave enough room for unrestricted cable connections The Mobile base is intended for use in an enclosed space protected from the elements Do not mount the Mobile base on external veh...

Страница 106: ...t Charging the Main Battery The mobile base provides power to the Dolphin and allows charging of the main batteries in the terminal The main battery charges in 4 hours for the standard battery or 6 hours for the extended battery The intelligent battery charging system incorporated into all Dolphin terminals prevents overcharging which means that terminal may be seated in the base indefinitely with...

Страница 107: ...e into the terminal well Charging begins immediately if required by the Dolphin terminal Note Align the contacts on the back panel of the terminal with the charging contacts on the Mobile Base Ensure all components are dry prior to mating terminals batteries with peripheral devices Mating wet components may cause damage not covered by the warranty We recommend use of Honeywell Li Ion battery packs...

Страница 108: ...e cable 90 counterclockwise to disengage the cable lock 2 Remove the cable from the power jack Attempting to remove the cable without disengaging the lock may result in damage to the base and power cable not covered by the warranty 1 2 ...

Страница 109: ...rge to maintain the full charge As battery packs charge the charging circuitry follows the two step charging process CC CV that is recommended for the battery type The process monitors changes in temperature current and voltage The main battery of each terminal charges in 4 hours for the standard battery or 6 hours for the extended battery Note Before attempting to use charge or replace the batter...

Страница 110: ...erminal wells which offer independent battery charging for each docked terminal Dock LEDs The Dock LED indicates if the terminal is properly seated in the charging well Each well has a dedicated Dock LED which illuminates blue when a terminal is properly seated in the charging well 427 11 mm 16 80 inches 98 8 mm 3 89 inches 59 75 mm 2 35 inches Dock LED Qty 4 Terminal Wells Qty 4 ...

Страница 111: ...s the voltage from the AC power source to 12 volts DC Use only a UL Listed power supply which has been qualified by Honeywell with output rated at 12VDC and 5 amps with the device The operating temperature range is 10 to 50 C 14 to 122 F Honeywell recommends that you leave the ChargeBase connected to its power source at all times so that it is always ready to use We recommend use of Honeywell peri...

Страница 112: ...into one of the four terminal wells The Dock LED for the well illuminates blue Charging begins immediately if required by the Dolphin terminal Note When the terminal is docked the Battery Icon changes from to indicating the terminal is running on external power Battery charging occurs in the background When the Dolphin is removed from the base the battery icon indicates the charge level of the bat...

Страница 113: ... in OD x 7 32 in ID x 3 64 in thick washer Qty 4 3 16 in dia nut Qty 2 Note The items listed above are for reference only Final hardware selection is dependent on the material type and thickness of the mounting surface Installing the DIN Rail 1 Slide the DIN Rail into the DIN Rail slot on the bottom panel of the base 2 Turn the base and DIN Rail right side up 3 Use the appropriate hardware to secu...

Страница 114: ...11 6 ...

Страница 115: ...elligent battery charging system in all Dolphin terminals which senses when a full charge has been achieved and switches to a trickle charge to maintain the full charge As battery packs charge the charging circuitry follows the two step charging process CC CV that is recommended for the battery type The process monitors changes in temperature current and voltage The main battery of each terminal c...

Страница 116: ...aging cables and power supply Parts and Functions Front Panel Terminal Wells The base contains four terminal wells which offer independent battery charging for each docked terminal 427 11 mm 16 80 inches 98 8 mm 3 89 inches 59 75 mm 2 35 inches Dock LED Qty 4 Terminal Wells Qty 4 ...

Страница 117: ... STP When both RJ45 Ethernet ports are used do not connect both Net Base interfaces to the same layer 2 LAN Each RJ45 Ethernet port has a dedicated green and yellow status LED Note The terminal and Ethernet link must be set up properly to allow the terminal to communicate to other devices and or the Internet For more information see Establishing Ethernet Communication on page 12 5 DC Power Jack Th...

Страница 118: ... Battery The base provides power to the Dolphin terminals and allows charging of the batteries in the terminals The battery of each terminal charges in 4 hours for the standard battery or 6 hours for the extended battery The intelligent battery charging system incorporated into all Dolphin terminals prevents overcharging which means that Dolphin terminals may be stored in the base indefinitely wit...

Страница 119: ...J45 connector on the back of the Net Base 3 Plug the Ethernet cable into the network 4 Insert the Dolphin into the terminal well The Dock LED for the well illuminates blue Displaying the Net Base and Terminal IP Address Once the Dolphin terminal has been successfully connected to the network through Net Base the terminal uses the Net Base IP address The IP address can be used by any application on...

Страница 120: ...Qty 2 1 2 in OD x 7 32 in ID x 3 64 in thick washer Qty 4 3 16 in dia nut Qty 2 Note The items listed above are for reference only Final hardware selection is dependent on the material type and thickness of the mounting surface Installing the DIN Rail 1 Slide the DIN Rail into the DIN Rail slot on the bottom panel of the base 2 Turn the base and DIN Rail right side up 3 Use the appropriate hardwar...

Страница 121: ...ed power level the actual SAR level of the handheld computer while operating can be well below the maximum value This is because the device is designed to operate at multiple power levels so as to use only the poser required to reach the network In general the closer you are to a wireless base station antenna the lower the power output The highest reported SAR values for head and body worn accesso...

Страница 122: ...A 2 ...

Страница 123: ......

Страница 124: ...Honeywell Scanning Mobility 9680 Old Bailes Road Fort Mill SC 29707 www honeywellaidc com 75E H81 ENUS UG Rev A 8 15 ...

Отзывы: