Failure of Replaceable Batteries
This wireless key has been designed to provide several years of battery life under normal conditions. The
expected battery life is a function of the device environment, usage and type. Ambient conditions such as high
humidity, high or low temperatures, or large temperature fluctuations may reduce the expected battery life.
This device will report a low battery condition to the control panel as a trouble condition, when the batteries need to
be replaced. In addition the yellow LED will not flash when a button is pressed. However, if the device is unused
for a long period of time, it may fail to operate as expected. Regular testing and maintenance will keep the system
in good operating condition for the lifetime of the product.
Low Battery Indication
When the unit goes into a Low Battery condition, the yellow LED will not flash when a button is pressed. Change
both batteries immediately.
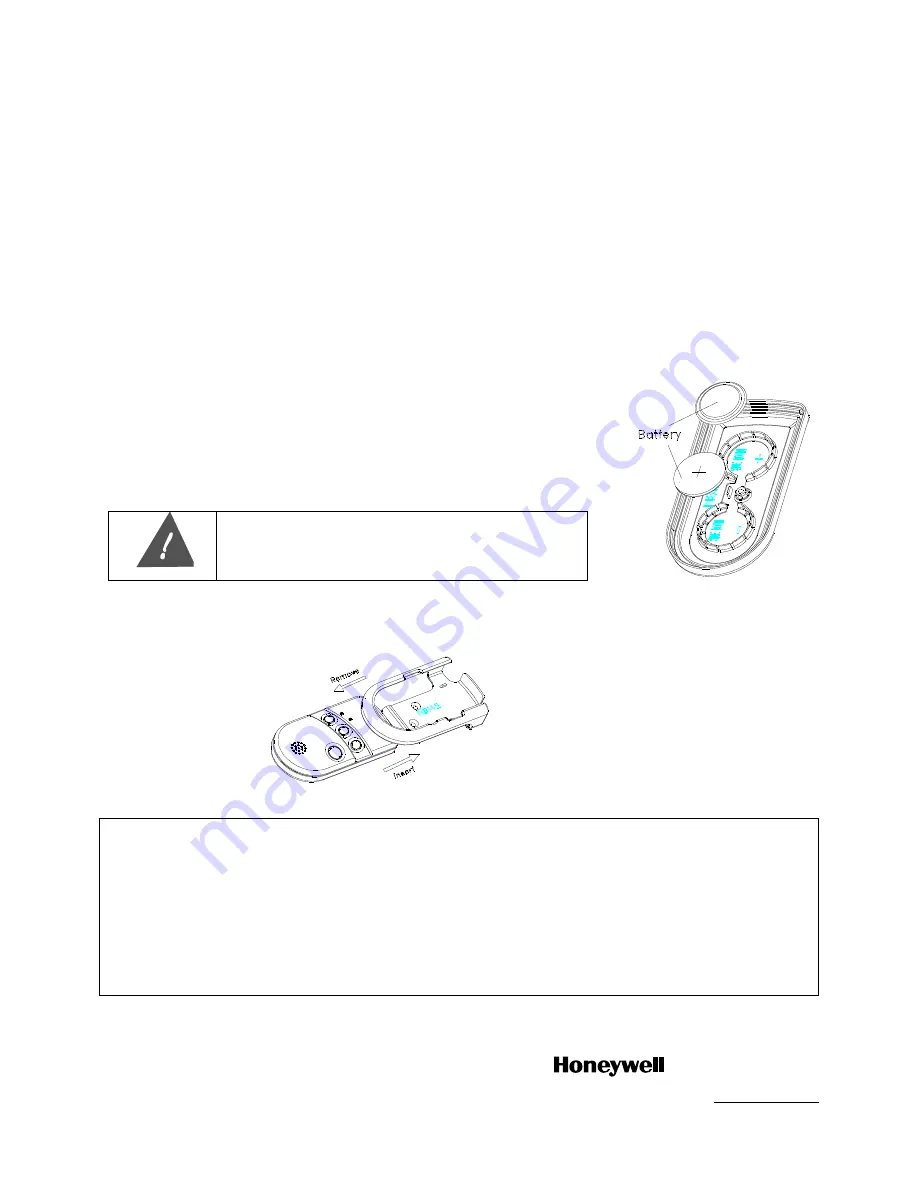
To Replace the Batteries
Removing or Inserting the Unit from a Belt Clip
LIMITATIONS STATEMENT
Signals sent by wireless transmitters may be blocked or reflected by metal objects before they reach the alarm receiver. Even if the
signal path has been recently checked during a weekly test, blockage can occur if a metal object somehow blocks the signal path.
Wireless button type transmitters that have visual and audible indications of status must be used to confirm that the desired action
(such as arming) has occurred after pressing a function button on any of these transmitters. Be sure to listen for appropriate
audible and visual indications that such action has occurred. Otherwise, you could inadvertently leave yourself or your premises
unprotected.
External factors such as humidity, high or low temperatures, or constant activation of a programmed button may reduce battery life
in a given installation. If the button unit is used infrequently, activate it regularly (once per week) to confirm operation. A button type
transmitter will report a low battery condition to the alarm control when a low battery status is detected.
N8547V1 04/09 Rev. A
2 Corporate Center Drive, Suite 100
P.O. Box 9040, Melville, NY 11747
Copyright © 2009 Honeywell International Inc.
www.honeywell.com/security
1. Remove the screw from the back case.
2. Remove case back by using the blade of a small screwdriver to pry open.
3. Place batteries as shown on diagram. Use CR2430 or DL2430 Lithium
batteries only.
4.
Close case by snapping case front and back together.
5.
Replace the screw to secure the case
.
WARNING!
Improperly installing the batteries will cause damage
to the batteries
.


