GB
MU0H-1155GE23 R0319
5
•
The filter must be cleaned by reverse rinsing regularly,
at least every 2 months
•
Non-compliance can lead to the filter becoming blocked
This results in a drop in pressure and decreased water
flow
•
The filter meshes are made of stainless steel. A red
coating as a consequence of rust from the pipelines has
no influence on function or the way the filter works
Do not forget to do a visual check of the ball valve.
Replace if it is dripping!
8.1.3 Pressure reducing valve
CAUTION!
Interval: once a year
1.
Close shut-off valve on outlet
2.
Check outlet pressure using a pressure meter when
there is zero through-flow
•
If the pressure is increasing slowly, the valve may
be dirty or defective. In this instance, carry out
servicing and cleaning
3.
Slowly open shut-off valve on outlet
8.2 Maintenance
Frequency: every 1-3 years (depending on local
operating conditions). To be carried out by an
installation company
8.2.1 Check valve
1.
Close shut-off valve on inlet
2.
Release pressure on outlet side (e.g. through water tap)
3.
Close shut-off valve on outlet
4.
Replace check valve
5.
Slowly open shut-off valves on inlet and outlet
8.2.2 Filter
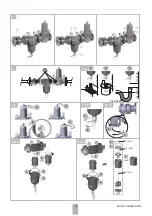
8.2.3 Replace filter insert
1.
Close shut-off valve on inlet
2.
Release pressure on outlet side (e.g. through water tap)
3.
Close shut-off valve on outlet
4.
Unscrew filter bowl
5.
Remove filter insert
6.
Insert new filter insert
•
Put on the O-ring
7.
Put new O-ring on filter bowl
8.
Screw filter bowl in place
9.
Slowly open shut-off valve on inlet
10. Slowly open shut-off valve on outlet
8.2.4 Replace filter mesh
1.
Close shut-off valve on inlet
2.
Release pressure on outlet side (e.g. through water tap)
3.
Close shut-off valve on outlet
4.
Unscrew filter bowl
5.
Remove filter insert
6.
Dismount filter insert
7.
Replace filter mesh
8.
Mount the filter insert
9.
Put filter insert into filter bowl
10. Put new O-ring on filter bowl
11. Screw filter bowl in place
12. Slowly open shut-off valve on inlet
13. Slowly open shut-off valve on outlet
8.2.5 Replace ball valve
1.
Close shut-off valve on inlet
2.
Release pressure on outlet side (e.g. through water tap)
3.
Close shut-off valve on outlet
4.
Unscrew discharge connection
5.
Remove ball valve
6.
Screw in new ball valve
7.
Screw in discharge connection
8.
Slowly open shut-off valve on inlet
9.
Slowly open shut-off valve on outlet
8.2.6 Pressure reducing valve
CAUTION!
Frequency: every 1-3 years (depending on local
operating conditions). To be carried out by an
installation company
1.
Close shut-off valve on inlet
2.
Release pressure on outlet side (e.g. through water tap)
3.
Close shut-off valve on outlet
4.
Loosen hexagon nut on spring bonnet
CAUTION!
There is a spring in the spring bonnet. It may cause
injuries if the spring is derailing.
• Make sure tension in compression spring is
slakkened!
5.
Slacken tension in compression spring
•
Turn control adjustment screw to the left (-) until it
does not move any more
6.
Unscrew spring bonnet
7.
Check the cartridge insert for fault-free condition and
replace insert or sealing parts if necessary.
8.
Reassemble in reverse order


