INSTRUCTION
MANUAL
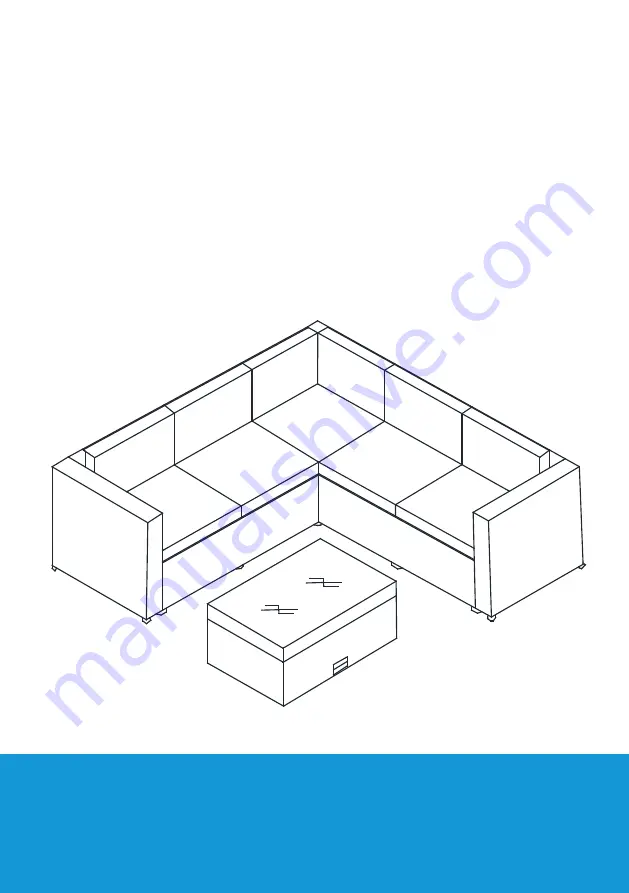
6-Seating Modern Sectional Set
with Storage Ottoman
SKU: P15
5
Страница 1: ...INSTRUCTION MANUAL 6 Seating Modern Sectional Set with Storage Ottoman SKU P155 ...
Страница 2: ...3 PCS M6 WASHER Page 1 of 12 Please do not exceed the weight limitations of this item Do not stand on or use any part of this item as a step ladder Firmly secure all bolts screws and nuts before use Reconfirm that all bolts screws and nuts are secure every 90 days Do not use or store this item in the proximity of open flame or flammable combustible chemicals Be aware that some parts are heavy and ...
Страница 3: ...RNER BACKREST SEAT CUSHION G 5 PCS BACK CUSHION H I 1 PC CORNER LEFT SIDE I Page 2 of 12 J L K 1 PC CORNER BACKREST M 1 PC CORNER TOP N I 1 PC CORNER LEFT SIDE O 1 PC CORNER F PANEL 1 PC TABLE BACK PANEL 1 PC CORNER SOFA TOP 1 PC CORNER FRONT PANEL ...
Страница 4: ...PARTS P R Q S V W 1 PC RIGHT TABLE SIDE T I 1 PC 1 PC TABLE COVER U GLASS TOP Page 3 of 12 1 PC TABLE TOP 1 PC TABLE BASE 1 PC SIDE CUSHION LEFT TABLE SIDE 1 PC TABLE FRONT PANEL 1 PC ...
Страница 5: ... washer and part 2 bolt Do not tighten screws too much at this stage PRODUCT ASSEMBLY CORNER SEAT 1 2 Attach part B Corner Side Panel and part I Front Panel to part J Corner Sofa Top with 5 PCS of part 1 washer and part 2 bolt Page 4 of 12 K K H 2 1 2 1 B I J 2 2 2 2 2 1 1 1 1 1 ...
Страница 6: ...washer and part 2 bolt Tighten all the bolts again to ensure this corner seat is stable enough to use PRODUCT ASSEMBLY CORNER SEAT 3 4 Place part F Seat Cushion and part G Back Cushions onto the Corner Seat The assembly of fitst corner seat finishes Page 5 of 12 H G F F G 2 2 1 1 2 1 2 2 2 1 1 1 2 1 K I B J ...
Страница 7: ...sher and part 2 bolt Do not tighten screws too much at this stage PRODUCT ASSEMBLY CORNER SEAT 1 2 Attach part B Corner Side Panel and part C Front Panel to part D Corner Sofa Top as below with 5 PCS of part 1 washer and part 2 bolt Page 6 of 12 2 2 1 1 A E 2 2 2 2 2 1 1 1 1 1 B C D ...
Страница 8: ...E Corner Backrest with 7 PCS of part 1 washer and part 2 bolt PRODUCT ASSEMBLY CORNER SEAT 3 4 Page 7 of 12 G F F G 2 2 1 2 1 2 1 1 2 1 2 2 1 1 C B D E A Place part F Seat Cushion and part G Back Cushions onto the Corner Seat The assembly of second corner seat finish es ...
Страница 9: ...t Side with 2 PCS of part 1 washer and part 2 bolt PRODUCT ASSEMBLY CORNER SEAT III 1 2 Page 8 of 12 2 2 2 2 2 1 1 1 1 1 Attach the part B Corner Side Panel and part L Corner F Panel to part M Corner Top with 3 PCS of part 1 washer and part 2 bolt A N M B L ...
Страница 10: ...er Left Side with 6 PCS of part 1 washer and part 2 bolt PRODUCT ASSEMBLY CORNER SEAT III 3 4 Page 9 of 12 Place part F Seat Cushion part G Back Cushions and part U Side Cushion onto the Corner Seat The assembly of single corner seat finishes 1 N B L 1 1 1 2 2 2 A G U F 1 2 2 ...
Страница 11: ...rt 1 washer and part 2 bolt Do not tighten screws too much at this stage PRODUCT ASSEMBLY COFFEE TABLE 1 2 Page 10 of 12 Attach part O Table Back Panel to part S Right Table Side and part P Tale Top with 2 PCS of part 1 washer and part 2 bolt 1 2 1 2 P P S S O 1 2 1 2 ...
Страница 12: ...le Back Panel with 4 PCS of part 1 washer and part 2 bolt PRODUCT ASSEMBLY COFFEE TABLE 3 4 Page 11 of 12 Attach part Q Table Base to part S Right Table Side and part T Left table side with 4 PCS of part 1 washer and part 2 bolt 1 1 2 2 T P O 1 2 1 2 1 1 2 2 Q P S T ...
Страница 13: ...nd part S Right Table Side with 2 PCS of part 1 washer part 2 bolt and part 3 nut PRODUCT ASSEMBLY COFFEE TAB LE 5 6 Page 12 of 12 Place part W Glass Top or part V Table cover onto part P Table Top The Assembly of Coffee Table finishes R W V P T S 1 2 1 1 2 2 3 ...