2
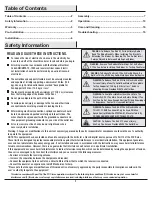
Table of Contents ................................................................ 2
Safety Information ............................................................... 2
Warranty ............................................................................... 3
Pre-Installation .................................................................... 3
Installation ............................................................................ 6
Assembly .............................................................................. 7
Operation ........................................................................... 13
Care and Cleaning ............................................................. 15
Troubleshooting ................................................................. 15
To reduce the risk of electric shock, ensure the electricity has
been turned off at the circuit breaker or fuse box before you begin.
All wiring must be in accordance with the National Electrical
Code ANSI/NFPA 70-1999 and local electrical codes. Electri
-
cal installation should be performed by a qualied licensed
electrician.
The outlet box and support structure must be securely mounted
and capable of reliably supporting a minimum of 35 lbs. (15.9
kg). Use only UL-listed outlet boxes marked “Acceptable for
Fan Support of 35 lbs. (15.9 kg) or less.”
The fan must be mounted with a minimum of 7 ft (2.1 m) clearance
Do not place objects in the path of the blades.
To avoid personal injury or damage to the fan and other items,
use caution when working around or cleaning the fan.
After making electrical connections, spliced conductors should
be turned upward and pushed carefully up into outlet box. The
wires should be spread apart with the grounded conductor and
the equipment-grounding conductor on one side of the outlet box.
All setscrews must be checked and retightened where
necessary before installation.
WARNING: To Reduce The Risk Of Personal Injury,Do Not
Bend The Blade Brackets When Installing The Brackets,
Balancing The Blades, Or Cleaning The Fan. Do Not Insert
WARNING:
Remove The Rubber Motor Stops On The Bottom
Of The Fan Before Installing The Blades Or Testing The Motor.
WARNING: To Reduce The Risk Of Fire Or Electric Shock, Do
Not Use This Fan With Any Solid-State Speed Control Device.
WARNING: To Avoid Possible Electrical Shock,Turn The
Electricity Off At The Main Fuse Box Before Wiring. If You
Feel You Do Not Have Enough Electrical Wiring Knowledge
Or Experience, Contact A Licensed Electrician.
WARNING:
This FC132-BNR Fan Should Only Be Used With Fan
Speed Control Model No. FYDC765- B1, Manufactured By
ZHONGSHAN KEZHUOER ELECTRONIC CO.,LTD.
Safety Information
Table of Contents
CAUTION: To Reduce The Risk Of Personal Injury,
Use Only The Screws Provided With The Outlet Box.
READ AND SAVE THESE INSTRUCTIONS.
from the trailing edge of the blades to the floor.
Foreign Objects In Between Rotating Fan Blades.
WARNING: To Reduce The Risk Of Fire Or Electric Shock,Or
Personal Injury, Mount To Outlet Box Marked "Acceptable
for Fan Support of 15.9 kg (35 lbs) or less" And Use
Mounting Screws Provided With The Outlet Box.
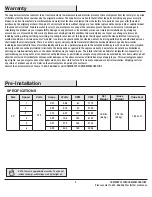
This device complies with part 15 of the FCC rules, operation is subject to the following two conditions. (1) this device may not cause harmful
interference and (2) this device must accept any interference received, including interference that may cause undesired operation.
To Reduce The Risk Of Fire Or Electric Shock,
“Please note that changes or modifications of this product is not expressly approved by the party responsible for compliance could void the
user's authority to operate the equipment.”
Warning: Changes or modifications to this unit not expressly approved by the party responsible for compliance could void the user’s authority
to operate the equipment.
NOTE: This equipment has been tested and found to comply with the limits for a Class B digital device, pursuant to Part 15 of the FCC Rules.
These limits are designed to provide reasonable protection against harmful interference in a residential installation. This equipment generates,
uses and can radiate radio frequency energy and, if not installed and used in accordance with the instructions, may cause harmful interference
to radio communications. However, there is no guarantee that interference will not occur in a particular installation.
If this equipment does cause harmful interference to radio or television reception, which can be determined by turning the equipment off and on,
the user is encouraged to try to correct the interference by one or more of the following measures:
-- Reorient or relocate the receiving antenna.
-- Increase the separation between the equipment and receiver.
-- Connect the equipment into an outlet on a circuit different from that to which the receiver is connected.
-- Consult the dealer or an experienced radio/TV technician for help.


