


Operation
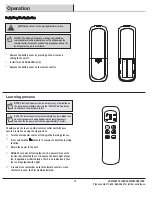
Installing the batteries
NOTE:
The battery will weaken with age and should be
replaced before leaking takes place as this will damage the
remote control. Dispose of used battery properly and keep the
battery out of the reach of children.
Remove the battery cover by pressing on the arrow and
sliding the cover off.
□
Install two 1.5V AAA batteries (S).
□
Replace the battery cover on the remote control.
□
CAUTION: Do not use with a wall light dimmer switch.
13
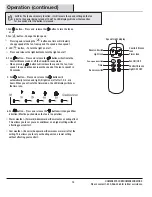
Learning process
Should you desire to use another remote control unit with your
new fan, install one using the steps below:
□
Turn the main power source off to begin the learning process.
Return the power to the unit.
Within 30 seconds of turning the fan's AC power ON, once the
receiver has detected the set frequency, the down light of your
fan, if applicable, will blink twice. There is no indication if your
fan is not equipped with a light.
□
NOTE
: After the AC power is on, do not press any other button on
the remote control before pressing the “FAN OFF” button. Doing
so will cause the procedure to fail.
NOTE
:
The remote control can learn multiple receivers. Make sure
no other receivers are operating during the learning process.
Separate the fan power switches by approximately 7 meters.
□
Press and hold the button for 5 seconds to enter the learning
function.
□
A receiver can remember up to three remote controls, when
the fourth is used, the first would be deleted.
□
HOMEDEPOT.COM/HOMEDECORATORS
Please contact 1-800-986-3460 for further assistance.