


Page
7
of
16
Assembly Instructions
1. Notice:
A. Please make sure there has enough space around the machine before assembly.
B. Please use the provided tools or right tools by yourself.
C. Check the parts and the hardware first.
2. Assembly instructions
:
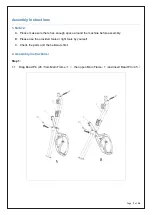
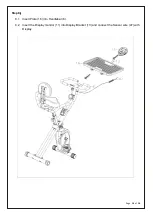
Step 1:
1.1 Drag Bead Pin (45
)
from Main Frame
(
1
),
then open Main Frame
(
1
)
and insert Bead Pin
(
45
)
.