background image

OPERATION 

HOLZMANN MASCHINEN GmbH   www.holzmann-maschinen.at 

 36


HBS 300J


17


OPERATION 

17.1


Operating notes 


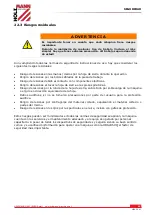
W A R N I N G  


Perform all machine settings with the machine being 

disconnected from the power supply! 


A T T E N T I O N  

TAKE ATTENTION when cutting long workpieces without 

additional support! 
Hazard of machine damage and injuries through upbouncing 

workpiece

.  

Therefore:

 always support long overhanging workpieces additionally


N O T I C E  

Let  the  engine  run  full  speed  when  you  begin  to  cut  a  work  a 

workpiece 
Important!

 After every new adjustment we recommend you to make a trial cut 

in order to check the new settings. 


For all cutting operations it is important to position the blade guide (11) 

as close as possible to the workpiece. 


Always guide the workpiece with both hands, holding it flat on the table 

(15) in order to prevent the blade (25) from jamming. 


Feed  the  workpiece  at  a  uniform  speed  that  enables  the  blade  to  cut 

through the material without difficulty and without blocking. 


Always aim at making a complete cut in one pass rather than in a stop-

and-go operation requiring the workpiece to be withdrawn. If you have to 

withdraw  the  workpiece,  switch  off  the  bandsaw  first  and  wait  for  the 

blade (25) to stop before freeing the workpiece.


The  workpiece  must  always  be  guided  by  the  longer  side  during 

cutting.


17.2


Operation 

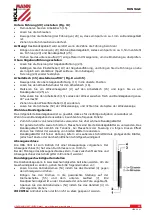
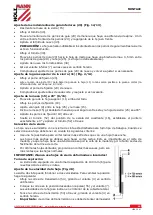
ON/OFF switch (Fig. 19) 


To turn the saw on, press the green button (g).


To turn the saw off again, press the red button (h).


Your bandsaw has a switch with undervoltage release. After a power failure you must reactivate the 

switch 

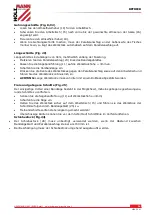
Parallel stop (Fig. 21) 

The parallel stop is used as a guide in slitting. 


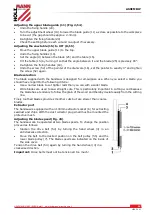
Place the parallel stop (23) onto the chain bar (2) on the left or right and set the desired dimension. 


Clamp the parallel stop in the desired position by turning the fixing lever (27) 


Содержание HBS 300J

Страница 1: ...E EN ES FR CZ Originalfassung DE BETRIEBSANLEITUNG HOLZBANDSÄGE Übersetzung Translation EN USER MANUAL WOOD BANDSAW ES MANUAL DE INSTRUCCIONES SIERRA DE CINTA FR MODE D EMPLOI SCIE À RUBAN CZ NÁVOD NA OBSLUHU PÁSOVÁ PILA NA DŘEVO HBS 300J ...

Страница 2: ...en 19 9 MONTAGE 20 9 1 Vorbereitende Tätigkeiten 20 9 1 1 Lieferumfang 20 9 1 2 Der Arbeitsplatz 20 9 1 3 Vorbereitung der Oberflächen 20 9 2 Montage der zum Transport abmontierten Teile 20 10 BETRIEB 23 10 1 Betriebshinweise 23 10 2 Bedienung 23 11 WARTUNG 25 11 1 Instandhaltung und Wartungsplan 25 11 1 1 Nach jeder Arbeitsschicht 25 11 2 Reinigung 25 11 3 Wechseln des Sägebandes Fig 16 26 11 4 L...

Страница 3: ...ments 33 16 1 3 Preparation of the surfaces 33 16 2 Assembly 33 17 OPERATION 36 17 1 Operating notes 36 17 2 Operation 36 18 MAINTENANCE 38 18 1 Maintenance plan 38 18 1 1 After each workshift 38 18 2 Cleaning 38 18 3 Changing the band saw blade Fig 16 39 18 4 Changing the rubber tires on the blade pulleys Fig 17 39 18 5 Changing the table insert Fig 18 39 18 6 Disposal 39 19 TROUBLE SHOOTING 40 2...

Страница 4: ...e mantenimiento 51 25 1 1 Después de cada turno de trabajo 51 25 2 Limpieza 51 25 3 Cambio de la hoja de sierra Fig 16 52 25 4 Cambio del recubrimiento de goma de los volantes Fig 17 52 25 5 Cambio de la inserción de mesa Fig 18 52 25 6 Reciclaje 52 26 SOLUCIÓN DE PROBLEMAS 53 27 PRÉFACE FR 54 28 CARACTERISTIQUES TECHNIQUES 55 28 1 Composants 55 28 2 Articles fournis 55 28 3 Données techniques 55 ...

Страница 5: ...ger le insert de table Fig 18 65 32 6 Disposition 65 33 DÉPANNAGE 66 34 PŘEDMLUVA CZ 67 35 TECHNIKA 68 35 1 Komponenty 68 35 2 Součást dodávky 68 35 3 Technické údaje 68 36 BEZPEČNOST 69 36 1 Účel použití 69 36 2 Bezpečnostní pokyny 70 36 3 Další rizika 71 37 MONTÁŽ 72 37 1 Úkony přípravy 72 37 1 1 Součást dodávky 72 37 1 2 Pracoviště 72 37 1 3 Příprava plochy 72 38 PROVOZ 75 38 1 Provozní pokyny ...

Страница 6: ... ODSTRAŇOVÁNÍ ZÁVAD 79 41 SCHALTPLAN WIRING DIAGRAM 80 42 ERSATZTEILE SPARE PARTS 81 42 1 Ersatzteilbestellung spare parts order 81 42 2 Explosionszeichnung explosion drawing 82 43 EG KONFORMITÄTSERKLÄRUNG CE CERTIFICATE OF CONFORMITY 87 44 GARANTIEERKLÄRUNG 88 45 GUARANTEE TERMS 89 46 GARANTÍA Y SERVICIO 90 47 GARANTIE ET SERVICE 91 48 ZÁRUČNÍ PODMÍNKY 92 49 PRODUKTBEOBACHTUNG 93 ...

Страница 7: ... úrazům končících až smrtí DE Allgemeiner Hinweis EN General note ES Notas generales FR Note générale CZ Všeobecný pokyn DE CE KONFORM Dieses Produkt entspricht den EG Richtlinien EN CE Conformal This product complies with the EC directives ES Conforme CE Este producto cumple con las Directivas CE FR Conforme CE Ce produit est conforme aux Directives CE CZ CE SHODNÉ tento výrobek odpovídá směrnicí...

Страница 8: ...with gloves forbidden ES La operación con guantes prohibido FR Opération avec des gants interdit CZ Nepoužívejte rukavice při práci s pásovou pilou DE Bedienung mit Schmuck verboten EN Operation with jewelry forbidden ES Uso prohibido llevando joyas FR Usage interdit portant des bijoux CZ Obsluha se šperky zakázána DE Bedienung mit Krawatte verboten EN Operation with tie forbidden ES Uso prohibido...

Страница 9: ...ano debido a la transmisión por correa FR Les blessures aux mains à cause de transmission par courroie CZ Řemenový pohon pozor nebezpečí úrazu DE Gefährliche elektrische Spannung EN High voltage ES Riesgo de descarga eléctrica FR Haute tension CZ Nebezpečné elektrické napětí DE Vor Nässe schützen EN Protect from moisture ES Protegerlo de la humedad FR Protéger de l humidité CZ Chraňte před vlhkem ...

Страница 10: ...ILLUSTRATION HOLZMANN MASCHINEN GmbH www holzmann maschinen at 10 HBS 300J 4 ILLUSTRATION ...

Страница 11: ...ILLUSTRATION HOLZMANN MASCHINEN GmbH www holzmann maschinen at 11 HBS 300J ...

Страница 12: ...ILLUSTRATION HOLZMANN MASCHINEN GmbH www holzmann maschinen at 12 HBS 300J ...

Страница 13: ...ILLUSTRATION HOLZMANN MASCHINEN GmbH www holzmann maschinen at 13 HBS 300J ...

Страница 14: ...HOLZMANN MASCHINEN GmbH www holzmann maschinen at 14 HBS 300J ...

Страница 15: ...nweise Missachtung kann zu ernsten Verletzungen führen Durch die ständige Weiterentwicklung unserer Produkte können Abbildungen und Inhalte geringfügig abweichen Sollten Sie Fehler feststellen informieren Sie uns bitte Technische Änderungen vorbehalten Kontrollieren Sie die Ware nach Erhalt unverzüglich und vermerken Sie etwaige Beanstandungen bei der Übernahme durch den Zusteller auf dem Frachtbr...

Страница 16: ...22 Einstellrad oberes Laufrad 9 Festziehrad 23 Parallelanschlag 11 Obere Sägebandführung 24 Maschinenkörper 12 Tür 25 Sägeband 7 2 Lieferumfang Bandsäge Schiebestock Sägeband Parallelanschlag Arbeitstisch Untergestell mit Räder 7 3 Technische Daten Spannung 230V 50Hz Leistung 750W Leerlauf no 1400 min 1 Bandsägebandlänge 2240mm Bandsägebandbreite 6 18mm Bandgeschwindigkeit 360 720 m min Schnitthöh...

Страница 17: ...E VERLETZUNGSGEFAHR Arbeitsbedingungen Die Maschine ist für die Arbeit unter folgenden Bedingungen bestimmt Feuchtigkeit max 70 Temperatur von 5 С bis 40 С Die Maschine ist nicht für den Betrieb im Freien bestimmt Die Maschine ist nicht für den Betrieb unter explosionsgefährlichen Bedingungen bestimmt Unzulässige Verwendung Der Betrieb der Maschine unter Bedingungen außerhalb der in dieser Anleitu...

Страница 18: ...Schmuck weite Kleidung Krawatten oder langes offenes Haar Lose Objekte können sich im Sägeband verfangen und zu schwersten Verletzungen führen Bei Arbeiten an der Maschine geeignete Schutzausrüstung Schutzbrille Gehörschutz Arbeitskleidung tragen Die laufende Maschine darf nie unbeaufsichtigt sein Vor dem Verlassen des Arbeitsbereiches die Maschine ausschalten und warten bis das Schleifband still ...

Страница 19: ...der rotierenden Teilen Verletzungsgefahr durch Bruch bzw Herausschleudern des Sägebandes bzw Teile davon v a bei Überlastung als auch bei falscher Laufrichtung des Sägebandes Gehörschäden sofern keine Vorkehrungen seitens des Benutzers für Gehörschutz getroffen wurden Verletzungsgefahr durch Rückschlag des Schnittgutes Herausschleudern des Schnittgutes bzw Teile davon Verletzungsgefahr für das Aug...

Страница 20: ...nsatz von Farbverdünnern Benzin aggressiven Chemikalien oder Scheuermitteln führt zu Sachschäden an den Oberflächen Daher gilt Bei der Reinigung nur milde Reinigungsmittel verwenden 9 2 Montage der zum Transport abmontierten Teile Untergestell montieren Befestigen Sie zuerst die Stellfüße 21 locker zur Grundplatte 5 der Maschine mit jeweils 2 Schrauben pro Fuß Schrauben Sie die 2 langen Querstrebe...

Страница 21: ...n Uhrzeigersinn gedreht werden Prüfen Sie nach jeder Einstellung die Änderung indem Sie das Laufrad mehrere Male komplett drehen Wenn Sie die Position des oberen Laufrades gefunden haben bei dem das Bandsägeband in der Mitte zentriert läuft drehen Sie bitte das obere Laufrad einige Male sodass das Band auch am unteren Laufrad in der Mitte aufliegt Wenn Sie das Bandsägeband erfolgreich eingestellt ...

Страница 22: ...e die Spitze der Winkelanzeige Wahl des Bandsägebandes Das mitgelieferte Bandsägeband ist so gewählt dass es für vielfältige Aufgaben verwendbar ist Wenn Sie ein Bandsägeband auswählen beachten Sie folgende Punkte Zum Schneiden von kleinen Radien verwenden Sie eher schmale Bandsägeblätter Für gerade Schnitte sowie Schnitte in Massivholz sind breite Bandsägeblätter zu verwenden Das Bandsägeblatt ha...

Страница 23: ... cm liegen ist für diese Seite statt der Hand der Schiebestock zu verwenden Führen Sie das Werkstück gleichmäßig zu sodass das Bandsägeblatt problemlos durchsägen kann Verwenden Sie stets den Parallelanschlag als seitliche Führung Wenn irgendwie möglich sollte ein Schnitt als ganzes durchgeführt werden Müssen Sie jedoch das Werkstück entfernen schalten sie VORHER die Maschine aus und warten bis da...

Страница 24: ...te des Werkstückes gegen den Parallelanschlag sowie auf den Arbeitstisch und führen Sie das Werkstück kontinuierlich zu ACHTUNG Lange Werkstücke müssen hinten mit einem Rollbock abgestützt werden Freie und gebogene Schnitte Fig 25 Der einzigartige Vorteil einer Bandsäge besteht in der Möglichkeit mühelos gebogene geschwungene runde Schnitte zu vollführen Senken Sie die Sägebandführung 11 auf Werks...

Страница 25: ...b den einwandfreien Zustand der Sicherheitseinrichtungen sowie des Sägebandes Bei Lagerung der Maschine darf diese nicht in einem feuchten Raum aufbewahrt werden und muss gegen den Einfluss von Witterungsbedingungen geschützt werden Vor der ersten Inbetriebnahme sowie nachfolgend alle 100 Arbeitsstunden alle beweglichen Verbindungsteile falls erforderlich vorher mit einer Bürste von Spänen und Sta...

Страница 26: ...eblatt einige Male falls nötig ist eine Bandsägebandeinstellung vorzunehmen 11 4 Laufradgummierung wechseln Fig 17 Durch den Betrieb nützen sich die Laufradgummierungen der Holzbandsäge ab Dies ist ganz normal Sobald die Gummierungen abgenützt sind müssen sie ersetzt werden Öffnen Sie die Türe 12 Entfernen Sie das Bandsägeband 25 Lösen Sie die Kante des Gummirades 3 mit einem kleinen Schlitzschrau...

Страница 27: ...ng nicht ausgerichtet Welliges Holz Übermäßige Vorschubgeschwindigkeit Falsches Sägeband Prüfen und einstellen Führung Wählen Sie ein anderes Stück Holz Vorschub reduzieren Sägeband od Typ korrigieren Ungenauer Schnitt Ungeeignetes Sägeband Sägeband falsch montiert Stumpfes Sägeband Sägeband ist locker Gummi oder Pech am Band Wechseln Sie das Sägeband Sägezähne nach unten Sägeband erneuern Spannen...

Страница 28: ...ant advancements in product design construction pictures and content may diverse slightly However if you discover any errors inform us please Technical specifications are subject to changes Please check the product contents immediately after receipt for any eventual transport damage or missing parts Claims from transport damage or missing parts must be placed immediately after initial product rece...

Страница 29: ...stop 22 Setting screw for upper blade pulley 9 Tightening screw 23 Parallel stop 11 Upper blade guide 24 Machine frame 12 Side cover 25 Blade 14 2 Delivery content Bandsaw Push stick Blade Parallel stop Machine table Machine stand with wheels 14 3 Technical details Voltage 230V 50Hz Motor power 750W Idle speed no 1400 min 1 Blade length 2240mm Blade width 6 18mm Blade speed 360 720 m min Cutting h...

Страница 30: ...amaged band saw blade Use the bandsaw never with defective or without mounted guard HIGHEST RISK OF INJURY Ambient conditons The machine may be operated humidity max 70 temperature 5 С to 40 С 41 F to 104 F The machine shall not be operated outdoors or in wet or damp areas The machine shall not be operated in areas exposed to increased fire or explosion hazard Prohibited use The operation of the m...

Страница 31: ...or jewellery as they might get caught in moving parts and cause severe accidents Wear a hair net if you have long hair Use personal safety equipment ear protectors safety goggles when working on dusty jobs Never leave the machine running unattended Before leaving the working area switch the machine off and wait until the saw band stops Always disconnect the machine prior to any actions performed a...

Страница 32: ...hen sound levels in workshop add up to a total level being harmful Wear ear muffs to eliminate this risk factor Respiratory damages due to harmful emissions of wood dust Severe cutting injuries at contact with the running band in the uncovered cutting zone Injuries cuts when changing the band Wear safety gloves when changing the saw band Injury from catapulted workpieces or parts of workpieces Inj...

Страница 33: ...ge the machine surface NOTICE Do not use solvents based on nitrite aggressive solvents like break cleaners or scrubbing agents These damage the machine surface 16 2 Assembly Assembly of the sub frame and wheels Fig 3 5 27 First attach the legs 21 loosely to the base plate 5 of the machine using 2 screws for each leg Use the round head M8x12 screws to do so Screw the 2 long struts 41 and the 2 shor...

Страница 34: ...5 on the lower blade pulley 7 Again the blade 25 should run in the middle of the blade pulley 7 When adjusting the upper blade pulley you have to turn it several times until the adjustment has an effect on the position of the blade on the lower blade pulley When adjustment has been completed close the side cover 12 again and secure it with the fasteners 13 Adjusting the blade guide Fig 11 13 Whene...

Страница 35: ...de you should have regard to the following criteria Use a narrow blade to cut tighter radii than you can with a wider blade Wide blades are used to saw straight cuts This is particularly important in cutting wood because the blade has a tendency to follow the grain of the wood and thereby deviate easily from the cutting line Finely toothed blades provide smoother cuts but are slower than coarse bl...

Страница 36: ... 15 in order to prevent the blade 25 from jamming Feed the workpiece at a uniform speed that enables the blade to cut through the material without difficulty and without blocking Always aim at making a complete cut in one pass rather than in a stop and go operation requiring the workpiece to be withdrawn If you have to withdraw the workpiece switch off the bandsaw first and wait for the blade 25 t...

Страница 37: ...top 23 to the left of the blade 25 as far as possible for the width required Lower the blade guide 11 down to the workpiece Switch the saw on Press the edge of the workpiece with your right hand to hold it securely against the parallel stop 23 and flat on the table 15 Guide the workpiece along the parallel stop 23 and through the blade 25 at a uniform speed Important Long workpieces must be secure...

Страница 38: ...condition of the saw band and the saw band guide The good condition and perfect adjustment of the guiding rollers is essential for a smooth band guidance and a clean cut Store the machine in a closed dry location NOTICE Clean your machine regularly after every usage it prolongs the machines lifespan and is a pre requisite for a safe working environment Repair jobs shall be performed by respectivel...

Страница 39: ... table Tension the blade 25 see 7 2 Close the side cover 12 again Mount the web panel 4 again 18 4 Changing the rubber tires on the blade pulleys Fig 17 After a certain time the rubber tires 3 on the blade pulleys 7 8 will get worn by the sharp teeth of the blades and must be replaced Open the side cover 12 Remove the blade 25 see 7 7 Lift the edge of the tire 3 with a small screwdriver f and remo...

Страница 40: ...heck and adjust fence Select another piece of wood Reduce feed rate Change band to correct type Saw makes unsatisfactory cuts Dull band Band mounted wrong Gum or pitch on band Incorrect band for cut Gum or pitch on table Replace band Teeth should point down Remove band and clean Change band to correct type Clean table Band does not come up to speed Extension cord too light or too Low shop voltage ...

Страница 41: ...tes Sin embargo si Usted descubre algún error le rogamos nos informe usando el formulario de sugerencias Las especificaciones técnicas pueden cambiar sin previo aviso Por favor compruebe el contenido del producto inmediatamente después de la recepción por cualquier daño eventual de transporte o falta de piezas Las reclamaciones de daños de transporte o falta de piezas se deben hacer inmediatamente...

Страница 42: ...nillo de ajuste del volante superior 9 Tornillo de apriete 23 Palograma 11 Guía superior de la sierra 24 Cuerpo de la máquina 12 Puerta inferior superior 25 Hoja de sierra 21 2 Lieferumfang Sierra de cinta Empujador Sierra Palograma Mesa de la máquina Base con patas regulables 21 3 Datos técnicos Voltaje 230V 50Hz Potencia 750W Velocidad en ralentí no 1400 min 1 Velocidad en ralentí 2240mm Ancho d...

Страница 43: ...protecciones defectuosas o sin estar montadas en la máquina ALTO RIESGO DE LESIONES Condiciones de trabajo La máquina está prevista para trabajar en las siguientes condiciones ambientales Humedad máx 70 Temperatura de 5 С a 40 С La máquina no está diseñada para uso al aire libre La máquina no está diseñada para funcionar en condiciones explosivas Uso prohibido Nunca use la máquina fuera de los lím...

Страница 44: ...idad Use una máscara contra el polvo si las operaciones producen polvo Nunca deje la máquina desatendida mientras trabaje Desconecte la máquina y espere hasta que la hoja de sierra se pare antes de dejar el puesto de trabajo Antes de realizar cualquier trabajo de mantenimiento o ajuste la máquina debe estar desconectada de la fuente de alimentación Siempre que trabaja con una máquina eléctrica se ...

Страница 45: ...s al tocar la hoja de sierra o las piezas giratorias Riesgo de lesiones por la rotura de la hoja de sierra sobre todo por sobrecarga de la máquina o el giro en dirección equivocada de la hoja Daños auditivos si no se tomaron precauciones por parte del usuario para la protección auditiva Peligro de lesiones por contragolpe del material cortado expulsando el material cortado o partes del mismo Riesg...

Страница 46: ...ctos químicos agresivos o productos de limpieza abrasivos pueden dañar la carcasa de la máquina Por lo tanto Para la limpieza use sólo detergentes suaves 23 2 Montaje de las piezas desmontadas para el transporte Montaje de la base y las ruedas Fig 3 5 27 Primero coloque las patas 21 sin apretar a la placa base 5 de la máquina usando 2 tornillos para cada pata Utilice los tornillos M8x12 Atornille ...

Страница 47: ... ir centrada en el volante 7 Al ajustar el volante superior tiene que girar varias veces hasta que el ajuste tenga efecto en la posición de la cuchilla sobre el volante inferior Cuando haya completado el ajuste cierre la puerta lateral 12 de nuevo y asegúrela con los tornillos 13 Ajuste de la guía de la hoja Fig 11 13 Siempre que cambie la hoja debe restablecer los rodamientos de apoyo 30 31 y los...

Страница 48: ...line la mesa 15 girándola de manera que el ángulo entre ésta y la hoja de sierra 25 sea 90 Apriete los pomos de fijación 18 otra vez Suelte el tornillo 52 del puntero de la escala del cuadrante 16 establezca el puntero exactamente a 0 y apriete el tornillo 52 otra vez Selección de la sierra La hoja que se suministra con el sierra de cinta está diseñada para todo tipo de trabajos Cuando se seleccio...

Страница 49: ...iéndola sobre la mesa 15 con el fin de evitar que la hoja 25 se atasque Introduzca la pieza de trabajo a una velocidad uniforme que permite a la hoja de sierra cortar el material sin dificultad y sin bloquearse Siempre intente hacer un corte completo en una sola pasada y no en una operación de stop and go que requiere que la pieza de trabajo sea retirada Si tiene que retirar la pieza de trabajo ap...

Страница 50: ...a izquierda de la hoja 25 para el ancho requerido Baje la guía de la hoja 11 hasta la pieza de trabajo Encienda la sierra Presione el borde de la pieza con la mano derecha para mantenerla fija contra el palograma 23 y sobre la mesa 15 Guíe la pieza de trabajo a lo largo del palograma 23 y a través de la hoja 25 a una velocidad uniforme Importante Debe asegurar que las piezas de trabajo largas no s...

Страница 51: ...están disponibles y correctamente legibles en la máquina Compruebe antes de cada uso el perfecto estado de los dispositivos de seguridad así como la hoja de sierra Cuando almacene la máquina no debe ser almacenada en un ambiente húmedo y debe estar protegida contra la influencia de las condiciones meteorológicas Antes del primer uso y luego cada 100 horas de trabajo si es necesario antes limpie co...

Страница 52: ... 7 2 Cierre la puerta 12 de nuevo 25 4 Cambio del recubrimiento de goma de los volantes Fig 17 Después un tiempo los recubrimientos de goma 3 de los volantes 7 8 se desgastarán por los dientes afilados de las cuchillas y deberán ser reemplazados Abra la puerta lateral 12 Retire la hoja de sierra 25 ver 7 7 Levante el borde de la goma 3 con un destornillador pequeño f y sáquela del volante 8 Repita...

Страница 53: ...dera ondulada Excesivo velocidad de avance Hoja de sierra incorrecta Controlar y ajustar el carril guía Elija otra pieza de madera Reducir el avance Corregir la hoja de sierra o el tipo de hoja Corte impreciso Hoja de sierra inadecuada Hoja de sierra montada de forma incorrecta Hoja de sierra desafilada Hoja de sierra está suelta Goma o brea en la hoja Reemplace la hoja de sierra Los dientes de si...

Страница 54: ... utilisant le formulaire de commentaires Les caractéristiques techniques peuvent varier sans avis préalable S il vous plaît vérifier le contenu du produit immédiatement après réception pour quelque éventuelle dommages de transport ou de pièces manquantes Les réclamations pour dommages de transport ou de pièces manquantes doivent être faites immédiatement après la réception initiale et le déballage...

Страница 55: ... roue supérieure 9 Vias de serrage 23 Palogramme 11 Guide supérieure de la scie 24 Corps de la machine 12 Couvercle inférieur supérieur 25 Bande de lame 28 2 Articles fournis Scie à ruban Pousseur Lame Palogramme Table Base avec pieds réglables 28 3 Données techniques Tension 230V 50Hz Puissance 750W Vitesse de ralenti no 1400 min 1 Longueur de lame 2240mm Largeur de lame 6 18mm Vitesse de la lame...

Страница 56: ... ou sans être monté sur la machine HAUT RISQUE DE BLESSURES Conditions environnementales La machine est conçue pour fonctionner dans les conditions suivantes Humidité max 70 Température 5 С jusqu à 40 С La machine n est pas destinée à une utilisation en extérieur La machine ne doit pas travailler dans un milieu de risque d explosion Utilisation interdite N utiliser jamais la machine en dehors des ...

Страница 57: ...ter un équipement de sécurité approprié lorsque vous travaillez avec des machines des lunettes de sécurité chaussures de sécurité Ne laissez jamais la machine sans surveillance pendant le travail Débranchez la machine et attendre jusqu à ce qu il s arrête avant de quitter le lieu de travail Avant d effectuer tout entretien ou de réglage l appareil doit être débranché de l alimentation Toujours tra...

Страница 58: ... la lame ou les pièces en rotation Risque de blessure dû à la rupture de la lame de scie spécialement pour le surcharge de la machine ou si la lame tourne dans le mauvais sens Dommages auditifs si des mesures de protection n ont pas été prises par l utilisateur Risque de blessure suite à un rebond de la pièce expulsant le matériel coupé ou des parties de ceux ci Risque de blessure aux yeux de part...

Страница 59: ...ilisez jamais d eau NOTE L utilisation des diluants à peinture essence produits chimiques corrosifs ou abrasifs à de résultats des dommages à la surface Par consequent Lors du nettoyage utiliser un détergent doux seulement Montage de la base et les roues Fig 3 5 27 Premièrement mettez les pieds 21 sans serrer la plaque de base 5 de la machine en utilisant deux vis pour chaque pied Utilisez les vis...

Страница 60: ...olant inférieur 7 La lame 25 doit être centré sur la roue 7 En ajustant la roue supérieure doit se tourner plusieurs fois jusqu à ce que l ajustement prend effet dans la position de la lame sur la roue en bas Lorsque le réglage est terminé fermer la porte latérale 12 et le fixer avec des vis 13 Réglage du guide de la lame Fig 11 13 Chaque fois que la lame doit permettre de rétablir les paliers de ...

Страница 61: ...15 Inclinez la table 15 en tournant afin que l angle entre elle et la lame de scie 25 est de 90 Serrez les boutons de verrouillage 18 Desserrer la vis 52 pointeur échelle du cadran 16 régler le pointeur exactement à 0 et serrer la vis 52 à nouveau Sélection de la lame La lame de scie qui est venu avec la scie à ruban est conçu pour tous les types d emplois Lorsque vous sélectionnez une feuille doi...

Страница 62: ...niforme qui permet à la lame pour couper le matériau sans difficulté et sans caler Toujours essayer de faire une coupure complète en un seul passage et non à l opération stop and go qui exige que la pièce est retirée Si vous devez retirer la pièce la scie d abord et attendre que la lame 25 est arrêté avant de libérer la pièce La pièce doit toujours être guidé par le côté le plus long pendant la co...

Страница 63: ...sur le bord de la pièce avec la main droite de la tenir fixe contre palograma 23 et sur la table 15 Guide de la pièce le long de la palograma 23 et à travers la feuille 25 à une vitesse uniforme Important Vous devez vous assurer qu aucune pièce de travail à long tombent de la table à la fin de la coupe Coupe à main levée Figure 25 L un des traits saillants d une scie à ruban est la facilité avec l...

Страница 64: ...copeaux et poussière lubrifiez avec une fine couche d huile ou de graisse toutes les pièces mobiles 32 1 Plan de maintenance 32 1 1 Après chaque quart de travail Relâcher la tension de la lame de scie Débranchez l appareil du secteur Nettoyez complètement la machine Graisser légèrement de la lame le guide avec de l huile de machine Nettoyer la machine des copeaux 32 2 Nettoyage Après chaque journé...

Страница 65: ... la porte 12 à nouveau 32 4 Changer le revêtement en caoutchouc des roues Fig 17 Après un certain temps les poignées en caoutchouc 3 des roues 7 8 sera l usure par les dents acérées des pales et doit être remplacé Ouvrez la porte latérale 12 Retirer la lame de scie 25 voir 7 7 Soulevez le bord du caoutchouc 3 avec un petit tournevis f et enlever la roue 8 Répétez pour la roue inférieur 7 Installer...

Страница 66: ...r le rail de guidage Choisir une autre pièce de bois Réduire l avance Lame appropriée ou le type de lame Coupe imprécise Lame de scie inadéquate Lame de scie mal monté Lame émoussée La lame de scie est lâche Gomme ou résine sur la lame Remplacez la lame La dent de scie vers le bas Affûter la lame de scie Serrer la lame Réglez le guide de lame La lame de scie n atteint pas sa vitesse optimale Câble...

Страница 67: ...případným škodám Dodržujte bezpečnostní pokyny a dbejte výstrah Opomíjení bezpečnostních pokynů může vést k vážným škodám na zdraví apod Z důvodu neustálého vývoje našich produktů se mohou vyobrazení nebo obsah tohoto návodu mírně lišit od skutečnosti V případě zjištění nedostatků této dokumentace nás o těchto laskavě informujte Technické změny a tiskové chyby vyhrazeny Autorské právo 2017 Tato do...

Страница 68: ...hlavice horního hn kola 9 Utahovací hlavice 23 Podélné pravítko 11 Horní vedení pásové pily 24 Tělo stroje 12 Dvířka 25 Pás pily 35 2 Součást dodávky Pásová pila Posuvná tyč pomůcka Pás pásové pily Podélné pravítko Pracovní stůl Podstavec s ustavovacími patkami 35 3 Technické údaje Napětí 230V 50Hz Výkon 750W Volnoběžné otáčky no 1400 min 1 Délka pilového pásu 2240mm Šířka pilového pásu 6 18mm Ryc...

Страница 69: ...s vadnými nebo demontovanými bezpečnostními prvky VYSOKÉ RIZIKO ÚRAZU Provozní podmínky Stroj je určen pro provoz za následujících podmínek Vlhkost max 70 Teplota od 5 С do 40 С Stroj není určen pro provoz venku Stroj není určen pro provoz v místech s rizikem exploze Nedovolené použití Provoz stroje za podmínek nad rámec uvedený v tomto návodu na obsluhu není povolen Provoz stroje bez ochranných p...

Страница 70: ...štěné vlasy Volné části oděvu apod se mohou namotat na pilový pás a způsobit tak vážná zranění Při práci používejte vhodné ochranné prostředky Pracovní rukavice ochranné brýle ochranu sluchu apod Spuštěný stroj nesmí být nikdy ponechán bez dozoru Před opuštěním pracoviště stroj vypnětě a vyčkejte dokud se zcela nezastaví Před výkonem údržby nebo při seřizování odpojte stroj ze sítě Vždy když pracu...

Страница 71: ...oud Riziko úrazu při dotyku pilového pásu nebo jiných rotujících částí stroje Nebezpečí úrazu od přetrženého popř vymrštěného pilového pásu nebo jeho částí hlavně při přetížení stroje nebo při opačném směru otáčení pásu Poškození sluchu pokud trvale pracujete se strojem bez ochrany sluchu Nebezpečí úrazu od vymrštěného obrobku nebo jeho části Nebezpečí poškození zraku od vymrštěného obrobku nebo j...

Страница 72: ...didla nebo obdobné agresivní prostředky a v žádném případě nepoužívejte vodu UPOZORNĚNÍ Použití rozpouštědel benzinu agresivních chemikálií nebo odstraňovačů má za následek poškození povrchu výrobku Platí Při čištění používejte výhradně jemné čističe Montáž podstavce Nejprve namontujte patky stroje 21 zajistěte je k základní desce fundamentu 5 stroje pomocí 2 šroubů pro každou patku Namontujte 2 d...

Страница 73: ...u chodu hodinových ručiček Po každém nastavení zkontrolujte změnu tak že hnacím kolem několikrát zcela otočíte Až docílíte správné pozice horního hnacího kola při které se pás bude pohybovat po středu otočte horním hnacím kolem znovu tak aby pás dolehl správně na střed také u spodního hnacího kola Po úspěšném nastavení pilového pásu zavřete kryt dvířek 12 a zajistěte zámkem Ustavovací hlavici 22 z...

Страница 74: ...pásem svíral přesně 90 Páku zajištění úhlu 18 opět utáhněte Povolte šroub 52 ukazatele úhlu a ustavte jeho hrot tak aby směřoval přesně na značku 0 Šroub 52 opět utáhněte Výběr pilového pásu Dodaný pilový pás je zvolen výrobcem tak aby byl použitelný pro více účelů Při výběru pilového pásu dbejte na následující K řezání obrobků o malém poloměru použijte raději úzké pilové pásy Pro rovné řezy a pro...

Страница 75: ...u u jedné strany a linií řezu méně než 12 cm musíte u této strany místo ruky použít pro vedení obrobku posuvnou tyč Obrobek veďte rovnoměrně aby list pásové pily mohl snadno obrobek rozřezat Podélné pravítko využívejte jako boční vedení obrobku Pokud je to možné proveďte řez najednou bez zastavování Pokud musíte obrobek od pily odsunout NEJPRVE stroj vypněte a vyčkejte úplného zastavení listu páso...

Страница 76: ...listu pásové pily Přizpůsobte vedení pásové pily 11 na výšku obrobku na distanz 3 mm Pásovou pilu na dřevo zapněte Tlačte hranu obrobku proti podélnému pravítku a zároveň vůči pracovnímu stolu a obrobek přisunujte rovnoměrně k pile POZOR Dlouhé obrobky musí být na zadním konci podepřeny oporou obrobku Řez bez opory pravítka nebo řezání do oblouku Obr 25 Unikátní předností pásové pily je možnost pr...

Страница 77: ...ezpečnostních prvků a pilového pásu Uskladnění stroje je možné pouze v suchém prostředí a musí být zajištěn proti vlivu počasí Před prvním uvedením stroje do provozu a následně každých 100 motohodin je nutné aplikovat tenkou vrstvu oleje nebo mazacího tuku na všechny pohyblivé části a jejich spoje pokud je to potřeba před mazáním očistěte kartáčem od pilin a prachu 39 1 Péče o stroj a plán údržby ...

Страница 78: ...vřete dvířka 12 39 4 Výměna gumového obložení hnacího kola Obr 17 Provozem dochází k opotřebení gumového obložení hnacích kol pily Jedná se o běžný důsledek provozu pily Jakmile je gumové obložení opotřebené musí být vyměněno Otevřte dvířka 12 Sundejte pilový pás 25 Uvolněte hranu gumového obložení 3 pomocí malého plochého šroubováku f a gumové obložení vyměňte Nasaďte nový gumový pás k objednání ...

Страница 79: ...zání pohybuje Vedení není vyrovnáno Dřevo je zvlněné Příliš velká rychlost posuvu Vadný pilový pás Zkontrolujte a ustavte vedení Použijte vhodnější obrobek kus dřeva Snižte rychlost posuvu Použijte vhodný typ pilového pásu Nepřesný řez Nevhodný pilový pás Pilový pás chybně namontován Tupý pilový pás Volný pilový pás Na pásu je smůla nebo je špatně ustavený na gumovém povrchu Pilový pás vyměňte Zub...

Страница 80: ...SCHALTPLAN WIRING DIAGRAM HOLZMANN MASCHINEN GmbH www holzmann maschinen at 80 HBS 300J 41 SCHALTPLAN WIRING DIAGRAM ...

Страница 81: ...he machine type spare parts number and partname We recommend to copy the spare parts diagram and mark the spare part you need You find the order address in the preface of this operation manual Para máquinas Holzmann utilice siempre repuestos originales para reparar la máquina El ajuste óptimo de las piezas reduce el tiempo de instalación y preserva la vida de la máquina AVISO la instalacion de pie...

Страница 82: ...ERSATZTEILE SPARE PARTS HOLZMANN MASCHINEN GmbH www holzmann maschinen at 82 HBS 300J 42 2 Explosionszeichnung explosion drawing ...

Страница 83: ...bores 4 58 adjustable bolt 1 18 6203 bearing 5 59 4x24 spring pin 1 19 Ø 17 circlip 2 60 adjustable handle 1 20 saw band 1 61 plastic barricade 1 21 Ø 12 circlip 1 62 ST4 8 cross panhead tapping bolt 2 22 6001bearing 2 63 locating plate 1 23 Ø 28 circlip for bores 2 64 upper battern 1 24 locked cover 1 65 M8x25 square neck bolt 1 25 locked shaft 1 66 upper fixed plate 1 26 drive belt 1 67 adjustab...

Страница 84: ...ress plate 2 99 locking blcok for fence 3 1 138 extensive working table 1 100 Clamping plate for fence 2 139 side plate guard 1 101 M6X12 inner hex bolt 2 140 M5 10 crossing pan head 2 102 Ø 6 teeth washer 2 141 Ø 5 big washer 2 103 throttle for fence 1 142 adjusting bar 1 104 fence 1 143 spring2 1 105 Ø 5 30 5 pin 1 144 Ø 6circlip 1 106 Triangular block 1 145 Extended locking plate 1 107 adjustab...

Страница 85: ... 1 166 M4x8 crossing screw 10 185 fix rod2 1 167 Ø 4 washer 2 186 M6 butterfly nut 1 168 Ø 4 teeth wansher 1 187 M6X35 outer hex screw 1 169 M5x18 screw 2 188 fix rod long 1 170 fix rod press plate 1 189 M8X14 outer hex screw 1 171 M5 nut 6 190 knob for tool box 1 172 upper miro switch connecting cable 1 191 push stick 1 173 press plate 2 1 192 ST3 9 10 cross pan head tapping screw 1 174 upper fix...

Страница 86: ... lower rung 1 2 5 M8 16 square neck bolt 24 6 M8 nut 30 7 Ø8 flat washer 28 8 lower rung 3 1 9 lower rung 2 1 10 φ8 spring washer 4 11 M8 45 outer hex bolt 4 13 cap for wheel 2 14 Ø20 flat washer 2 15 wheel 2 16 wheel stand cpl right 1 17 wheel stand cpl left 1 18 M8 20 Half round head square neck bolt 2 19 leg 2 1 20 leg 3 1 21 Ø20 Circlip 2 ...

Страница 87: ...ungen an der Maschine vorgenommen werden die nicht mit uns abgestimmt wurden Hereby we declare that the above mentioned machines meet the essential safety and health requirements of the above stated EC directives Any manipulation or change of the machine not being explicitly authorized by us in advance renders this document null and void Por la presente declaramos que la máquina mencionada cumple ...

Страница 88: ...hneideeinrichtungen Führungen Kupplungen Dichtungen Laufräder Sageblätter Hydrauliköle Ölfiltern Gleitbacken Schalter Riemen usw d Ausgeschlossen sind Schäden an den Geräten welche durch unsachgemäße Verwendung durch Fehlgebrauch des Gerätes nicht seinem normalen Verwendungszweckes entsprechend oder durch Nichtbeachtung der Bedienungs und Wartungsanleitungen oder höhere Gewalt durch unsachgemäße R...

Страница 89: ...cutting devices guides couplings seals impellers blades hydraulic oils oil filters sliding jaws switches belts etc d Also excluded are damages on the machine caused by incorrect or inappropriate usage if it was used for a purpose which the machine is not supposed to ignoring the user manual force majeure repairs or technical manipulations by not authorized workshops or by the customer himself usag...

Страница 90: ...slach Austria Los gastos de transporte para envíos hacia y desde nuestro centro de servicio no están incluidos en esta garantía E La garantía no incluye los siguientes Las piezas de uso desgaste como correas herramientas suministradas etc con excepción de daños iniciales que tiene que ser reclamados inmediatamente después de recibir y comprobar inicialmente la máquina Los defectos en la herramient...

Страница 91: ...ur les expéditions vers et à partir de notre centre de service ne sont pas inclus dans cette garantie E La garantie ne comprend pas les éléments suivants Pièces d utilisation d usure comme les courroies les outils fournis etc sauf que un dommage initial que doit être réclamé immédiatement après réception et vérification de la machine Défauts dans l outil machine causé par la violation des instruct...

Страница 92: ...ace je sídlo společnosti HOLZMANN MASCHINEN na adrese 4707 Haslach Österreich Tato záruka výrobce nekryje případné náklady na přepravu zboží do sídla firmy E Výluky ze záruky Na díly které vykazují známky opotřebení a při vadách stroje které jsou následkem běžného opotřebení Při nevhodné nebo nedbalé montáži stroje chybného uvedení do provozu příp nevhodného připojení k elektrické síti Při nedodrž...

Страница 93: ...ucts in the frame of a Quality Management policy Um einen ständigen Verbesserungsprozess gewährleisten zu können sind wir von Ihnen und Ihren Eindrücken beim Umgang mit unseren Produkten abhängig Your opinion is essential for further product development and product choice Please let us know about your Probleme die beim Gebrauch des Produktes auftreten Impressions and suggestions for improvement Fe...

Страница 94: ......

Отзывы: