- 21 -
6.3 CLEANING
1. Carefully clean the interior using the brush and vacuum cleaner.
2.
Clean areas that are difficult to access using compressed air. Then remove any loose particles
using the vacuum cleaner.
3. Remove any stubborn soiling from the interior and exterior of the upper and lower parts using a
cloth, which has been moistened with a mild soap solution.
4.
If a humidifier is present, wash out the water container and spray-disinfect it. Treat stubborn
calcification with 5 % vinegar solution.
6.4 CHECK THE SILICONE TUBES
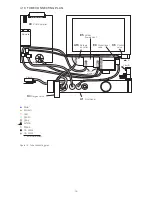
Check every silicone tube used in the device for signs of mechanical damage, ageing and for cor-
rect seating and, if necessary replace acc. to tube connecting plan (see Figure 12 on page 15):
•
Oxygen connection tubes on the blower box (A3) and the O
2
block (C3)
•
Pressure measuring tubes on the pressure sensors
• Pressure measuring tubes on the flow element holder (E5)
•
Excess pressure tube on the pressure switch and air outlet (E1)
•
Tubes on the control valve (C6)
6.5 CHECK THE CABLES AND CONNECTIONS
Check every connecting and supply cable for correct seating and signs of damage. If necessary
correct or replace:
•
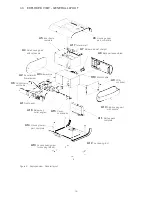
Ribbon cable operation panel (K1)
•
Ribbon cable display (K2)
•
Cable signal transmitter (K3)
•
Cable oxygen sensor (K4)
•
Cable oxygen valve (K5)
•
Cable proportional valve (K6)
•
Ribbon cable temperature sensor (K7)
•
Cable battery pack (K8)
•
Cable control valve (K9)
• Cable humidifier connection (E6)
•
Motor cable (K10)
6.6 CHANGING THE 9V RECHARGEABLE BATTERY
The 9V rechargeable battery is included in the Maintenance kit 1 and should be changed annually.
Change the 9V rechargeable battery, after the device has been disassembled, as follows:
1. Cut the cable tie.
2. Remove the 9V rechargeable battery from the holder.
3. Insert a new battery (Ni-MH; HR 8.4 V/200 mAh).
4.
Ensure that the polarity and the fit in the holder are correct.
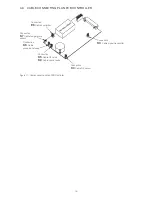
Affix the 9V rechargeable battery to the PCB controller (A9) using the cable tie (142 mm)
included in Maintenance kit 1. Cut off the cable tie’s protruding end section with a side cutter.
Содержание TRENDvent
Страница 1: ...Service Manual Ventilator TRENDvent ...

