32
TV SETUP OPERATION (continued)
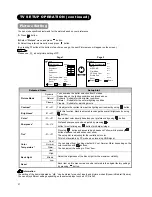
PC Adjustment Setting
You can adjust the display condition such as position adjustment and color setting while connecting to the PC and being
RGB mode. See
16
for the PC connection.
From Setup Menu (RGB)
1.
Press
button.
2.
Select “
Setup
” menu and press
button.
3.
Select the preferred menu item and press
button.
►
►
Reset
Off
Off
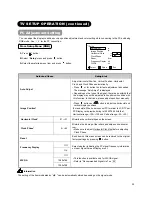
Setup
Auto Adjust
Image Position
Horizontal Clock
Clock Phase
Reset
Frequency Display
WXGA
Select Return Exit
+4
21
Selected Items
Setup hint
Auto Adjust
Adjust Horizontal Position, Vertical Position, Horizontal
Clock, and Clock Phase automatically.
• Press
or
▶
button to start auto adjustment as needed.
The message “Auto Adjust” is displayed.
• Depending on the type of the signal, there is a possibility that
the display may not be adjusted in its optimum condition with
this function. In that case, please adjust each item manually.
Image Position*
• Press
button and
button to adjust the horizontal and
vertical display positions.
(For example: When user connect PC terminal to LCD TV set.
PC Display card provide timing is 1024X768 60Hz that
Horizontal range: -100~+100 and Vertical range: -22~+22.)
Horizontal Clock*
-31~+31
Minimize the vertical stripes on the screen.
Clock Phase*
0~+63
Minimize the blurring of the letters and stripes on horizontal
row.
• Make sure to adjust Horizontal Clock first before adjusting
Clock Phase.
Reset
Each item on this menu screen can be restored to the original
factory settings by pressing
button.
Off
Frequency Display
On
Select whether indicating the PC signal frequency information
on Input Signal Screen Display or not.
Off
1280x768
WXGA
1360x768
• This function is available only for WXGA signal.
• Refer to “Recommended Signal List” on
45
.
Information
The setting of the items indicated by “
*
” can be automatically stored depending on the signal mode.


