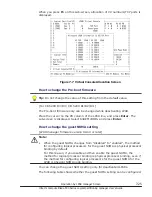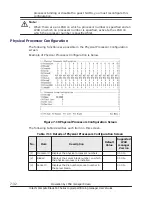
•
Set the service ratio so that the service time becomes the number of
processors assigned to an LPAR multiplied by 250ms. If not, processing
performance may slow down under heavy load.
How to change the memory size allocated to an LPAR
Move the cursor over the 'Mem' column of the LPAR whose memory size you
want to change, and press Enter.
This will open a sub-screen where you can enter the memory size. Adjust the
memory size with the arrow keys, and press Enter.
For an LPAR for which the guest NUMA is enabled, specify the memory size
for each node.
Move the cursor over the "Mem" column of the "LPAR" row whose memory
size you want to change, and press Enter. On the displayed sub-screen,
move the cursor over the "Mem Size" column of the "Node" row, and press
Enter. This will open another sub-screen. Adjust the memory size with the
arrow keys, and press Enter.
Tip:
•
You can also specify the numeric number in GB unit after the pressing
F1(Input number in GB) in the sub-screen, to allocate memory size to an
LPAR.
How to change the memory Node number which would be allocated
to an LPAR.
[LPAR manager Firmware version 01-2X or later]
Note:
•
In the environment which has the LPAR specifying a memory node and
the LPAR not specifying a memory node, when you activate the latter
LPAR first, activation of the former LPAR might fail.
Specify the memory node to all LPARs when you have at least one LPAR
which specifies the memory node.
If you need to use the environment which has both the LPAR specifying a
memory node and the LPAR not specifying a memory node, be sure to
activate the former LPAR first.
Move the cursor over the 'MN' column of the LPAR whose the Node number
you want to change, and press Enter to open a sub-screen. Set "A" or the
Node number, and press Enter.
How to check the node number of the processor and memory which
is assigned to the LPAR.
[LPAR manager firmware version 01-2X or later]
Operation by LPAR manager Screen
7-21
Hitachi Compute Blade 500 Series Logical partitioning manager User's Guide
Содержание CB 520A A1
Страница 238: ...6 6 LPAR manager backup Hitachi Compute Blade 500 Series Logical partitioning manager User s Guide ...
Страница 376: ...8 6 LPAR manager Dump Collection Hitachi Compute Blade 500 Series Logical partitioning manager User s Guide ...
Страница 530: ...C 4 Console Types Hitachi Compute Blade 500 Series Logical partitioning manager User s Guide ...
Страница 536: ...D 6 LPAR manager use Port numbers Hitachi Compute Blade 500 Series Logical partitioning manager User s Guide ...
Страница 542: ...E 6 System Configuration Hitachi Compute Blade 500 Series Logical partitioning manager User s Guide ...
Страница 557: ...Hitachi Compute Blade 500 Series Logical partitioning manager User s Guide ...

