


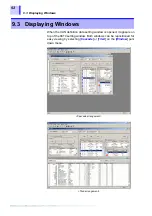


8.2 Executing Data Transfer
84
1.
Make sure that the 8910 is connected to the PC.
2.
Make sure that the CAN1 and CAN2 ports on the 8910 are not
connected to any cable.
3.
Set the 8910 to ONLINE mode. (Position the [
online/offline
] switch to
[
ONLINE
] side.)
4.
Execute transfer by selecting [
Send
] on the [
Comm
] pull-down menu.
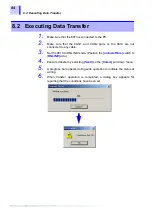
5.
A progress bar appears during write operation to indicate the status of
writing.
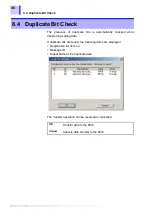
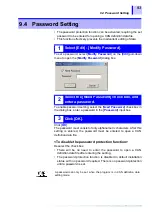
6.
When transfer operation is completed, a dialog box appears for
reporting that the conditions have been set.
8.2 Executing Data Transfer
Содержание 8910
Страница 1: ...8910 Instruction Manual CAN ADAPTER EN Aug 2018 Revised edition 7 8910A981 07 18 08H ...
Страница 2: ......
Страница 8: ...Contents vi ...
Страница 18: ...Notes on Use 10 ...
Страница 44: ...3 5 Operation Map 36 ...
Страница 48: ...4 2 Program Setup 40 ...
Страница 56: ...5 4 Operation Flowchart 48 ...
Страница 78: ...6 6 Editing in Another Window 70 ...
Страница 90: ...7 4 Setting the ID Filter 82 ...
Страница 99: ...91 9 2 Setting Data Printout ...
Страница 130: ...10 2 Using the 8910 with the 8841 8842 MEMORY HiCORDER 122 ...
Страница 147: ......
Страница 148: ......
Страница 149: ......
Страница 150: ......