


DS-PR1-60 User Manual
UM DS-PR1-60 090920NA
29
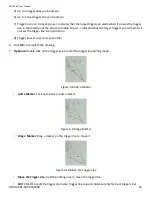
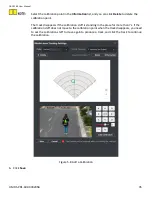
Figure 5-3 Add a Camera
3)
Click
OK
.
3.
Link zones and trigger lines to the camera.
1)
Select a camera in the camera list.
2)
Select zones and trigger lines in the
Linkage Settings
.
3)
Click
Save
.
Up to four linked cameras can be enabled simultaneously on a single radar.
4.
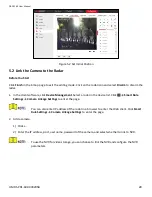
Add the camera to the client software.
1)
In the client software, click
Device Management
.
2)
Click
Add
in the device list, enter name, IP address, port, user name, password of the camera. Check
Import to Group
.
3)
Click
Add
.
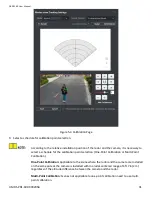
5.3
Calibrate Camera
Calibrate the linked camera to ensure the accuracy of camera tracking.
Before You Start
•
You need to disarm the radar before the operation. Click
Finish
in the E-map page to exit the editing mode.
Click on the radar icon and select
Disarm
to disarm the radar.
•
You need to link the speed dome to the zone before calibration, and set the speed dome initial position.
•
The installation height of the linked speed dome should to be more than 9 ft 10 in (3 m).
Содержание DS-PR1-60
Страница 1: ...DS PR1 60 Security Radar User Manual...
Страница 32: ...DS PR1 60 User Manual UM DS PR1 60 090920NA 32 Figure 5 5 Installation Scene for One Point Calibration...
Страница 42: ...DS PR1 60 User Manual UM DS PR1 60 090920NA 42...
Страница 69: ...DS PR1 60 User Manual UM DS PR1 60 090920NA 69...
Страница 70: ...DS PR1 60 User Manual UM DS PR1 60 090920NA 70...
Страница 71: ...DS PR1 60 User Manual UM DS PR1 60 090920NA 71 UD13649B...