


Main Elevator Controller
User Manual
16
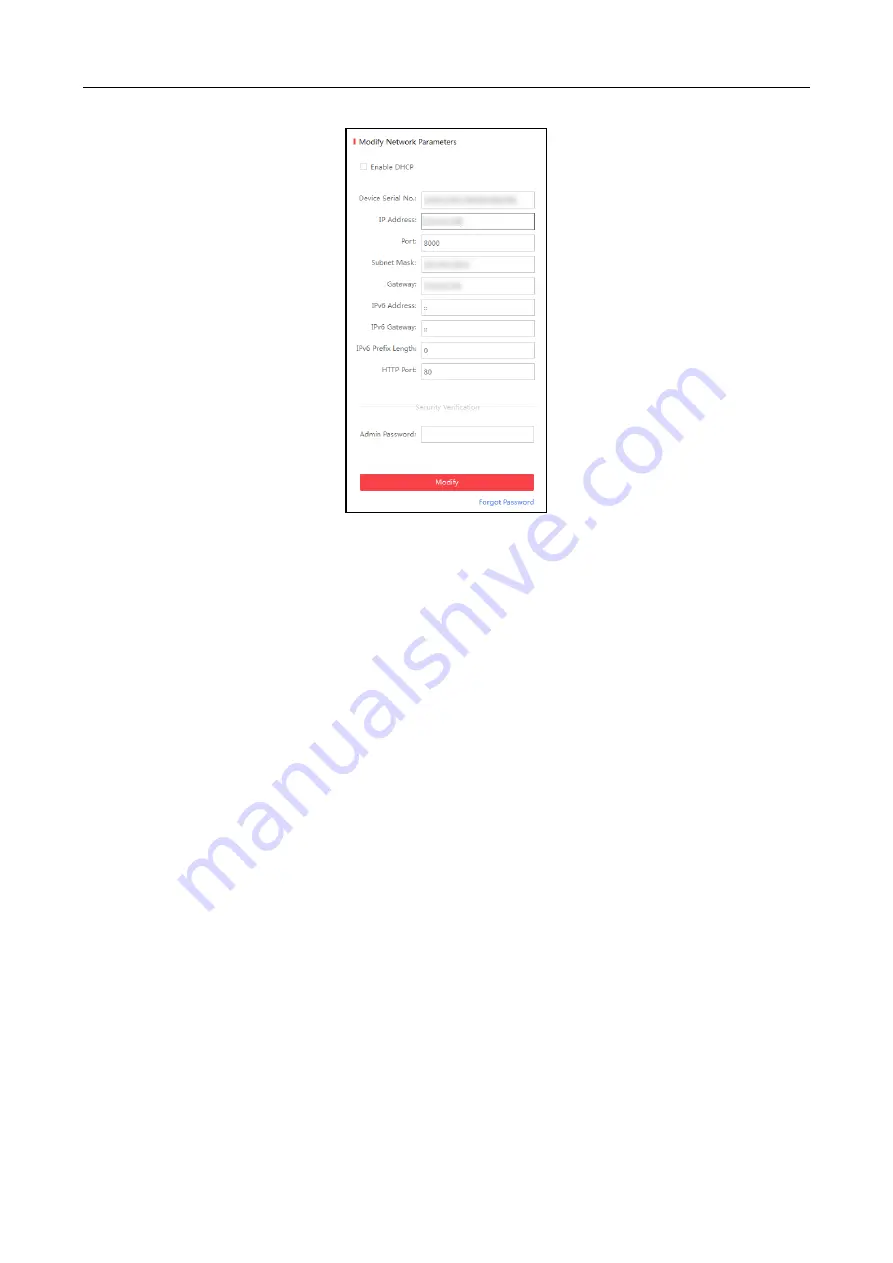
6.
Input the password and click Modify to save the IP address.
5.3
Activating via Client Software
Purpose:
The client software is versatile video management software for multiple kinds of devices.
Get the client software from the supplied disk or the official website, and install the software
according to the prompts. Follow the steps to activate the control panel.
Steps:
1.
Run the client software and the control panel of the software pops up, as shown in the figure
below.
Содержание DS-k2210
Страница 1: ...Main Elevator Controller User Manual...
Страница 100: ...Main Elevator Controller User Manual 99 UD03831B C...