background image

COMPUSHIFT II Manual  –  COMPUSHIFT II Manual

Monitoring & Tuning Your System

 –  

64


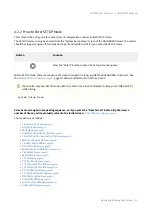
Button

Function

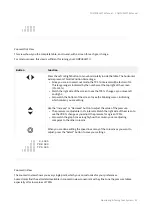
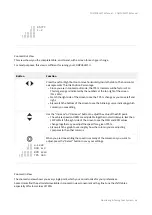
Enter the zoomed-in mode from the zoomed-out mode. Select a gear change to 
edit, move left/right in zoomed-out mode, and then press the "Option" button to 
zoom on in the data for that specific 10% range.
This mode gives you a "window" into the detailed data, showing you 10% of the 
TPS spectrum at a time. Check the top right of the screen to see what TPS % range 

you are viewing. 

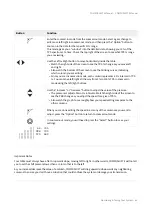
Use the Left or Right button to move horizontally inside the table.

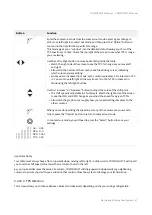
Watch the right side of the screen to see the TPS % change as you move left 
and right.
Also watch the bottom of the screen to see the blinking cursor, indicating 
which column you are editing.
Since you are in zoomed-in mode, each column represents a 1% interval in TPS 
%. You can move left/right all the way from 0% to 100% TPS in zoomed-in 
mode using the left/right buttons.

Use the "Increase" or "Decrease" button to adjust the value of the pressure.

The pressure is adjustable in 1% intervals. Watch the right side of the screen to 
see the PRB change as you adjust the speed for a given TPS %.
Also watch the graph to see roughly how your speed setting compares to the 
other columns.

When you are done editing the speed in as many of the columns as you want to 
adjust, press the "Option" button to return to zoomed-out mode.

 In zoomed-out mode, you will need to press the "Select" button to save your 

settings.

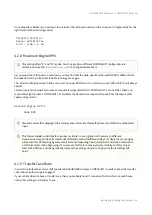
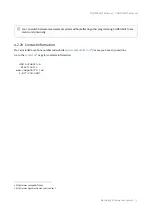
          |||  60- 70%

      ||||||| PRB  73%
   |||||||||| TPS  66%
   |||||||||| 


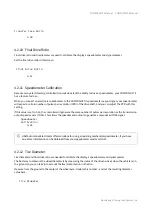
Important Notes

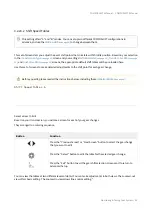
Your table must always have a flat or upwards slope, moving left to right. In other words, COMPUSHIFT II will not all 
you to set the shift pressure lower than a column that is to the left.

As you increase/decrease the value of a column, COMPUSHIFT will drag upwards/downwards any neighboring 
columns to ensure you don't have a situation that could confuse the system or damage your transmission.

 

Содержание COMPUSHIFT II

Страница 1: ...COMPUSHIFT II Manual COMPUSHIFT II Manual Exported on 12 08 2020 ...

Страница 2: ...Kit 16 2 1 The COMPUSHIFT II Controller 16 2 2 The Display 16 2 3 Transmission Wiring Harness 17 2 4 Power Engine Wiring Harness 18 2 5 Hydraulic Pressure Sensor Harness Optional 18 2 6 Switch Shift Harness 19 2 7 The Acculink TPS Optional 19 2 8 The TPS Connector for an Electronic Fuel Injection Optional 20 2 8 1 For an Electronic Fuel Injection Engine with a standard GM TPS 20 2 8 2 For other ty...

Страница 3: ...t 28 3 4 1 3 Assemble and Install the Ratio Arm 29 3 4 1 4 Align the Ratio Arm 29 3 4 1 5 Assemble the Adjustable Arm 30 3 4 1 6 Attach The Throttle Position Sensor 30 3 4 1 7 Set the Adjustable Arm Length 31 3 4 1 8 Install the Adjustable Arm 31 3 4 1 9 Check the Adjustable Arm TPS 31 3 4 1 10 Check The Linkage 32 3 4 1 11 Connect the AccuLink TPS to the Harness 33 3 4 1 12 Secure the Wiring Harn...

Страница 4: ...g Your System 44 4 1 Display DASHBOARD Screens 45 4 1 1 Mixed Meter Screen 45 4 1 2 Large Digit Gear Screen 46 4 1 3 Large Digit Engine RPM Screen 47 4 1 4 Large Digit Vehicle Speed Screen 47 4 1 5 Large Digit Transmission Temperature Screen 47 4 1 6 Stopwatch Screen 47 4 1 7 System Setup Menu Screen 48 4 1 8 System Status Screen 49 4 1 9 Shift Speed Adjust Screen 49 4 1 10 Shift Pressure Adjustme...

Страница 5: ...Defaults 60 4 2 23 Advanced Setup 61 4 2 23 1 Shift Pressure Tables 62 4 2 23 2 Shift Speed Tables 65 4 2 23 3 TPS Direction 67 4 2 23 4 TPS Ground 68 4 2 23 5 MAP Sensor Ground 68 4 2 23 6 Engine Temp Sensor Bias 68 4 2 23 7 Transmission Temp Sensor Bias 69 4 2 24 System Diagnostics Screen 69 4 2 25 Display Contrast 69 4 2 26 Display Brightness 70 4 2 27 Display Color 70 4 2 28 System Units 70 4 ...

Страница 6: ...2 11 System Over Temp 77 6 3 System Diagnostics 77 6 3 1 Shift Pressure 77 6 3 2 Shift Solenoids 77 6 3 3 Torque Converter Clutch 77 6 3 4 Gear Lever Position 78 6 3 5 Transmission Temperature 78 6 3 6 Transmission Output Shaft Speed 78 6 3 7 Switch Input Diagnostics 78 6 3 8 Voltage Input Diagnostics 78 6 3 9 Speed Input Diagnostics 78 6 3 10 Switch Output Diagnostics 78 6 3 11 Software Version 7...

Страница 7: ...S to the Carburetor 89 7 5 12 Installing the Adjustable Arm 91 7 5 13 Checking the Adjustable Arm and Sensor 92 7 5 14 Connecting the TPS 93 7 5 15 Securing the TPS Wiring Harness 94 7 6 Connecting to a ZF 4HP24 Gear Lever Position Sensor 94 7 6 1 US Version 94 7 6 2 UK Version 94 7 7 Automatic Transmission Basics 95 8 Specifications Pinouts 96 8 1 Controller Mechanical Drawings 96 8 2 Controller ...

Страница 8: ...g Hardware 100 8 4 4 Environmental Requirements 100 8 4 5 Adjustments 100 8 4 6 Attachment 100 8 5 Cable TPS Specifications 101 8 5 1 Type 101 8 5 2 Chassis 101 8 5 3 Environmental Requirements 101 8 5 4 Cable 101 8 6 Connector Pinouts 101 8 6 1 Pinouts for Engine Connector 102 8 6 1 1 ENGINE Connector 102 8 6 2 Pinouts for Option Connector 104 8 6 2 1 OPTIONS Connector 104 8 6 3 Pinouts for Ford ...

Страница 9: ... 8 6 7 2 ENGINE Connector 137 8 6 7 3 OPTIONS Connector 139 8 6 8 Pinouts for GM 4L60E and 4L80E 142 8 6 8 1 TRANS 1 Connector 142 8 6 8 2 ENGINE Connector 144 8 6 8 3 OPTIONS Connector 146 8 6 9 Pinouts for Toyota A442F 149 8 6 9 1 TRANS 1 Connector 149 8 6 9 2 TRANS 2 Connector 150 8 6 10 Pinouts for ZF 4HP24 155 8 6 10 1 TRANS 1 Connector 155 8 6 10 2 ENGINE Connector 158 8 6 10 3 OPTIONS Conne...

Страница 10: ...age 22 Mount the Controller see page 22 Install the Transmission Harness see page 22 Install the Power Engine Harness see page 25 Install or Connect a Throttle Position Sensor see page 27 Install the Switch Shift Wiring Harness Optional see page 37 Install the A B Mode Switch Optional see page 39 Install the Overdrive Cancel Switch Optional see page 40 Install the Manual TCC Switch Optional see pa...

Страница 11: ...smission Basics see page 95 This manual all photos design documents and schematics are copyright 2000 2017 by HGM Automotive Electronics Corporation All rights reserved No part of this book may be reproduced in any form or by any electronic or mechanical means without permission of HGM Automotive Electronics Corporation All software circuit designs and creative content in COMPUSHIFT II are copyrig...

Страница 12: ...tructions Think through and plan your approach It will pay off 1 2 Transmission Preparation Find your transmission from the list below and review these specific tips Installation Notes for GM 4L80E 4L60E Series see page 14 Installation Notes for Ford AODE 4R70W 4R100 E4OD see page 14 1 3 Additional Planning Prior to installation you ll also need to decide Failure to follow all instructions may cau...

Страница 13: ... an original in dash speedometer see page 56 and eliminates the need for dual speed sensors Refer to the COMPUSHIFT II Quick Install Guide see page 80 also included in the packaging to get an overview of all the components 1 5 Tools You Will Need No 2 Phillips screwdriver 1 8 or 3 16 flat blade screwdrivers Drill and small drill bit assortment Socket open end wrench assortment Wire cutters wire st...

Страница 14: ... II does not provide the connector for the discontinued model fortunately it can be easily fitted with the internal wiring harness plug from a late model GM 4L80E Order it from General Motors Part No P N24200161 and have a qualified transmission shop install 1 8 Installation Notes for Ford AODE 4R70W 4R100 E4OD Ford transmissions have the following positions on shift lever Park Reverse Neutral Dri...

Страница 15: ... labeled OVERDRIVE CANCEL INDICATOR One side of the LED should be connected to the wire and the other side connected to ground You do not need to use the OVERDRIVE CANCEL or OVERDRIVE CANCEL INDICATOR wires unless you want to prohibit fourth gear If insulated the wires can be left unconnected HGM stocks a variety of pushbutton switches and indicators2 or you can provide your own ...

Страница 16: ...ted TPS for all other engines including older diesel engines Please contact your distributor or HGM headquarters3 right away if you re missing the required part s for your specific TPS system Here s what s in a COMPUSHIFT II kit 2 1 The COMPUSHIFT II Controller The controller is the heart of the transmission control system On its exterior you will see Five 5 connectors for wiring Two 2 for the tra...

Страница 17: ...he COMPUSHIFT II Display and all of its screens visit Monitoring Tuning Your System see page 44 section 2 3 Transmission Wiring Harness The Transmission Wiring Harness shown here or one similar connects the COMPUSHIFT II Controller to the transmission See here for installation instructions see page 22 ...

Страница 18: ...to the vehicle s TPS tachometer speedometer and power See here for installation instructions see page 25 Each harness has a rubber grommet for the firewall These are placed in a recommended spot but can be repositioned 2 5 Hydraulic Pressure Sensor Harness Optional The Hydraulic Pressure Sensor Harness shown here connects the COMPUSHIFT II Controller to the transmission s hydraulic pressure sensor...

Страница 19: ... Edelbrock AFB Holley and Rochester carburetors The sensor is a spring loaded fully sealed rotary position sensor specifically designed for automotive use All linkages brackets screws and nuts are made of stainless steel for corrosion resistance and longer life The linkage and brackets are laser cut for extreme accuracy The sensor mounts directly to the carburetor and connects via a metal linkage ...

Страница 20: ...wn built in Throttle Position Sensor TPS and you ll only need our provided adapter harness to tap into the signal You will not need an Acculink TPS or Cable TPS No advance assembly is required for this adapter harness You will install it later in this step see page 36 along with the Power Engine Harness For a diesel EFI engine you will need to tap into the pedal position sensor signal Consult your...

Страница 21: ... connector plugs into the Power Engine Harness according to the instructions on this page see page 36 2 9 Cable Operated Throttle Position Sensor Optional If you have a mechanically actuated throttle that cannot accommodate AccuLink TPS HGM Automotive Electronics offers a Cable TPS and Sensor Box The parts in the kit are shown in the photo To install follow the instructions on this page Install th...

Страница 22: ...roller vertically mounted on an under dash kick panel an ideal spot You can also mount the controller on the floor pan or under a seat provided there s at least 1 of clearance and free flowing air around it Make sure the engine exhaust system is not heating the spot where you plan to mount it Carefully consider the mounting location The unit is not waterproof so never mount the controller in the e...

Страница 23: ...nsor TOSS depending on whether the vehicle is two or four wheel drive See the chart below for TOSS Locations for Different Transmissions see page 24 Two wheel drive vehicles usually have a TOSS on the output snout or rear section of the transmission Four wheel drive vehicles usually have the TOSS somewhere on the transfer case 3 2 2 1 Installation Choose the correct TOSS adapter for your transmiss...

Страница 24: ...Ford AODE 4R70W Left side of case at rear Ford E4OD Extension housing the speedometer drive Ford 4R100 Top of extension housing 3 2 3 Connect the Lever Sensor Connector if applicable The COMPUSHIFT II transmission harness for some transmissions have an additional connector For a Ford 4R70W or 4R100 transmission the Digital Range Sensor connector is separate from the main plug It is a square 4 pin ...

Страница 25: ...nsfer case switch to the yellow Transmission Wiring Harness wire labeled TRANSFER CASE CALCULATION WIRE You must also enter the transfer case s ratio into the COMPUSHIFT II Controller so it will operate correctly in the LOW Range 3 3 Install the Power Engine Harness The Power Engine Harness brings power to the COMPUSHIFT II system and provides several inputs and outputs to the vehicle It has two 2...

Страница 26: ... terminal or engine block Connect the brown wire marked RPM INPUT TO ECM to either the tachometer output of an electronic ignition system for example an HEI or the tachometer output of an MSD ignition system This will allow your Display to show your engine RPM Connect the red wire marked TO 12 VOLTS SWITCHED CLEAN SINGLE CIRCUIT to a circuit min 6 amps of current that s powered when your ignition ...

Страница 27: ...rtain versions of the HGM software can obtain throttle position engine speed manifold pressure manifold temperature and other information directly from the ECU through the CAN bus Information on this feature is covered in a software guide specific to that software version 3 4 Install or Connect a Throttle Position Sensor When you ordered COMPUSHIFT II you had to choose from one 1 of three 3 Thrott...

Страница 28: ...ashers brackets and screws 3 4 1 2 Assemble the AccuLink TPS and Bracket Identify the TPS itself the sensor bracket and the two 10 32 x 7 8 Phillips pan head screws Mount the TPS to the sensor bracket with the screws gently tightened Be sure the plug side of the TPS is vertical near the bracket mount as shown Tighten the TPS screws Sorry the widget is not supported in this export But you can reach...

Страница 29: ...sing the 20 x 5 8 pan head Phillips screw washer and nylon insert lock nut The Ratio Arm is designed to mount in the linkage where a kick down cable normally attaches The washer sits between the carburetor linkage and the nylon insert lock nut Gently snug the screw and nut but do not completely tighten 3 4 1 4 Align the Ratio Arm Edelbrock AFB Holley Set the Ratio Arm so that the center of its pin...

Страница 30: ...ving the screws gently snug 3 4 1 6 Attach The Throttle Position Sensor Attach the fully assembled AccuLink TPS to the carburetor using its linkage side rear manifold bolt The TPS must be aligned correctly rotation of the throttle linkage should match the rotation of the TPS The Ratio Arm must be aligned along a straight line with the TPS see photo Hint think of self aligning window louvers A stra...

Страница 31: ...o the carburetor butterflies are on low speed idle 3 4 1 8 Install the Adjustable Arm Install the Adjustable Arm by rotating the TPS so its pin can be inserted into the Arm as shown here in its fully installed position 3 4 1 9 Check the Adjustable Arm TPS Check the Adjustable Arm with the throttle fully closed There should be tension on the arm and no free play Correct any free play by slightly sh...

Страница 32: ...is is especially important on the Rochester Quadrajet To ensure smooth clearance adjust the TPS bracket as necessary The TPS should not reach the end of its rotation or stroke in either direction but be slightly off the stop at each end of its travel Failure to achieve this could result in poor operation Do not lubricate the linkage The AccuLink system is designed to work without lubrication Most ...

Страница 33: ...on t bend the sensor bracket This may require two hands If you can see the green gasket first photo it is not fully connected It should be fully compressed second photo This photo shows an incorrect install the TPS rotation is not aligned with the linkage and neither are the arms Your system may have been shipped with an extension cable to connect the AccuLink TPS to the Controller if it s mounted...

Страница 34: ...le TPS Find the Ratio Arm and attach it to the throttle linkage at an appropriate point using the supplied screw washer and locking nut The adjustable cable end attaches to the Ratio Arm The Ratio Arm must be attached so that the cable moves about 3 4 through the full throttle travel For correct travel the end of the Ratio Arm should be positioned about 3 4 below the throttle plate shaft Travel sh...

Страница 35: ...re the cable has some preload in the closed throttle position You can adjust the preload by loosening the cable end screw and taking up the slack 3 4 2 3 Mount the Sensor Box The splashproof Sensor Box can be mounted in the engine compartment under the vehicle or inside the cabin Be sure to mount it away from the exhaust system and somewhat shielded from weather Use the supplied mounting tabs and ...

Страница 36: ...the throttle position sensor from its original wiring harness Plug the male end of the Y adapter harness into the throttle position sensor Plug the original plug into the female end of the Y adapter harness Connect the 3 wire mail COMPUSHIFT engine harness TPS connector into the mated connector on the Y adapter harness 3 4 3 2 Other Systems If you have some other type of socket we can provide you ...

Страница 37: ...air of pushbuttons or a paddle shifter The Switch Shift Wiring Harness shown here connects into the Transmission Wiring Harness and should be routed to your switch location or paddle shifter Be sure to set the TPS Ground see page 68 setting in the COMPUSHIFT controller to off when you are using an existing EFI TPS Because each Switch Shift installation is customized you ll have to provide your own...

Страница 38: ... to one pole of both switches The white red striped wire gets connected to the upshift switch The white black striped wire gets connected to the downshift switch 3 5 2 Connect to the Power Engine Harness Snap together the three prong plug with the socket provided on the Power Engine Harness Be sure to fully compress the green gasket ...

Страница 39: ...is easy to reach from the drivers seat Drill a 19mm or 3 4 hole for the switch Install the switch from the front with the o ring in place Install the nut on the rear of the switch Tighten gently From the switch the black and yellow wires connect to ground These wires have a ground lug already installed The green wire on the switch connects to the blue orange wire from the COMPUSHIFT II engine harn...

Страница 40: ...empt to adjust these settings while driving 3 7 Install the Overdrive Cancel Switch Optional HGM offers a billet push button switch that can be used for overdrive cancel on transmissions that need it 3 7 1 Installing the Switch Here are the simple instructions on how to install it Locate a position that is easy to reach from the drivers seat Drill a 19mm or 3 4 hole for the switch Install the swit...

Страница 41: ...r clutch control 3 8 1 Installing the Switch Here are the simple instructions on how to install it Locate a position that is easy to reach from the drivers seat Drill a 19mm or 3 4 hole for the switch Install the switch from the front with the o ring in place Install the nut on the rear of the switch Tighten gently From the switch the black and yellow wires connect to ground These wires have a gro...

Страница 42: ...n place and the COMPUSHIFT II controller should be connected and mounted As a precaution recheck all electrical connections and wire routing for safety If these are confirmed to be OK then reconnect your battery Once the battery is connected do the following Turn on the ignition switch to the first position but do not start the engine Confirm that the status LED on your COMPUSHIFT II Controller is...

Страница 43: ...06 2 51 4 94 Press the Enter button and you ll have 5 seconds to completely depress and release the throttle pedal This one stroke of the throttle pedal should be done in a slow even motion before the 5 seconds elapse Once you ve stroked the throttle wait 5 more seconds and then observe the status LED on the COMPUSHIFT II Controller it should be slowly blinking green Depress the throttle pedal com...

Страница 44: ...refer in SETUP mode The next section explains the Display DASHBOARD Screens see page 45 SETUP screens are available when your vehicle is stopped and the engine is off with ignition switch on SETUP allows you to change the Controller s programming When COMPUSHIFT II is in SETUP mode control of the transmission is disabled SETUP is covered further in Display SETUP Screens see page 50 The buttons fun...

Страница 45: ... as follows Mixed Meter Screen see page 45 Large Digit Gear Screen see page 46 Large Digit Engine RPM Screen see page 47 Large Digit Vehicle Speed Screen see page 47 Large Digit Transmission Temperature Screen see page 47 Stopwatch Screen see page 47 System Setup Menu Screen see page 48 System Status Screen see page 49 Shift Speed Adjust Screen see page 49 Shift Pressure Adjustment Screen see page...

Страница 46: ...t port on the transmission Regarding GEAR If you use Switch Shift controls paddles or pushbuttons to select your gear the gear indicator is prefaced by an S example GEAR S1 When the automatic transmission is on control of shifting the gear indicator is prefaced by an A as shown example GEAR A1 In manual mode the gear indicator is prefaced by an M example GEAR M1 If you have a four wheel drive vehi...

Страница 47: ...y offers large digit screens including this one that shows the current vehicle speed M P H 4 1 5 Large Digit Transmission Temperature Screen So you can view key readouts at a glance the COMPUSHIFT II Display offers large digit screens including this one that shows the current transmission temperature T E M P 4 1 6 Stopwatch Screen COMPUSHIFT II has a built in stopwatch that allows you to time trip...

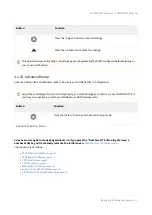
Страница 48: ... the stopwatch and clear all lap times 4 1 7 System Setup Menu Screen This screen is the entry point for a second set of configuration controls called SETUP mode The SETUP mode can only be entered from the System Setup Menu screen of the DASHBOARD mode The vehicle should be stopped engine off transmission in park and ignition on before you enter the SETUP mode Button Function Press the Select butt...

Страница 49: ...anings Button Function Press the Select button to clear the fault messages one by one If the problem occurred in the past the message will be removed If it is an active issue the message will not clear out until the problem is resolved System Status No Faults 4 1 9 Shift Speed Adjust Screen This display shows the relative shift speed adjustment Increasing this value makes your transmission shift a...

Страница 50: ...d use the mode switch see page 39 to change between them You should only enter SETUP mode when it is safe to do so Do not attempt to setup your COMPUSHIFT II while driving If you purchased COMPUSHIFT II from a dealer the dealer has pre programed your COMPUSHIFT II for your specific application based on a series of questions We recommend consulting your dealer or HGM headquarters before attempting ...

Страница 51: ...so if you press the Next Screen button right arrow a number of times you ll eventually return to the initial screen Transmission Type see page 52 The sequence is as follows Transmission Type see page 52 Engine Type see page 52 Shift Mode see page 52 Number of Engine Cylinders see page 53 Throttle Position Sensor Calibration see page 54 Maximum Engine RPM see page 55 Transfer Case Ratio see page 55...

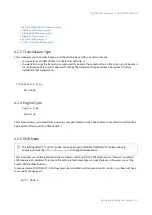
Страница 52: ...tory defaults for that transmission Transmission Type GM 4L60E 4 2 4 Engine Type Engine Type Gasoline This screen allows you to select from Gasoline Low Speed Diesel or High Speed Diesel Your selection will load the appropriate shift curves into COMPUSHIFT II 4 2 5 Shift Mode This screen sets your shifting mode to either Automatic or Manual If the Shift Mode is set to Manual automatic shift sequen...

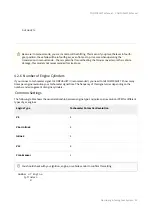
Страница 53: ...tween engine type and pulses per revolution PPR for different types of gas engines Engine Type Tachometer Pulses Per Revolution V8 4 V6 or Inline 6 3 Inline 4 2 V12 6 Crank sensor 1 Number of Engine Cylinders 8 Be aware In manual mode you are in control of the shifting This means if you place the lever in fourth gear position the vehicle will be in fourth gear even from a stop Use care when operat...

Страница 54: ...etween the other two numbers as the throttle is moved If the measured throttle position sensor voltage exceeds either the minimum or maximum voltage a TPS low or TPS high fault will be recorded in the system Before COMPUSHIFT II is properly calibrated you will see 0 00 as the left hand and right hand numbers on the screen In this situation the system records both TPS low and TPS high faults until ...

Страница 55: ... order to calculate the correct shift speeds and DASHBOARD displays COMPUSHIFT II needs to know the transfer case ratio when low range is engaged If your vehicle does not have a transfer case then you probably haven t connected the transfer case switch wire and so this setting won t matter to you This setting offers A and B modes You can set up two different COMPUSHIFT configurations in advance an...

Страница 56: ... this setting If this value is set to 0 00 the controller will generate the same number of pulses per revolution as the transmission output speed sensor TOSS This allows the speedometer output to generate a reproduced TOSS signal Speedometer Calibration 4 00 4 2 12 Tire Diameter Tire diameter and final drive ratio are needed to calibrate the display s speedometer and dynamometer The best way to me...

Страница 57: ...etting is Automatic and you can change it to Manual if needed TCC Mode A Automatic 4 2 15 TCC Enable Gear You can choose to lock your Torque Converter Clutch TCC in either 4th gear 3rd and 4th gear or not at all Some transmissions also offer the option to lock in 2nd gear The 3rd and 4th gear setting is useful if your vehicle has high gearing and you frequently cruise in 3rd gear The factory defau...

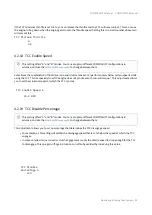
Страница 58: ...ops below this percentage the TCC will unlock If the TCC minimum throttle is set to 0 you can release the throttle and the TCC will never unlock This can cause the engine to bog down when the engine gets close to the throttle speed Setting this to a small number above zero will prevent this As you release the throttle in a normal transmission configuration the TCC is disengaged Use this setting to...

Страница 59: ...d at which the TCC can lock TCC Enable Speed A 25 0 MPH 4 2 19 TCC Disable Percentage This adjustment allows you to set a percentage that determines the TCC disengage speed For example a 10 setting will establish a disengage speed that is 10 below the speed at which the TCC engages In some vehicles torque converter clutch engagement causes the vehicle speed to drop enough for the TCC to disengage ...

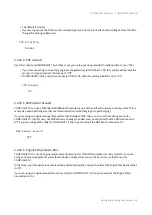
Страница 60: ...o 75 the throttle is less sensitive and takes more throttle to accomplish a downshift Downshift Offset A 95 4 2 22 Load Factory Defaults When you change your engine or transmission type via the SETUP screens COMPUSHIFT II will automatically change the appropriate parameters that are different But if you need to reset everything use this function You will be asked to confirm your decision since thi...

Страница 61: ...right arrow a number of times you ll eventually return to the initial screen Shift Pressure Tables see page 62 The sequence is as follows Shift Pressure Tables see page 62 Shift Speed Tables see page 65 TPS Direction see page 67 TPS Ground see page 68 MAP Sensor Ground see page 68 Engine Temp Sensor Bias see page 68 Transmission Temp Sensor Bias see page 69 This operation erases all settings inclu...

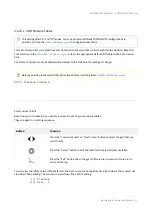
Страница 62: ...y arranged in a rotating sequence Button Function Press the Previous Screen or Next Screen button to select the gear that you want to edit Press the Select button to edit the table for the selected pressure table Press the Exit button to exit the gear shift selection screens and to return to Advanced Setup You can view the tables at two different levels of detail You can make adjustments in both v...

Страница 63: ...right Also watch the bottom of the screen to see the blinking cursor indicating which column you are editing Use the Increase or Decrease button to adjust the value of the pressure The pressure is adjustable in 1 intervals Watch the right side of the screen to see the PRB change as you adjust the pressure for a given TPS Also watch the graph to see roughly how the column you are adjusting compares...

Страница 64: ...he way from 0 to 100 TPS in zoomed in mode using the left right buttons Use the Increase or Decrease button to adjust the value of the pressure The pressure is adjustable in 1 intervals Watch the right side of the screen to see the PRB change as you adjust the speed for a given TPS Also watch the graph to see roughly how your speed setting compares to the other columns When you are done editing th...

Страница 65: ...on you will see a screen for each of your gear changes They arranged in a rotating sequence Button Function Press the Previous Screen or Next Screen button to select the gear change that you want to edit Press the Select button to edit the table for the selected gear change Press the Exit button to exit the gear shift selection screens and to return to Advanced Setup You can view the tables at two...

Страница 66: ...he screen to see the blinking cursor indicating which column you are editing Use the Increase or Decrease button to adjust the value of the shift point The vehicle speed and RPM are adjustable together in small intervals less than 1 MPH Watch the right side of the screen to see the MPH and RPM values change together as you adjust the speed for a given TPS Also watch the graph to see roughly how th...

Страница 67: ...the Increase or Decrease button to adjust the value of the shift point The shift speed is adjustable in 1 intervals Watch the right side of the screen to see the MPH and RPM change as you adjust the speed for a given TPS Also watch the graph to see roughly how your speed setting compares to the other columns When you are done editing the speed in as many of the columns as you want to adjust press ...

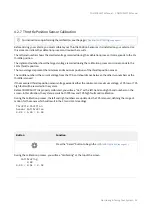
Страница 68: ...pressure control system This is most often useful with engines that use forced induction turbocharging or supercharging If you are using an engine management system that includes a MAP then you can use that existing sensor for COMPUSHIFT II In that case your MAP sensor is already grounded and you should set the MAP Sensor Ground to Off If you are using a MAP solely for COMPUSHIFT II then you shoul...

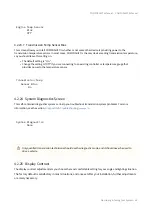
Страница 69: ...re gauge that provides power to the temperature sensor Transmission Temp Sensor Bias On 4 2 24 System Diagnostics Screen This self contained diagnostics system can help you troubleshoot transmission system problems For more information see the section Diagnostics Troubleshooting see page 74 System Diagnostics Menu 4 2 25 Display Contrast The display contrast adjustment lets you choose the most com...

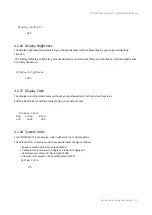
Страница 70: ...ess 100 4 2 27 Display Color The display color adjustment lets you choose your preferred color for the text on the screen Edit the Red Green and Blue values to mix your custom color Display Color Red Green Blue 10 100 35 4 2 28 System Units Your COMPUSHIFT II can display units in either metric or US standards The default is US In metric mode the measurements change as follows Speed is measured in ...

Страница 71: ... Contact Information We ve included our phone number and website www compushift com4 in case you have any questions Go to the Contact Us5 page for complete information HGM Automotive Electronics www compushift com 1 877 744 3887 You can switch between measurement systems without affecting other programming COMPUSHIFT uses metric units internally ...

Страница 72: ...and downshift the transmission via a pair of pushbuttons or paddles Here s how the feature works When you first put the transmission in gear shifting will be automatic Press either the upshift or downshift button to change the transmission gear The display will show S in the GEAR meter instead of A After a button press the transmission will stay in switch shift mode and will not automatically shif...

Страница 73: ...your current mode You can adjust these on the fly by pressing the up or down key 5 3 2 SETUP Screens Within the SETUP screens see page 50 many settings offer an Mode A B feature The settings that are intrinsic to your vehicle such as vehicle weight and final drive ratio do not offer Mode settings they are constant for both modes You should only enter SETUP mode when it is safe to do so Do not atte...

Страница 74: ...rent problem Consult the System Status screen on the Display to see the current issue s If the red LED blinks slowly there has been a fault in the past Consult the System Status screen on the Display to see the past issue s and press the center button to clear fault messages one by one The Display s System Status Display see page 0 will show messages indicating the fault code and name see page 74 ...

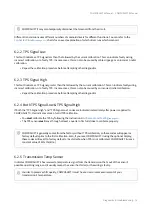
Страница 75: ...h TPS Signal Low TPS Signal High If both the TPS Signal High and TPS Signal Low codes are indicated immediately after power is applied to COMPUSHIFT II this indicates a lack of valid TPS calibration You must calibrate the TPS by following the instructions in Checkout and Testing see page 42 The TPS sensor must move through at least a quarter of its full stroke to calibrate properly 6 2 5 Transmiss...

Страница 76: ...the 12 volt power supply has exceeded the normal operating range 6 2 10 Invalid PRNDL Indicates an invalid signal combination has been received from the transmission gear selector PRNDL switch Turn off your vehicle as soon as possible as transmission damage is imminent This fault is triggered when transmission temperature exceeds 275 F 135 C for 10 seconds or more Contact HGM Automotive Electronic...

Страница 77: ...een to actively adjust shift pressure This value will be held until you exit diagnostics 6 3 2 Shift Solenoids Use this screen to set the shift solenoids to any commanded gear This command will be held until you exit diagnostics 6 3 3 Torque Converter Clutch Use this screen to engage the Torque Converter Clutch You can set it to Off or On This fault can occur if a partial short exists in the trans...

Страница 78: ...the current reading from the TOSS sensor 6 3 7 Switch Input Diagnostics This menu will display current switch input values 6 3 8 Voltage Input Diagnostics This screen will show voltages at different controller inputs 6 3 9 Speed Input Diagnostics This screen will show the frequency of speed sensors 6 3 10 Switch Output Diagnostics This screen will show the status of switch input pullup current sou...

Страница 79: ...c Transmission Basics see page 95 7 1 Changing a Wiring Harness Terminal If you need to change or remove a wire in any of your HGM wiring harness connectors it is easy to do with the right tool Contact us7 to order a terminal remover It is the exact size and shape needed to release the terminal without damage to the connector or the wire With the remover tool and a small flat head screwdriver on h...

Страница 80: ...e tool to release the tooth and the wire will slide out easily If it does not release try giving it more slack from the back do not tug If you need to replace wires you can contact HGM to order additional terminals We have terminals already connected to pre cut sections of wire in many different colors 7 2 COMPUSHIFT II Quick Install Guide This reference sheet was included in your original packagi...

Страница 81: ...hose to the pressure port on your transmission you may need a 90 degree fitting not supplied Remove the stock pan bolt Using the provided bolt install the clamp holding the sensor Add the spacer between the clamp and the pan if needed Connect the cable to the sensor and its other end to the TRANS 2 socket on the COMPUSHIFT II controller Be sure to check for leaks 7 3 2 ZF4HP24 The ZF4HP24 does not...

Страница 82: ...ation 82 After locating the line pressure plug remove it and drill an 11 32 hole through the plug Then thread the plug using a 1 8 pipe thread tap The results should look like the photo to the left You can now use that plug as an adapter to connect the pressure sensor ...

Страница 83: ... cable operated throttle position sensor We have hundreds of people including us who use it However the cable operated system can be difficult to get perfect Some custom fabrication is usually required and not everybody gets consistently great results We studied this problem at length and came up with a solution that fits the most popular carburetors Holley Edelbrock AFB and Rochester QuadraJet Th...

Страница 84: ...tment You may also need the following supplies Insulating tape Wire crimp connectors Wire spade lugs 7 5 4 Removing the Old System Remove the existing cable bracket cable end studs and linkage plates Disconnect the throttle position cable wiring from the sensor box Remove the box and the cable from the car ...

Страница 85: ...he four case screws and lid Lift the cable loop from the sensor and push it forward into the cable housing Using a Phillips screwdriver remove the two screws holding the sensor Remove the sensor from the case 7 5 6 Installing the Sensor Pin Place the sensor pin over the sensor arm and align the Allen set screw with the flat of the arm ...

Страница 86: ...rock AFB or Holley carburetor remove the insert washer knockout For a Rochester Quadrajet leave the washer in place Install the ratio arm onto the carburetor linkage using the 20 x 5 8 pan head Phillips screw washer and nylon insert lock nut as shown above The ratio arm is designed to mount in the linkage where a kick down cable would normally attach The washer sits between the carburetor linkage ...

Страница 87: ...or Edelbrock AFB and Holley Carburetors For Edelbrock AFB and Holley carburetors set ratio arm angle so that the center of the ratio arm pin is aligned with edge of carburetor linkage as shown above Tighten the screw and nut in this position 7 5 9 Aligning the Ratio Arm for Rochester Quadrajet Carburetors ...

Страница 88: ... Bracket Identify throttle position sensor sensor bracket and two 10 32x7 8 Phillips pan head screws Mount the throttle position sensor to the sensor bracket as shown on the opposing page Gently tighten the screws gently so that throttle position sensor can be rotated on the bracket Rotate throttle position sensor on the sensor bracket fully counterclockwise The plug side of the throttle position ...

Страница 89: ...sembly to the carburetor using the carburetor s linkage side rear manifold bolt The sensor must be aligned correctly The rotation of the throttle linkage should match the rotation of the throttle position sensor The ratio arm needs to be aligned along a straight line with the throttle position sensor think of the motion of louvers on a window shade A straight edge or ruler can be used as shown to ...

Страница 90: ... especially important on the Rochester Quadrajet Rotate the throttle linkage through its full range of travel to be sure that no part of it hits the throttle position sensor Adjust the sensor bracket as needed to avoid interference This picture shows an example of an incorrect installation The sensor rotation is not aligned with the linkage and the arms are not aligned ...

Страница 91: ...gently snug Attach the fixed section of the adjustable arm to the ratio arm The screw heads should face outward away from the carburetor Adjust the arm length so that edge of the hole of the sliding section is aligned with the center of the throttle position sensor pin The correct length is shown in the picture above Tighten the adjustable arm screws at this position Disable the fast idle cam for ...

Страница 92: ...eck the adjustable arm with the throttle fully closed There should be tension on the arm and no free play Correct any free play by shortening the arm slightly Hold the carburetor linkage in the fully open position Verify that the throttle position sensor has some remaining stroke rotation by pressing on the sensor arm as shown above The sensor should have some additional travel rotation If the sen...

Страница 93: ...e plug has a rubber gasket that is tight fitting Be sure to push the plug into the socket by squeezing the plug and the sensor together as shown so as not to bend the sensor bracket This may require two hands Your system may have shipped with an extension cable for the throttle position sensor If necessary install the extension cable between the controller and the sensor ...

Страница 94: ...ts of 9 wires The wires that you will need are BROWN PURPLE BLUE PURPLE BLUE BLACK BLUE GREEN and BLUE WHITE In your kit you are provided with a 5 Way plug that you can use for these wires to make connecting to the 5 Way plug on the provided transmission harness a snap You may prefer to skip the 5 Way plugs and solder directly to the harness In either instance BROWN PURPLE connects to the BLACK wi...

Страница 95: ...OMPUSHIFT II has three main components sun gear planet gears and the planet gears carrier and ring gear Clutches Bands Clutches and bands alternatively connect and disconnect different gears in the transmission The correct sequencing of band and clutch activation is what shifts the transmission The amount of hydraulic pressure applied to the clutches determines how the transmission shifts Under lo...

Страница 96: ...ee page 155 Pinouts for Toyota AB60 see page 162 Warranty see page 170 8 1 Controller Mechanical Drawings For vehicle and powertrain integrators HGM publishes solid models of the CS2 controller Please choose from the following CS2 Solid Model STEP format CS2 Solid Model IGES format 8 2 Controller Specifications 8 2 1 COMPUSHIFT II 8 2 1 1 System Design High speed microcontroller running COMPUSHIFT...

Страница 97: ...0º C 22º 140º F Temperature Storage 30º 85º C 22º 185º F Protection Automatic internal shutdown for over temperature condition Automatic protection against failed solenoids 8 2 1 6 Electrical Specifications Supply Voltage 8 16 volts DC Supply Current Quiescent 600 mA 14 4 volts Supply Current Maximum 5 A 14 4 volts dependent on transmission type Solenoid Capacity 12 solenoids drivers with automati...

Страница 98: ...to PC 8 2 1 8 Indicators 1 Red Green LED indicating system status 8 3 Display Specifications 8 3 1 COMPUSHIFT II 8 3 1 1 Type Handheld or dash mountable backlit LCD display with 7 key keypad 8 3 1 2 Display Characteristics Number of Characters 80 20 characters x 4 lines Matrix format 5 x 7 with underline Display Area 82 00 mm x 28 40 mm Character Size 3 90 mm x 5 20mm not including underline LED B...

Страница 99: ...ower is provided by the COMPUSHIFT II controller Connection is provided via a standard 4 pin connector and 2 meter 6 foot cable Custom cable lengths available upon request 8 3 1 7 Display Formats Mixed display of information in small characters Large digits Bar graphs 8 3 1 8 Running Dashboard Displays The display provides a number of meters while the system is operating including System Status an...

Страница 100: ...ink TPS Specifications 8 4 1 Description Carburetor mounted direct linkage actuated sealed position sensor with spring preload 8 4 2 Linkage Adjustable stainless steel linkage arm ratio arm sensor arm 8 4 3 Mounting Hardware Stainless steel nuts washers brackets screws 8 4 4 Environmental Requirements Relative Humidity 0 90 Temperature Operating and Storage 30 85 C 22 185 F 8 4 5 Adjustments Rotat...

Страница 101: ...Requirements Relative Humidity 0 90 Temperature Operating and Storage 30º 85º C 22º 185º F 8 5 4 Cable Type Steel cable in pre lubricated high temperature plastic housing Mounting Cable housing attaches to a flange with a pair of provided nuts on the threaded housing end Dimensions 3 L x 3 8 D Travel 3 4 Adjustment Screw adjustment on cable length Attachment Socket type attachment for provided stu...

Страница 102: ...ngine Connector 8 6 1 1 ENGINE Connector A 1 2 1 1 1 0 9 8 7 6 5 4 3 2 1 B 1 2 1 1 1 0 9 8 7 6 5 4 3 2 1 Note This is the view into the receptacle on controller not the plug CONNECT OR RO W PIN PIN NAME FUNCTION WIRE COLOR TERMINATION NOTE S ENGINE A 1 TACH SIG IN INPUT RPM SIG BRN FLYING LEAD ENGINE A 2 ENGINE A 3 ENGINE A 4 5V TPS 5 VOLT SUPPLY GRN RED TPS TERMINAL C ENGINE A 5 TPS SIGNAL TPS SI...

Страница 103: ...O ADJUSTABLE SPEEDOMETER OUTPUT PPL WHT FLYING LEAD ENGINE B 2 ENGINE B 3 MODE MODE A B SWITCH BLUE OR FLYING LEAD ENGINE B 4 MODE SWITCH SWITCH LED ON OFF FLYING LEAD ENGINE B 5 OD ON OFF LED TO LED ON SWITCH BLU RED FLYING LEAD ENGINE B 6 OD CANCEL SWITCH SWITCH INPUT TO ECM BLU YEL FLYING LEAD ENGINE B 7 SWITCH SHIFT UP SHIFT UP WHT RED FLYING LEAD ENGINE B 8 SWITCH SHIFT COM GND OR COMMON WHT ...

Страница 104: ...ption Connector 8 6 2 1 OPTIONS Connector A 1 2 1 1 1 0 9 8 7 6 5 4 3 2 1 B 1 2 1 1 1 0 9 8 7 6 5 4 3 2 1 Note This is the view into the receptacle on controller not the plug CONNEC TOR RO W PI N NAME FUNCTION WIRE COLOR TERMINATI ON NOTES OPTIONS A 1 12 V 12 VOLT OUT OPTIONS A 2 5 V 5 VOLT DISPLAY YELLOW DISPLAY PLUG OPTIONS A 3 CAN2 CAN BUS 2 HIGH SIGNAL OPTIONS A 4 RS232 TX DISPLAY RED DISPLAY ...

Страница 105: ...CTION OPTIONS A 9 SOLENOID 12 REVERSE LAMP RELAY Must drive relay not lamps directly OPTIONS A 10 SOLENOID 11 NEUTRAL START RELAY Not available on GM 4L80E GM 4L60E GM 4L65E OPTIONS A 11 SOLENOID 10 OPTIONS A 12 SOLENOID 9 OPTIONS B 1 GND GND OPTIONS B 2 GND GND DISPLAY BLACK DISPLAY PLUG OPTIONS B 3 CAN2 CAN BUS 2 LOW SIGNAL OPTIONS B 4 RS232 RX DISPLAY GREEN DISPLAY PLUG OPTIONS B 5 CALIBRATION ...

Страница 106: ... B 8 CALIBRATION INDICATOR 2 OPTIONS B 9 TCC MANUAL ENGAGE TURNS ON TCC BLU OR TO SWITCH SWITCH TO GND OPTIONS B 10 TCC LOCKUP INDICATOR POWERS LED BLU TO LED OPTIONS B 11 NO CONNECTION OPTIONS B 12 NO CONNECTION 8 6 3 Pinouts for Ford 4R70W Black Plug 8 6 3 1 TRANS 1 Connector A 1 2 1 1 1 0 9 8 7 6 5 4 3 2 1 B 1 2 1 1 1 0 9 8 7 6 5 4 3 2 1 Note This is the view into the receptacle on controller n...

Страница 107: ...ONNECTIO N TRANS 1 A 3 5V POWER NO CONNECTIO N TRANS 1 A 4 TEMP SENSOR TRANS TEMP BRN TRANS PLUG PIN 1 TRANS 1 A 5 TISS INPUT HIGH NO CONNECTIO N TRANS 1 A 6 TOSS INPUT HIGH TOSS HIGH PPL YEL TOSS PIN A WEATHERPAC K 2PIN FEM TRANS 1 A 7 SOLENOID 1 PRESS SOL CONT GRN RED TRANS PLUG PIN 5 TRANS 1 A 8 SOLENOID 2 TCC CONTROL SIDE GRN WHT TRANS PLUG PIN 2 TRANS 1 A 9 SOLENOID 3 NO CONNECTIO N TRANS 1 A...

Страница 108: ... 1 B 2 GND NO CONNECTIO N TRANS 1 B 3 TOSS OUTPUT REPRO REPRO TOSS PPL WHT OUT OF LOOM TOSS FLYING LEAD TRANS 1 B 4 TEMP SENSOR RET TRANS TEMP BRN TRANS PLUG PIN 4 TRANS 1 B 5 TISS INPUT LOW NO CONNECTIO N TRANS 1 B 6 TOSS INPUT LOW TOSS LOW PPL TOSS PIN B WEATHERPAC K 2PIN FEM TRANS 1 B 7 DIGITAL SHIFT LEVER 1 RANGE SENSOR A BLU RED 4 WAY PIN A WEATHERPAC K 4PIN TRANS 1 B 8 DIGITAL SHIFT LEVER 2 ...

Страница 109: ...SE 1 TRANSFER CASE YELLOW OUT OF LOOM TOSS FLYING LEAD 8 6 3 2 ENGINE Connector A 1 2 1 1 1 0 9 8 7 6 5 4 3 2 1 B 1 2 1 1 1 0 9 8 7 6 5 4 3 2 1 Note This is the view into the receptacle on controller not the plug CONNECT OR RO W PIN PIN NAME FUNCTION WIRE COLOR TERMINATION NOTE S ENGINE A 1 TACH SIG IN INPUT RPM SIG BRN FLYING LEAD ENGINE A 2 ENGINE A 3 ENGINE A 4 5V TPS 5 VOLT SUPPLY GRN RED TPS ...

Страница 110: ...ENGINE A 9 MAP RETURN ENGINE A 10 ENGINE TEMP ENGINE A 11 CAN1 CAN BUS HIGH SIGNAL YEL ENGINE A 12 12V RED ENGINE B 1 TOSS OUT REPRO ADJUSTABLE SPEEDOMETER OUTPUT PPL WHT FLYING LEAD ENGINE B 2 ENGINE B 3 MODE MODE A B SWITCH BLUE OR FLYING LEAD ENGINE B 4 MODE SWITCH SWITCH LED ON OFF FLYING LEAD ENGINE B 5 OD ON OFF LED TO LED ON SWITCH BLU RED FLYING LEAD ENGINE B 6 OD CANCEL SWITCH SWITCH INPU...

Страница 111: ...NG LEAD ENGINE B 9 SWITCH DOWN SHIFT DOWN WHT BLK FLYING LEAD ENGINE B 10 ENGINE TEMP RETURN ENGINE B 11 CAN1 CAN BUS LOW SIGNAL ENGINE B 12 GND 8 6 3 3 OPTIONS Connector A 1 2 1 1 1 0 9 8 7 6 5 4 3 2 1 B 1 2 1 1 1 0 9 8 7 6 5 4 3 2 1 Note This is the view into the receptacle on controller not the plug CONNEC TOR RO W PI N NAME FUNCTION WIRE COLOR TERMINATI ON NOTES OPTIONS A 1 12 V 12 VOLT OUT OP...

Страница 112: ...ISPLAY PLUG OPTIONS A 5 LIN DATA COMMUNICATI ON OPTIONS A 6 NO CONNECTION OPTIONS A 7 NO CONNECTION OPTIONS A 8 NO CONNECTION OPTIONS A 9 SOLENOID 12 REVERSE LAMP RELAY Must drive relay not lamps directly OPTIONS A 10 SOLENOID 11 NEUTRAL START RELAY Not available on GM 4L80E GM 4L60E GM 4L65E OPTIONS A 11 SOLENOID 10 OPTIONS A 12 SOLENOID 9 OPTIONS B 1 GND GND OPTIONS B 2 GND GND DISPLAY BLACK DIS...

Страница 113: ...L OPTIONS B 4 RS232 RX DISPLAY GREEN DISPLAY PLUG OPTIONS B 5 CALIBRATION SELECT 1 OPTIONS B 6 CALIBRATION INDICATOR 1 OPTIONS B 7 CALIBRATION SELECT 2 OPTIONS B 8 CALIBRATION INDICATOR 2 OPTIONS B 9 TCC MANUAL ENGAGE TURNS ON TCC BLU OR TO SWITCH SWITCH TO GND OPTIONS B 10 TCC LOCKUP INDICATOR POWERS LED BLU TO LED OPTIONS B 11 NO CONNECTION OPTIONS B 12 NO CONNECTION ...

Страница 114: ...LOR TERMINATIO N NOTES TRANS 1 A 1 12V POWER 12VDC SOLENOIDS RED 18GA TRANS PLUG PIN 2 JOINED IN LOOM TRANS 1 A 1 12V POWER 12VDC RED 18GA TRANS PLUG PIN 7 JOINED IN LOOM TRANS 1 A 2 12V POWER 12VDC PRESS SOL RED BLK 18GA TRANS PLUG PIN 6 TRANS 1 A 3 5V POWER NO CONNECTIO N TRANS 1 A 4 TEMP SENSOR TRANS TEMP BRN TRANS PLUG PIN 4 TRANS 1 A 5 TISS INPUT HIGH NO CONNECTIO N TRANS 1 A 6 TOSS INPUT HIG...

Страница 115: ...RANS 1 A 10 SOLENOID 4 NO CONNECTIO N TRANS 1 A 11 SOLENOID 5 SS2 CONTROL SIDE BLU YEL TRANS PLUG PIN 5 TRANS 1 A 12 SOLENOID 6 SS1 CONTROL SIDE YEL BLU TRANSPLUG PIN 1 TRANS 1 B 1 GND DRS GND BLK 4 WAY PLUG PIN D WEATHERPAC K 4PIN TRANS 1 B 2 GND NO CONNECTIO N TRANS 1 B 3 TOSS OUTPUT REPRO REPRO TOSS PPL WHT OUT OF LOOM TOSS FLYING LEAD TRANS 1 B 4 TEMP SENSOR RET TRANS TEMP BRN TRANS PLUG PIN 8...

Страница 116: ... 1 B 8 DIGITAL SHIFT LEVER 2 RANGE SENSOR B BLU BLK 4 WAY PIN B WEATHERPAC K 4PIN TRANS 1 B 9 DIGITAL SHIFT LEVER 3 RANGE SENSOR C BLU 4 WAY PIN C WEATHERPAC K 4PIN TRANS 1 B 10 DIGITAL SHIFT LEVER 4 NO CONNECTIO N TRANS 1 B 11 DIGITAL SHIFT LEVER 5 NO CONNECTIO N TRANS 1 B 12 TRANSFER CASE 1 TRANSFER CASE YELLOW OUT OF LOOM TOSS FLYING LEAD 8 6 4 2 ENGINE Connector A 1 2 1 1 1 0 9 8 7 6 5 4 3 2 1...

Страница 117: ... ENGINE A 3 ENGINE A 4 5V TPS 5 VOLT SUPPLY GRN RED TPS TERMINAL C ENGINE A 5 TPS SIGNAL TPS SIGNAL GRN TPS TERMINAL B ENGINE A 6 TPS RETURN TPS GND GRN WHT TPS TERMINAL A ENGINE A 7 5V ENGINE A 8 MAP SIGNAL ENGINE A 9 MAP RETURN ENGINE A 10 ENGINE TEMP ENGINE A 11 CAN1 CAN BUS HIGH SIGNAL YEL ENGINE A 12 12V RED ENGINE B 1 TOSS OUT REPRO ADJUSTABLE SPEEDOMETER OUTPUT PPL WHT FLYING LEAD ENGINE B ...

Страница 118: ...N OFF LED TO LED ON SWITCH BLU RED FLYING LEAD ENGINE B 6 OD CANCEL SWITCH SWITCH INPUT TO ECM BLU YEL FLYING LEAD ENGINE B 7 SWITCH SHIFT UP SHIFT UP WHT RED FLYING LEAD ENGINE B 8 SWITCH SHIFT COM GND OR COMMON WHT RED FLYING LEAD ENGINE B 9 SWITCH DOWN SHIFT DOWN WHT BLK FLYING LEAD ENGINE B 10 ENGINE TEMP RETURN ENGINE B 11 CAN1 CAN BUS LOW SIGNAL ENGINE B 12 GND 8 6 4 3 OPTIONS Connector A 1 ...

Страница 119: ...5 VOLT DISPLAY YELLOW DISPLAY PLUG OPTIONS A 3 CAN2 CAN BUS 2 HIGH SIGNAL OPTIONS A 4 RS232 TX DISPLAY RED DISPLAY PLUG OPTIONS A 5 LIN DATA COMMUNICATI ON OPTIONS A 6 NO CONNECTION OPTIONS A 7 NO CONNECTION OPTIONS A 8 NO CONNECTION OPTIONS A 9 SOLENOID 12 REVERSE LAMP RELAY Must drive relay not lamps directly OPTIONS A 10 SOLENOID 11 NEUTRAL START RELAY Not available on GM 4L80E GM 4L60E GM 4L65...

Страница 120: ...TIONS B 3 CAN2 CAN BUS 2 LOW SIGNAL OPTIONS B 4 RS232 RX DISPLAY GREEN DISPLAY PLUG OPTIONS B 5 CALIBRATION SELECT 1 OPTIONS B 6 CALIBRATION INDICATOR 1 OPTIONS B 7 CALIBRATION SELECT 2 OPTIONS B 8 CALIBRATION INDICATOR 2 OPTIONS B 9 TCC MANUAL ENGAGE TURNS ON TCC BLU OR TO SWITCH SWITCH TO GND OPTIONS B 10 TCC LOCKUP INDICATOR POWERS LED BLU TO LED OPTIONS B 11 NO CONNECTION OPTIONS B 12 NO CONNE...

Страница 121: ... COLOR TERMINATIO N NOTES TRANS 1 A 1 12V POWER 12VDC SOLENOIDS RED 18GA TRANS PLUG PIN 1 TRANS 1 A 2 12V POWER 12VDC PRES SOL RED BLK 18GA TRANS PLUG PIN 12 TRANS 1 A 3 5V POWER NO CONNECTIO N TRANS 1 A 4 TEMP SENSOR TRANS TEMP BRN TRANS PLUG PIN 7 TRANS 1 A 5 TISS INPUT HIGH NO CONNECTIO N TRANS 1 A 6 TOSS INPUT HIGH TOSS HIGH PPL YEL TOSS PIN A WEATHERPAC K 2PIN FEM TRANS 1 A 7 SOLENOID 1 PRESS...

Страница 122: ...ID 5 SS2 CONTROL SIDE BLU YEL TRANS PLUG PIN 2 TRANS 1 A 12 SOLENOID 6 SS1 CONTROL SIDE YEL BLU TRANS PLUG PIN 3 TRANS 1 B 1 GND DRS GND BLK 4 WAY PIN D WEATHERPAC K 4PIN TRANS 1 B 2 GND NO CONNECTIO N TRANS 1 B 3 TOSS OUTPUT REPRO REPRO TOSS PPL WHT OUT OF LOOM TOSS FLYING LEAD TRANS 1 B 4 TEMP SENSOR RET TRANS TEMP BRN TRANS PLUG PIN 8 TRANS 1 B 5 TISS INPUT LOW NO CONNECTIO N TRANS 1 B 6 TOSS I...

Страница 123: ...GITAL SHIFT LEVER 3 RANGE SENSOR C BLU 4 WAY PIN C WEATHERPAC K 4PIN TRANS 1 B 10 DIGITAL SHIFT LEVER 4 NO CONNECTIO N TRANS 1 B 11 DIGITAL SHIFT LEVER 5 NO CONNECTIO N TRANS 1 B 12 TRANSFER CASE 1 TRANSFER CASE YELLOW OUT OF LOOM TOSS FLYING LEAD 8 6 5 2 ENGINE Connector A 1 2 1 1 1 0 9 8 7 6 5 4 3 2 1 B 1 2 1 1 1 0 9 8 7 6 5 4 3 2 1 Note This is the view into the receptacle on controller not the...

Страница 124: ...TPS TERMINAL C ENGINE A 5 TPS SIGNAL TPS SIGNAL GRN TPS TERMINAL B ENGINE A 6 TPS RETURN TPS GND GRN WHT TPS TERMINAL A ENGINE A 7 5V ENGINE A 8 MAP SIGNAL ENGINE A 9 MAP RETURN ENGINE A 10 ENGINE TEMP ENGINE A 11 CAN1 CAN BUS HIGH SIGNAL YEL ENGINE A 12 12V RED ENGINE B 1 TOSS OUT REPRO ADJUSTABLE SPEEDOMETER OUTPUT PPL WHT FLYING LEAD ENGINE B 2 ENGINE B 3 MODE MODE A B SWITCH BLUE OR FLYING LEA...

Страница 125: ...CANCEL SWITCH SWITCH INPUT TO ECM BLU YEL FLYING LEAD ENGINE B 7 SWITCH SHIFT UP SHIFT UP WHT RED FLYING LEAD ENGINE B 8 SWITCH SHIFT COM GND OR COMMON WHT RED FLYING LEAD ENGINE B 9 SWITCH DOWN SHIFT DOWN WHT BLK FLYING LEAD ENGINE B 10 ENGINE TEMP RETURN ENGINE B 11 CAN1 CAN BUS LOW SIGNAL ENGINE B 12 GND 8 6 5 3 OPTIONS Connector A 1 2 1 1 1 0 9 8 7 6 5 4 3 2 1 B 1 2 1 1 1 0 9 8 7 6 5 4 3 2 1 N...

Страница 126: ...OPTIONS A 3 CAN2 CAN BUS 2 HIGH SIGNAL OPTIONS A 4 RS232 TX DISPLAY RED DISPLAY PLUG OPTIONS A 5 LIN DATA COMMUNICATI ON OPTIONS A 6 NO CONNECTION OPTIONS A 7 NO CONNECTION OPTIONS A 8 NO CONNECTION OPTIONS A 9 SOLENOID 12 REVERSE LAMP RELAY Must drive relay not lamps directly OPTIONS A 10 SOLENOID 11 NEUTRAL START RELAY Not available on GM 4L80E GM 4L60E GM 4L65E OPTIONS A 11 SOLENOID 10 OPTIONS ...

Страница 127: ...TIONS B 3 CAN2 CAN BUS 2 LOW SIGNAL OPTIONS B 4 RS232 RX DISPLAY GREEN DISPLAY PLUG OPTIONS B 5 CALIBRATION SELECT 1 OPTIONS B 6 CALIBRATION INDICATOR 1 OPTIONS B 7 CALIBRATION SELECT 2 OPTIONS B 8 CALIBRATION INDICATOR 2 OPTIONS B 9 TCC MANUAL ENGAGE TURNS ON TCC BLU OR TO SWITCH SWITCH TO GND OPTIONS B 10 TCC LOCKUP INDICATOR POWERS LED BLU TO LED OPTIONS B 11 NO CONNECTION OPTIONS B 12 NO CONNE...

Страница 128: ...ES TRANS 1 A 1 12V POWER 12VDC SOLENOIDS RED 18GA TRANS PLUG PIN 2 JOINED IN LOOM TRANS 1 A 1 12V POWER 12VDC SOLENOIDS RED 18GA TRANS PLUG PIN 7 JOINED IN LOOM TRANS 1 A 2 12V POWER 12VDC PRESS SOL RED BLK 18GA TRANS PLUG PIN 6 TRANS 1 A 3 5V POWER 5VDC TO 1K RES B7 PULL UP RES TRANS 1 A 4 TEMP SENSOR TRANS TEMP BRN TRANS PLUG PIN 4 TRANS 1 A 5 TISS INPUT HIGH NO CONNECTION TRANS 1 A 6 TOSS INPUT...

Страница 129: ...LU YEL TRANS PLUG PIN 5 TRANS 1 A 12 SOLENOID 6 SS 1 2 CONTROL SIDE YEL BLU TRANS PLUG PIN 1 TRANS 1 B 1 GND MLPS GND BLACK MLPS PIN B WEATHERPAC K 2PIN MALE TRANS 1 B 2 GND NO CONNECTION TRANS 1 B 3 TOSS OUTPUT REPRO REPRO TOSS PPL WHT OUT OF LOOM TOSS FLYING LEAD TRANS 1 B 4 TEMP SENSOR RET TRANS TEMP BRN TRANS PLUG PIN 8 TRANS 1 B 5 TISS INPUT LOW NO CONNECTION TRANS 1 B 6 TOSS INPUT LOW TOSS L...

Страница 130: ...IFT LEVER 4 NO CONNECTION TRANS 1 B 11 DIGITAL SHIFT LEVER 5 NO CONNECTION TRANS 1 B 12 TRANSFER CASE 1 TRANSFER CASE YELLOW OUT OF LOOM TOSS FLYING LEAD 8 6 6 2 ENGINE Connector A 1 2 1 1 1 0 9 8 7 6 5 4 3 2 1 B 1 2 1 1 1 0 9 8 7 6 5 4 3 2 1 Note This is the view into the receptacle on controller not the plug CONNECT OR RO W PIN PIN NAME FUNCTION WIRE COLOR TERMINATION NOTE S ENGINE A 1 TACH SIG ...

Страница 131: ...PS SIGNAL GRN TPS TERMINAL B ENGINE A 6 TPS RETURN TPS GND GRN WHT TPS TERMINAL A ENGINE A 7 5V ENGINE A 8 MAP SIGNAL ENGINE A 9 MAP RETURN ENGINE A 10 ENGINE TEMP ENGINE A 11 CAN1 CAN BUS HIGH SIGNAL YEL ENGINE A 12 12V RED ENGINE B 1 TOSS OUT REPRO ADJUSTABLE SPEEDOMETER OUTPUT PPL WHT FLYING LEAD ENGINE B 2 ENGINE B 3 MODE MODE A B SWITCH BLUE OR FLYING LEAD ENGINE B 4 MODE SWITCH SWITCH LED ON...

Страница 132: ... TO ECM BLU YEL FLYING LEAD ENGINE B 7 SWITCH SHIFT UP SHIFT UP WHT RED FLYING LEAD ENGINE B 8 SWITCH SHIFT COM GND OR COMMON WHT RED FLYING LEAD ENGINE B 9 SWITCH DOWN SHIFT DOWN WHT BLK FLYING LEAD ENGINE B 10 ENGINE TEMP RETURN ENGINE B 11 CAN1 CAN BUS LOW SIGNAL ENGINE B 12 GND 8 6 6 3 OPTIONS Connector A 1 2 1 1 1 0 9 8 7 6 5 4 3 2 1 B 1 2 1 1 1 0 9 8 7 6 5 4 3 2 1 Note This is the view into ...

Страница 133: ...OPTIONS A 3 CAN2 CAN BUS 2 HIGH SIGNAL OPTIONS A 4 RS232 TX DISPLAY RED DISPLAY PLUG OPTIONS A 5 LIN DATA COMMUNICATI ON OPTIONS A 6 NO CONNECTION OPTIONS A 7 NO CONNECTION OPTIONS A 8 NO CONNECTION OPTIONS A 9 SOLENOID 12 REVERSE LAMP RELAY Must drive relay not lamps directly OPTIONS A 10 SOLENOID 11 NEUTRAL START RELAY Not available on GM 4L80E GM 4L60E GM 4L65E OPTIONS A 11 SOLENOID 10 OPTIONS ...

Страница 134: ...TIONS B 3 CAN2 CAN BUS 2 LOW SIGNAL OPTIONS B 4 RS232 RX DISPLAY GREEN DISPLAY PLUG OPTIONS B 5 CALIBRATION SELECT 1 OPTIONS B 6 CALIBRATION INDICATOR 1 OPTIONS B 7 CALIBRATION SELECT 2 OPTIONS B 8 CALIBRATION INDICATOR 2 OPTIONS B 9 TCC MANUAL ENGAGE TURNS ON TCC BLU OR TO SWITCH SWITCH TO GND OPTIONS B 10 TCC LOCKUP INDICATOR POWERS LED BLU TO LED OPTIONS B 11 NO CONNECTION OPTIONS B 12 NO CONNE...

Страница 135: ...TERMINATIO N NOTES TRANS 1 A 1 12V POWER 12VDC SOLENOIDS RED 18GA TRANS PLUG PIN 1 TRANS 1 A 2 12V POWER 12VDC PRES SOL RED BLK 18GA TRANS PLUG PIN 12 TRANS 1 A 3 5V POWER 5VDC TO 1K RES B7 PULL UP RES TRANS 1 A 4 TEMP SENSOR TRANS TEMP BRN TRANS PLUG PIN 7 TRANS 1 A 5 TISS INPUT HIGH NO CONNECTION TRANS 1 A 6 TOSS INPUT HIGH TOSS HIGH PPL YEL TOSS PIN A WEATHERPAC K 2PIN FEM TRANS 1 A 7 SOLENOID ...

Страница 136: ...TROL SIDE YEL BLU TRANS PLUG PIN 3 TRANS 1 B 1 GND MLPS GND BLK MLPS PLUG PIN B WEATHERPAC K 2PIN MALE TRANS 1 B 2 GND NO CONNECTION TRANS 1 B 3 TOSS OUTPUT REPRO REPRO TOSS PPL WHT OUT OF LOOM TOSS FLYING LEAD TRANS 1 B 4 TEMP SENSOR RET TRANS TEMP BRN TRANS PLUG PIN 8 TRANS 1 B 5 TISS INPUT LOW NO CONNECTION TRANS 1 B 6 TOSS INPUT LOW TOSS LOW PPL TOSS PIN B WEATHERPAC K 2PIN FEM TRANS 1 B 7 DIG...

Страница 137: ...FT LEVER 5 NO CONNECTION TRANS 1 B 12 TRANSFER CASE 1 TRANSFER CASE YELLOW OUT OF LOOM TOSS FLYING LEAD 8 6 7 2 ENGINE Connector A 1 2 1 1 1 0 9 8 7 6 5 4 3 2 1 B 1 2 1 1 1 0 9 8 7 6 5 4 3 2 1 Note This is the view into the receptacle on controller not the plug CONNECT OR RO W PIN PIN NAME FUNCTION WIRE COLOR TERMINATION NOTE S ENGINE A 1 TACH SIG IN INPUT RPM SIG BRN FLYING LEAD ENGINE A 2 ENGINE...

Страница 138: ... GRN WHT TPS TERMINAL A ENGINE A 7 5V ENGINE A 8 MAP SIGNAL ENGINE A 9 MAP RETURN ENGINE A 10 ENGINE TEMP ENGINE A 11 CAN1 CAN BUS HIGH SIGNAL YEL ENGINE A 12 12V RED ENGINE B 1 TOSS OUT REPRO ADJUSTABLE SPEEDOMETER OUTPUT PPL WHT FLYING LEAD ENGINE B 2 ENGINE B 3 MODE MODE A B SWITCH BLUE OR FLYING LEAD ENGINE B 4 MODE SWITCH SWITCH LED ON OFF FLYING LEAD ENGINE B 5 OD ON OFF LED TO LED ON SWITCH...

Страница 139: ... LEAD ENGINE B 8 SWITCH SHIFT COM GND OR COMMON WHT RED FLYING LEAD ENGINE B 9 SWITCH DOWN SHIFT DOWN WHT BLK FLYING LEAD ENGINE B 10 ENGINE TEMP RETURN ENGINE B 11 CAN1 CAN BUS LOW SIGNAL ENGINE B 12 GND 8 6 7 3 OPTIONS Connector A 1 2 1 1 1 0 9 8 7 6 5 4 3 2 1 B 1 2 1 1 1 0 9 8 7 6 5 4 3 2 1 Note This is the view into the receptacle on controller not the plug CONNEC TOR RO W PI N NAME FUNCTION W...

Страница 140: ... 2 HIGH SIGNAL OPTIONS A 4 RS232 TX DISPLAY RED DISPLAY PLUG OPTIONS A 5 LIN DATA COMMUNICATI ON OPTIONS A 6 NO CONNECTION OPTIONS A 7 NO CONNECTION OPTIONS A 8 NO CONNECTION OPTIONS A 9 SOLENOID 12 REVERSE LAMP RELAY Must drive relay not lamps directly OPTIONS A 10 SOLENOID 11 NEUTRAL START RELAY Not available on GM 4L80E GM 4L60E GM 4L65E OPTIONS A 11 SOLENOID 10 OPTIONS A 12 SOLENOID 9 OPTIONS ...

Страница 141: ...CAN2 CAN BUS 2 LOW SIGNAL OPTIONS B 4 RS232 RX DISPLAY GREEN DISPLAY PLUG OPTIONS B 5 CALIBRATION SELECT 1 OPTIONS B 6 CALIBRATION INDICATOR 1 OPTIONS B 7 CALIBRATION SELECT 2 OPTIONS B 8 CALIBRATION INDICATOR 2 OPTIONS B 9 TCC MANUAL ENGAGE TURNS ON TCC BLU OR TO SWITCH SWITCH TO GND OPTIONS B 10 TCC LOCKUP INDICATOR POWERS LED BLU TO LED OPTIONS B 11 NO CONNECTION OPTIONS B 12 NO CONNECTION ...

Страница 142: ...ION WIRE COLOR TERMINATIO N NOTES TRANS 1 A 1 12V POWER 12VDC SOLENOIDS RED 18GA TRANS PLUG PIN E TRANS 1 A 2 12V POWER 12VDC PRESS SOL RED BLK 18GA TRANS PLUG PIN C TRANS 1 A 3 5V POWER NO CONNECTION TRANS 1 A 4 TEMP SENSOR TRANS TEMP HIGH BRN TRANS PLUG PIN L TRANS 1 A 5 TISS INPUT HIGH NO CONNECTION TRANS 1 A 6 TOSS INPUT HIGH TOSS HIGH PPL YEL TOSS PIN A WEATHERPA CK 2PIN TRANS 1 A 7 SOLENOID ...

Страница 143: ...IN B TRANS 1 A 12 SOLENOID 6 SS 1 2 CONTROL SIDE YEL BLU TRANS PLUG PIN A TRANS 1 B 1 GND NO CONNECTION TRANS 1 B 2 GND NO CONNECTION TRANS 1 B 3 TOSS OUTPUT REPRO REPRO TOSS PPL WHT OUT OF LOOM TOSS FLYING LEAD TRANS 1 B 4 TEMP SENSOR RET TRANS TEMP LOW BRN TRANS PLUG PIN M TRANS 1 B 5 TISS INPUT LOW NO CONNECTION TRANS 1 B 6 TOSS INPUT LOW TOSS LOW PPL TOSS PIN B WEATHERPA CK 2PIN TRANS 1 B 7 DI...

Страница 144: ...TAL SHIFT LEVER 5 NO CONNECTION TRANS 1 B 12 TRANSFER CASE 1 TRANSFER CASE YELLOW OUT OF LOOM TOSS FLYING LEAD 8 6 8 2 ENGINE Connector A 1 2 1 1 1 0 9 8 7 6 5 4 3 2 1 B 1 2 1 1 1 0 9 8 7 6 5 4 3 2 1 Note This is the view into the receptacle on controller not the plug CONNECT OR RO W PIN PIN NAME FUNCTION WIRE COLOR TERMINATION NOTE S ENGINE A 1 TACH SIG IN INPUT RPM SIG BRN FLYING LEAD ENGINE A 2...

Страница 145: ... GRN WHT TPS TERMINAL A ENGINE A 7 5V ENGINE A 8 MAP SIGNAL ENGINE A 9 MAP RETURN ENGINE A 10 ENGINE TEMP ENGINE A 11 CAN1 CAN BUS HIGH SIGNAL YEL ENGINE A 12 12V RED ENGINE B 1 TOSS OUT REPRO ADJUSTABLE SPEEDOMETER OUTPUT PPL WHT FLYING LEAD ENGINE B 2 ENGINE B 3 MODE MODE A B SWITCH BLUE OR FLYING LEAD ENGINE B 4 MODE SWITCH SWITCH LED ON OFF FLYING LEAD ENGINE B 5 OD ON OFF LED TO LED ON SWITCH...

Страница 146: ... LEAD ENGINE B 8 SWITCH SHIFT COM GND OR COMMON WHT RED FLYING LEAD ENGINE B 9 SWITCH DOWN SHIFT DOWN WHT BLK FLYING LEAD ENGINE B 10 ENGINE TEMP RETURN ENGINE B 11 CAN1 CAN BUS LOW SIGNAL ENGINE B 12 GND 8 6 8 3 OPTIONS Connector A 1 2 1 1 1 0 9 8 7 6 5 4 3 2 1 B 1 2 1 1 1 0 9 8 7 6 5 4 3 2 1 Note This is the view into the receptacle on controller not the plug CONNEC TOR RO W PI N NAME FUNCTION W...

Страница 147: ... 2 HIGH SIGNAL OPTIONS A 4 RS232 TX DISPLAY RED DISPLAY PLUG OPTIONS A 5 LIN DATA COMMUNICATI ON OPTIONS A 6 NO CONNECTION OPTIONS A 7 NO CONNECTION OPTIONS A 8 NO CONNECTION OPTIONS A 9 SOLENOID 12 REVERSE LAMP RELAY Must drive relay not lamps directly OPTIONS A 10 SOLENOID 11 NEUTRAL START RELAY Not available on GM 4L80E GM 4L60E GM 4L65E OPTIONS A 11 SOLENOID 10 OPTIONS A 12 SOLENOID 9 OPTIONS ...

Страница 148: ...CAN2 CAN BUS 2 LOW SIGNAL OPTIONS B 4 RS232 RX DISPLAY GREEN DISPLAY PLUG OPTIONS B 5 CALIBRATION SELECT 1 OPTIONS B 6 CALIBRATION INDICATOR 1 OPTIONS B 7 CALIBRATION SELECT 2 OPTIONS B 8 CALIBRATION INDICATOR 2 OPTIONS B 9 TCC MANUAL ENGAGE TURNS ON TCC BLU OR TO SWITCH SWITCH TO GND OPTIONS B 10 TCC LOCKUP INDICATOR POWERS LED BLU TO LED OPTIONS B 11 NO CONNECTION OPTIONS B 12 NO CONNECTION ...

Страница 149: ...A 1 TRANS 1 A 2 TRANS 1 A 3 TRANS 1 A 4 TEMP SENS TEMP HIGH BRN 20GA TRANS PLUG TERMINAL B TERMINAL 1 BLUE TRANS 1 A 5 TRANS 1 A 6 TOSS TOSS HIGH PPL YEL 20GA TOSS PLUG TERMINAL A WEATHER PACK GRN ON TOSS TRANS 1 A 7 SOLENOID 1 TRANS 1 A 8 SOLENOID 2 TRANS 1 A 9 SOLENOID 3 TCC CONTROL GRN WHT 20GA TRANS PLUG TERMINAL D TERMINAL 7 GRN TRANS 1 A 10 SOLENOID 4 TIMING SOL GRN 20GA TRANS PLUG TERMINAL ...

Страница 150: ...RANS 1 B 5 TRANS 1 B 6 TOSS TOSS LOW PPL 20GA TOSS PLUG TERMINAL B WEATHER PACK RED ON TOSS TRANS 1 B 7 SHIFT LEV 1 PARK BLU RED SHIFT LEVER PLUG PIN B MLPS PIN 8 GRN WHT TRANS 1 B 8 SHIFT LEV 2 DRIVE BLU BLK SHIFT LEVER PLUG PIN C MLPS PIN 2 GRN YEL TRANS 1 B 9 SHIFT LEV 3 SECOND BLU ORN SHIFT LEVER PLUG PIN E MLPS PIN 9 GRN TRANS 1 B 10 SHIFT LEV 4 LOW BLU WHT SHIFT LEVER PLUG PIN F MLPS PIN 1 G...

Страница 151: ...LEV 7 REVERS E BLU YEL SHIFT LEVER PLUG PIN H MLPS PIN 4 RED BLK ENGINE Connector A 1 2 1 1 1 0 9 8 7 6 5 4 3 2 1 B 1 2 1 1 1 0 9 8 7 6 5 4 3 2 1 Note This is the view into the receptacle on controller not the plug CONNECT OR RO W PIN PIN NAME FUNCTION WIRE COLOR TERMINATION NOTE S ENGINE A 1 TACH SIG IN INPUT RPM SIG BRN FLYING LEAD ENGINE A 2 ENGINE A 3 ENGINE A 4 5V TPS 5 VOLT SUPPLY GRN RED TP...

Страница 152: ...11 CAN1 CAN BUS HIGH SIGNAL YEL ENGINE A 12 12V RED ENGINE B 1 TOSS OUT REPRO ADJUSTABLE SPEEDOMETER OUTPUT PPL WHT FLYING LEAD ENGINE B 2 ENGINE B 3 MODE MODE A B SWITCH BLUE OR FLYING LEAD ENGINE B 4 MODE SWITCH SWITCH LED ON OFF FLYING LEAD ENGINE B 5 OD ON OFF LED TO LED ON SWITCH BLU RED FLYING LEAD ENGINE B 6 OD CANCEL SWITCH SWITCH INPUT TO ECM BLU YEL FLYING LEAD ENGINE B 7 SWITCH SHIFT UP...

Страница 153: ...HT BLK FLYING LEAD ENGINE B 10 ENGINE TEMP RETURN ENGINE B 11 CAN1 CAN BUS LOW SIGNAL ENGINE B 12 GND OPTIONS Connector A 1 2 1 1 1 0 9 8 7 6 5 4 3 2 1 B 1 2 1 1 1 0 9 8 7 6 5 4 3 2 1 Note This is the view into the receptacle on controller not the plug CONNEC TOR RO W PI N NAME FUNCTION WIRE COLOR TERMINATI ON NOTES OPTIONS A 1 12 V 12 VOLT OUT OPTIONS A 2 5 V 5 VOLT DISPLAY YELLOW DISPLAY PLUG OP...

Страница 154: ...ICATI ON OPTIONS A 6 NO CONNECTION OPTIONS A 7 NO CONNECTION OPTIONS A 8 NO CONNECTION OPTIONS A 9 SOLENOID 12 REVERSE LAMP RELAY Must drive relay not lamps directly OPTIONS A 10 SOLENOID 11 NEUTRAL START RELAY Not available on GM 4L80E GM 4L60E GM 4L65E OPTIONS A 11 SOLENOID 10 OPTIONS A 12 SOLENOID 9 OPTIONS B 1 GND GND OPTIONS B 2 GND GND DISPLAY BLACK DISPLAY PLUG OPTIONS B 3 CAN2 CAN BUS 2 LO...

Страница 155: ...CALIBRATION SELECT 1 OPTIONS B 6 CALIBRATION INDICATOR 1 OPTIONS B 7 CALIBRATION SELECT 2 OPTIONS B 8 CALIBRATION INDICATOR 2 OPTIONS B 9 TCC MANUAL ENGAGE TURNS ON TCC BLU OR TO SWITCH SWITCH TO GND OPTIONS B 10 TCC LOCKUP INDICATOR POWERS LED BLU TO LED OPTIONS B 11 NO CONNECTION OPTIONS B 12 NO CONNECTION 8 6 10 Pinouts for ZF 4HP24 8 6 10 1 TRANS 1 Connector A 1 2 1 1 1 0 9 8 7 6 5 4 3 2 1 ...

Страница 156: ...18GA TRANS PLUG PIN M TRANS 1 A 2 12V POWER NC TRANS 1 A 3 5V POWER NC TRANS 1 A 4 TEMP SENSOR TRANS TEMP BRN TEMP SENSOR PLUG TO SCREW IN SENSOR TRANS 1 A 5 TISS INPUT HIGH NC TRANS 1 A 6 TOSS INPUT HIGH TOSS HIGH PPL YEL TRANS PLUG PIN E TRANS 1 A 7 SOLENOID 1 PRESS SOL CONT GRN RED TRANS PLUG PIN B TRANS 1 A 8 SOLENOID 2 TCC CONTROL SIDE GRN WHT TRANS PLUG PIN L TRANS 1 A 9 SOLENOID 3 NC TRANS ...

Страница 157: ...B 4 TEMP SENSOR RET TRANS TEMP RTN BRN TEMP SENSOR PLUG TO SCREW IN SENSOR TRANS 1 B 5 TISS INPUT LOW NC TRANS 1 B 6 TOSS INPUT LOW TOSS LOW PPL TRANS PLUG F TRANS 1 B 7 DIGITAL SHIFT LEVER 1 RANGE SENSOR A BLU RED 5 WAY PLUG PIN A TO SWITCH W BLU PPL TRANS 1 B 8 DIGITAL SHIFT LEVER 2 RANGE SENSOR B BLU BLK 5 WAY PLUG PIN B TO SWITCH X BLU BLK TRANS 1 B 9 DIGITAL SHIFT LEVER 3 RANGE SENSOR C BLU 5...

Страница 158: ...A 1 2 1 1 1 0 9 8 7 6 5 4 3 2 1 B 1 2 1 1 1 0 9 8 7 6 5 4 3 2 1 Note This is the view into the receptacle on controller not the plug CONNECT OR RO W PIN PIN NAME FUNCTION WIRE COLOR TERMINATION NOTE S ENGINE A 1 TACH SIG IN INPUT RPM SIG BRN FLYING LEAD ENGINE A 2 ENGINE A 3 ENGINE A 4 5V TPS 5 VOLT SUPPLY GRN RED TPS TERMINAL C ENGINE A 5 TPS SIGNAL TPS SIGNAL GRN TPS TERMINAL B ENGINE A 6 TPS RE...

Страница 159: ...11 CAN1 CAN BUS HIGH SIGNAL YEL ENGINE A 12 12V RED ENGINE B 1 TOSS OUT REPRO ADJUSTABLE SPEEDOMETER OUTPUT PPL WHT FLYING LEAD ENGINE B 2 ENGINE B 3 MODE MODE A B SWITCH BLUE OR FLYING LEAD ENGINE B 4 MODE SWITCH SWITCH LED ON OFF FLYING LEAD ENGINE B 5 OD ON OFF LED TO LED ON SWITCH BLU RED FLYING LEAD ENGINE B 6 OD CANCEL SWITCH SWITCH INPUT TO ECM BLU YEL FLYING LEAD ENGINE B 7 SWITCH SHIFT UP...

Страница 160: ...K FLYING LEAD ENGINE B 10 ENGINE TEMP RETURN ENGINE B 11 CAN1 CAN BUS LOW SIGNAL ENGINE B 12 GND 8 6 10 3 OPTIONS Connector A 1 2 1 1 1 0 9 8 7 6 5 4 3 2 1 B 1 2 1 1 1 0 9 8 7 6 5 4 3 2 1 Note This is the view into the receptacle on controller not the plug CONNEC TOR RO W PI N NAME FUNCTION WIRE COLOR TERMINATI ON NOTES OPTIONS A 1 12 V 12 VOLT OUT OPTIONS A 2 5 V 5 VOLT DISPLAY YELLOW DISPLAY PLU...

Страница 161: ...ICATI ON OPTIONS A 6 NO CONNECTION OPTIONS A 7 NO CONNECTION OPTIONS A 8 NO CONNECTION OPTIONS A 9 SOLENOID 12 REVERSE LAMP RELAY Must drive relay not lamps directly OPTIONS A 10 SOLENOID 11 NEUTRAL START RELAY Not available on GM 4L80E GM 4L60E GM 4L65E OPTIONS A 11 SOLENOID 10 OPTIONS A 12 SOLENOID 9 OPTIONS B 1 GND GND OPTIONS B 2 GND GND DISPLAY BLACK DISPLAY PLUG OPTIONS B 3 CAN2 CAN BUS 2 LO...

Страница 162: ...TION INDICATOR 1 OPTIONS B 7 CALIBRATION SELECT 2 OPTIONS B 8 CALIBRATION INDICATOR 2 OPTIONS B 9 TCC MANUAL ENGAGE TURNS ON TCC BLU OR TO SWITCH SWITCH TO GND OPTIONS B 10 TCC LOCKUP INDICATOR POWERS LED BLU TO LED OPTIONS B 11 NO CONNECTION OPTIONS B 12 NO CONNECTION 8 6 11 Pinouts for Toyota AB60 8 6 11 1 Abbreviations The following abbreviations are used in the charts below Abbreviation Connec...

Страница 163: ...1 1 1 0 9 8 7 6 5 4 3 2 1 Note This is the view into the receptacle on controller not the plug CONNECTOR ROW PIN TERMINATIO N WIRE COLOR FUNCTION NOTES TRANS 1 A 10 AUX 02 Yellow Solenoid SL2 TRANS 1 A 11 MAIN 08 White Blue Solenoid S1 TRANS 1 A 12 MAIN 15 Brown Yellow Solenoid S2 TRANS 1 A 4 MAIN 02 Brown Temperature Sensor 1 Ground TRANS 1 A 5 TRANS TISS 1 Purple Input Shaft Speed High TRANS 1 A...

Страница 164: ...low Blk Transfer Case Calculation TRANS 1 B 2 MLPS 2 Black White Ground for MLPS TRANS 1 B 4 MAIN 10 Brown Temperature Sensor 1 TRANS 1 B 5 TRANS TISS 2 Purple Input Shaft Speed Low TRANS 1 B 6 TRANS TOSS 2 Purple Yellow Output Shaft Speed Low TRANS 1 B 7 MLPS 6 Blue Orange MLPS Park TRANS 1 B 8 MLPS 1 Blue Red MLPS Reverse TRANS 1 B 9 MLPS 9 Blue Black MLPS Neutral Note that ground wires MAIN 03 ...

Страница 165: ...noid Ground for SLU or TRANS 1 B1 TRANS 2 B 8 AUX 04 Black Solenoid Ground for SL2 or TRANS 1 B1 TRANS 2 B 8 MAIN 05 Black Solenoid Ground for SLT or TRANS 1 B1 Note that ground wires MAIN 03 MAIN 04 AUX 04 and MAIN 05 can be connected to TRANS 1 B1 instead of TRANS 2 B8 depending on wiring loom build variation ENGINE Connector A 1 2 1 1 1 0 9 8 7 6 5 4 3 2 1 B 1 2 1 1 1 0 9 8 7 6 5 4 3 2 1 Note T...

Страница 166: ...PS SIGNAL GRN TPS TERMINAL B ENGINE A 6 TPS RETURN TPS GND GRN WHT TPS TERMINAL A ENGINE A 7 5V ENGINE A 8 MAP SIGNAL ENGINE A 9 MAP RETURN ENGINE A 10 ENGINE TEMP ENGINE A 11 CAN1 CAN BUS HIGH SIGNAL YEL ENGINE A 12 12V RED ENGINE B 1 TOSS OUT REPRO ADJUSTABLE SPEEDOMETER OUTPUT PPL WHT FLYING LEAD ENGINE B 2 ENGINE B 3 MODE MODE A B SWITCH BLUE OR FLYING LEAD ENGINE B 4 MODE SWITCH SWITCH LED ON...

Страница 167: ...EAD ENGINE B 8 SWITCH SHIFT COM GND OR COMMON WHT RED FLYING LEAD ENGINE B 9 SWITCH DOWN SHIFT DOWN WHT BLK FLYING LEAD ENGINE B 10 ENGINE TEMP RETURN ENGINE B 11 CAN1 CAN BUS LOW SIGNAL ENGINE B 12 GND In addition the following other connections are assigned CONNECTOR ROW PIN TERMINATION WIRE COLOR FUNCTION ENGINE B 5 SI 1 White Blue S Mode Indicator ENGINE B 6 SL 3 Brown White S Mode ENGINE B 7 ...

Страница 168: ...CONNEC TOR RO W PI N NAME FUNCTION WIRE COLOR TERMINATI ON NOTES OPTIONS A 1 12 V 12 VOLT OUT OPTIONS A 2 5 V 5 VOLT DISPLAY YELLOW DISPLAY PLUG OPTIONS A 3 CAN2 CAN BUS 2 HIGH SIGNAL OPTIONS A 4 RS232 TX DISPLAY RED DISPLAY PLUG OPTIONS A 5 LIN DATA COMMUNICATI ON OPTIONS A 6 NO CONNECTION OPTIONS A 7 NO CONNECTION OPTIONS A 8 NO CONNECTION OPTIONS A 9 SOLENOID 12 REVERSE LAMP RELAY Must drive re...

Страница 169: ...4L65E OPTIONS A 11 SOLENOID 10 OPTIONS A 12 SOLENOID 9 OPTIONS B 1 GND GND OPTIONS B 2 GND GND DISPLAY BLACK DISPLAY PLUG OPTIONS B 3 CAN2 CAN BUS 2 LOW SIGNAL OPTIONS B 4 RS232 RX DISPLAY GREEN DISPLAY PLUG OPTIONS B 5 CALIBRATION SELECT 1 OPTIONS B 6 CALIBRATION INDICATOR 1 OPTIONS B 7 CALIBRATION SELECT 2 OPTIONS B 8 CALIBRATION INDICATOR 2 OPTIONS B 9 TCC MANUAL ENGAGE TURNS ON TCC BLU OR TO S...

Страница 170: ...GM Automotive Electronics will repair or replace at our expense and option any COMPUSHIFT II component that in normal use has proven to be defective in workmanship or material The customer must return the component prepaid to HGM Automotive Electronics with proof of purchase to allow opportunity to verify the alleged defect by inspection HGM Automotive Electronics will not be responsible for any a...

Отзывы: