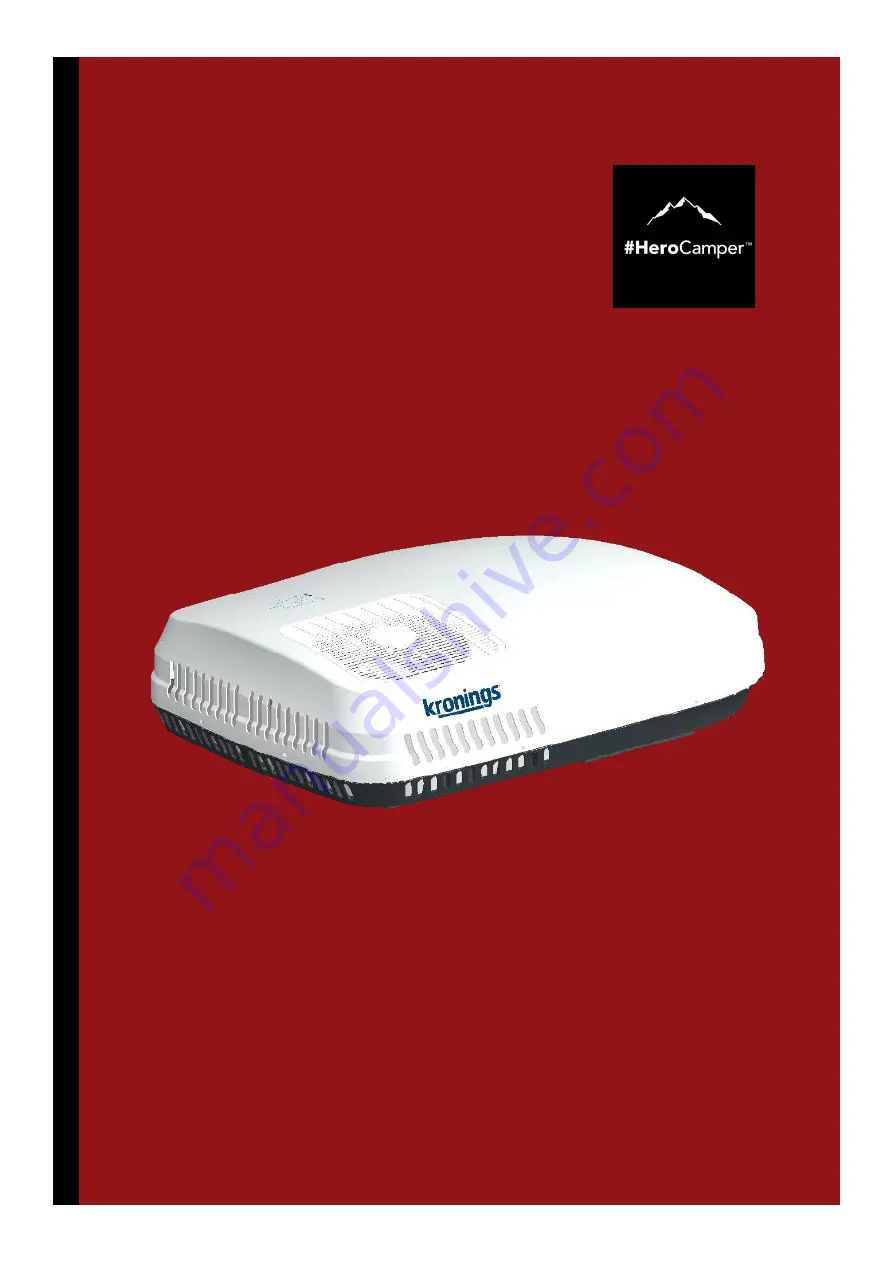
K3600-50/EU
Aircondition
INSTALLATION GUIDE AND USER MANUAL
Please read all instructions carefully before using the unit and keep instructions for future reference.
Страница 1: ...K3600 50 EU Aircondition INSTALLATION GUIDE AND USER MANUAL Please read all instructions carefully before using the unit and keep instructions for future reference...
Страница 2: ...jerg N Denmark Phone 45 7022 5840 sales herocamper com www herocamper com VAT No DK 40193189 1 Introduction 2 Instllation guide 3 Operation instructions 4 Specifications parameters 5 Product maintenan...
Страница 3: ...2 HeroCamper Lammefjordsvej 5 6715 Esbjerg N Denmark Phone 45 7022 5840 sales herocamper com www herocamper com VAT No DK 40193189 Introduction...
Страница 4: ...rocamper com VAT No DK 40193189 Exploded Parts List Key components 1 Air conditioner main unit 1 2 Reinforced roof support 1 3 Mounting frame 1 4 Plenum unit 1 Fastener components 5 M8 x 110 mm bolts...
Страница 5: ...erstand total heat load as well to choose a suitable air conditioner some tips to reduce heat load and improve performance Park the caravan at a shaded place to avoid direct sunshine exposure close al...
Страница 6: ...aravan meets with the cold air from the outlet In this case please pay attention to the following measures Close all the doors skylights windows and draw the curtains to decrease any warm moist air fr...
Страница 7: ...tabile 230V AC power source and may require a generator in some remote circumstance Requirements for inverter generator include efficient power source stable current output sine wave which shall meet...
Страница 8: ...um thickness of roof 23mm maximum thickness of roof 55mm Installation instructions Read and understand this manual thoroughly before installation Abide by the wiring rules in the installation Do not a...
Страница 9: ...n The main unit should be installed in the center of roof it is recommended to have a min 100mm space around the top unit Before installing please verify there is suitable space in the ceiling to acce...
Страница 10: ...ter Please consult with your caravan manufacturer for the best solution if there is a requirement to cut a mounting hole if provision has not been made for an air conditioner Cut a 400 x 400 hole and...
Страница 11: ...camper com VAT No DK 40193189 Installation Remove the roof support from carton and make sure it is aligned correctly Add a continuous line of sealant on the back of the support and fit into the cut ou...
Страница 12: ...om www herocamper com VAT No DK 40193189 Installation continued Installation and placement instructions For best use of ventilation and airflow make sure to install the A C product in such a way that...
Страница 13: ...m mounting bracket through the ceiling to base Pay attention as the C hook must match the corresponding C area on the base Finally fasten Insert 4xM8 bolts washers spring washer and metal plate via mo...
Страница 14: ...ioner has been installed in compliance with the instructions of this manual Incorrect installation methods or alteration of the product may cause damage to the product or personal injuries to the user...
Страница 15: ...ly 13 This appliance is not to be used by persons including children with reduced physical sensory or mental capabilities or lack of experience and knowledge unless they are under supervision 14 The s...
Страница 16: ...n And Off Up Key Set Temperature and time Down Key Set Temperature and time FAN Key Circular Select Low Medium High Speed AUTO Switch Temperature Between Celsius And Fahrenheit Spare Key MODE Key Circ...
Страница 17: ...F Press the Power key again unit turns off and the plenum will display nothing AUTO mode Press the MODE key select the mode Fan volume will set automatically and it is adjustable Press FAN button to g...
Страница 18: ...y select the DRY mode the air volume is un adjustable to stay at minimum level and the plenum will display and the set temperature Make sure to adjust the setting temperature at least 1 lower than roo...
Страница 19: ...key the LED light turn on Press the LED key again the LED light turn off TIMER ON Press the TIMER ON key the ON TIME will flash Press up or down arrow key to set desired time for TIMER ON Press the SE...
Страница 20: ...s the SLEEP key to display sleep icon on the remote screen when in cooling mode under this function after 1 hour the temperature will automatically increase 1 degree and after 2 hours it will raise 2...
Страница 21: ...air in COOL mode and hot air in HEAT mode When the unit is on press the DISPLAY key on the remote control to display on the plenum The air conditioner features power cut memory and automatic resets a...
Страница 22: ...gerant charged R407C 850g Rated cooling capacity W 3600 Rated heating capacity W 3600 Input power for cooling W 1150 Input power for heating W 1100 Rated current for cooling A 5 2 Rated current for he...
Страница 23: ...display A Remove the filters from the plenum and wash in warm water with a touch of detergent B Click the cancel button for 3 seconds to reset the display indicator The refrigerant level may drop ove...
Страница 24: ...r conditioner is operated regularly to ensure good performance In the case of a caravan that will not be used regularly then the unit should be operated for 20 30 minutes every 6 months In the event t...
Страница 25: ...ttery of remote control is good Check if the remote control is turned on off Check if the power has good connection from roof unit to plenum 2 Cooling not good Select correct cooling mode and confirm...
Страница 26: ...munication fault E1 Room temperature sensor faulty Fault in connection to room temperature sensor or other damage E2 Indoor coil temperature sensor faulty Fault in connection to indoor coil temperatur...
Страница 27: ...26 HeroCamper Lammefjordsvej 5 6715 Esbjerg N Denmark Phone 45 7022 5840 sales herocamper com www herocamper com VAT No DK 40193189 Warranty The unit comes with a 2 year warranty...
Страница 28: ...5 6715 Esbjerg N Denmark Phone 45 7022 5840 sales herocamper com www herocamper com VAT No DK 40193189 1 Einf hrung 2 Montageanleitung 3 Betriebsanleitung 4 Spezifikationsparameter 5 Produktwartung 6...
Страница 29: ...28 HeroCamper Lammefjordsvej 5 6715 Esbjerg N Denmark Phone 45 7022 5840 sales herocamper com www herocamper com VAT No DK 40193189 Einf hrung...
Страница 30: ...m VAT No DK 40193189 Gar teaufbau Hauptkomponenten 1 Haupteinheit der Klimaanlage 1 2 Verst rkte Dachst tze 1 3 Montagerahmen 1 4 Verteilereinheit 1 Verbindungskomponenten 10 M8 x 110 mm Bolzen 4 11 F...
Страница 31: ...lage zu w hlen Einige Tipps zur Reduzierung der W rmebelastung und zur Leistungssteigerung Parken Sie das Wohnmobil an einem schattigen Ort um direkte Sonneneinstrahlung zu vermeiden schlie en Sie all...
Страница 32: ...e Luft aus dem Auslass trifft Achten Sie in diesem Fall auf folgende Ma nahmen Schlie en Sie alle T ren Oberlichter Fenster und ziehen Sie die Vorh nge zu um das Eindringen warmer feuchter Luft zu ver...
Страница 33: ...und kann unter bestimmten Umst nden einen Generator ben tigen Zu den Anforderungen an den Wechselrichtergenerator geh ren effiziente Stromquelle stabiler Strom Sinus Ausgangswelle die den Anforderunge...
Страница 34: ...mm maximale Dicke des Dachs 55 mm Montageanleitung Lesen und verstehen Sie diese Anleitung vor der Installation vollst ndig Beachten Sie w hrend der Montage die Verkabelungsvorschriften F gen Sie w hr...
Страница 35: ...in der Mitte des Dachs installiert werden Es wird empfohlen einen Abstand von mindestens 100 mm um die obere Einheit zu haben Vergewissern Sie sich vor der Montage dass in der Decke ein geeigneter Ra...
Страница 36: ...hren Wohnmobilhersteller wenn keine Klimaanlage vorgesehen ist und eine Montage ffnung geschnitten werden muss Schneiden Sie ein 400 x 400 Loch und verst rken Sie es mit einem entsprechend dimensionie...
Страница 37: ...Entfernen Sie die Dachst tze aus dem Karton und achten Sie auf die korrekte Ausrichtung Tragen Sie eine durchgehende Linie Dichtungsmasse auf der R ckseite der St tze auf und legen Sie sie in den Aus...
Страница 38: ...VAT No DK 40193189 Installation Fortsetzung Installations und Platzierungshinweise Um die Bel ftung und den Luftstrom optimal zu nutzen stellen Sie sicher dass da A C Produkt so installiert wird dass...
Страница 39: ...e Verteiler Montagehalterung durch die Decke an die Basis Achten Sie darauf dass der C Haken mit der entsprechenden C Fl che auf der Basis bereinstimmt Zum Schluss befestigen 4x M8 Schrauben Unterlegs...
Страница 40: ...limaanlage gem den Anweisungen in dieser Anleitung montiert wurde Falsche Montagemethoden oder nderungen am Produkt k nnen zu Sch den am Produkt oder zu Verletzungen des Benutzers f hren 5 Vergewisser...
Страница 41: ...t darf nicht von Personen einschlie lich Kindern mit eingeschr nkter k rperlicher sensorischer oder geistiger Leistungsf higkeit oder mangelnder Erfahrung und Kenntnis verwendet werden es sei denn si...
Страница 42: ...And Off Up Key Set Temperature and time Down Key Set Temperature and time FAN Key Circular Select Low Medium High Speed AUTO Switch Temperature Between Celsius And Fahrenheit Spare Key MODE Key Circu...
Страница 43: ...s Ger t und das Display schalten sich aus AUTO Modus Dr cken Sie die MODE Taste und w hlen Sie Das Ventilatorvolumen wird automatisch eingestellt und ist einstellbar Dr cken Sie die FAN Taste um das e...
Страница 44: ...ken Sie die FAN Taste um den Ventilator einzustellen Das Display zeigt und die eingestellte Temperatur an TROCKNEN Modus Dr cken Sie die MODE Taste und w hlen Sie Das Volumen ist auf das Minimum einge...
Страница 45: ...emperatureinheit ndern Dr cken Sie die C F Taste um die Temperatureinheit zu ndern LED ein ausschalten Dr cken Sie die LED Taste um die LEDs ein auszuschalten TIMER AN Dr cken Sie die TIMER ON Taste u...
Страница 46: ...die gew nschte Zeit einzustellen SLEEP Modus Dr cken Sie die SLEEP Taste um den Sleep Modus einzuschalten In diesem Modus wird die Temperatur nach einer Stunde um 1 C erh ht und nach zwei Stunden um...
Страница 47: ...EIZ Modus warme Luft Dr cken Sie wenn das Ger t eingeschaltet ist die Taste DISPLAY auf der Fernbedienung um das Display am Verteiler einzuschalten Die Klimaanlage verf gt ber einen Speicher f r Strom...
Страница 48: ...dern Modell K3600 50 Stromzufuhr 220 240V 50Hz K ltemittelbef llung R407C 850g Nennleistung K hlung W 3600 Nennleistung Heizung W 3600 Eingangsleistung K hlung W 1150 Eingangsleistung Heizung W 1100 N...
Страница 49: ...igt C Entfernen Sie die Filter aus dem Verteiler und waschen Sie sie mit etwas Reinigungsmittel in warmem Wasser D Dr cken Sie die Abbruchtaste f r 3 Sekunden um die Anzeige zur ckzusetzen Der K hlmit...
Страница 50: ...m ig zu betreiben um eine gute Leistung zu gew hrleisten Im Falle eines Wohnmobils das nicht regelm ig benutzt wird sollte das Ger t alle 6 Monate f r 20 30 Minuten betrieben werden F r den Fall dass...
Страница 51: ...ng vom Dachger t zum Verteiler besteht 2 Keine gute K hlung W hlen Sie den richtigen K hlmodus und vergewissern Sie sich dass angezeigt wird Die eingestellte Temperatur sollte niedriger sein als die R...
Страница 52: ...em Temperatursensor oder andere Sch den E3 Au enraumspulen Temperatursensor Fehler in Verbindung mit dem Temperatursensor oder andere Sch den E4 Unzureichendes K ltemittel Kapillarrohrbruch f hrt zu K...
Страница 53: ...52 HeroCamper Lammefjordsvej 5 6715 Esbjerg N Denmark Phone 45 7022 5840 sales herocamper com www herocamper com VAT No DK 40193189 Garantie Das Ger t hat eine 2 j hrige Garantie nur auf Teile...