42
8
8))
Display shows “SOLUTION ADDED?” “YES NO”. Fill vat with hot water to 1 in.
(25 mm) above the top fill line, add 4 oz. (0.12 liters) of open fryer cleaner, and
mix thoroughly. Press “✓” button and display shows “START CLEAN” “YES
NO”.
9
9))
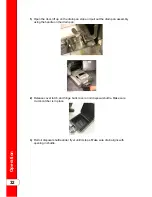
Remove the disposal shuttle and empty filter drain pan of internal filtering
components and move components to a sink to be cleaned. Return empty filter
drain pan and cover to fryer, making sure it is pushed securely into place and
the latch fully engaged.
1
10
0))
Press “✓” button, display shows “CLEANING” and a count-down timer. Heat
regulates to 195°F (91°C) for this step for one hour. Add water as needed during
cleaning process to keep solution 1 in. (25 mm) above the top fill line. To stop
cleaning cycle early, press “X” button; display shows “QUIT CLEANING” “YES
NO”. Press “✓” button to cancel the rest of countdown time and proceed to the
rinse steps.
1
11
1))
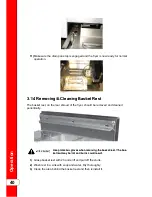
Using a 1/2 gal. (2 liter) stainless steel pitcher, remove the solution from the vat,
pouring it into a heat-resistant pail for disposal. Any remaining solution can be
drained into the drain pan for disposal.
1
12
2))
Using the open fryer brush (never use steel wool), scrub the inside of the vat. At
the end of the one hour, display shows “CLN DONE” and beeps. Press “✓”
button and display shows “REMOVE SOLUTION FROM VAT”.
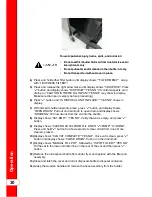
T
To
o a
avvo
oiid
d b
bu
urrn
nss w
wh
he
en
n p
po
ou
urriin
ng
g h
ho
ott sso
ollu
uttiio
on
n,, w
we
ea
arr g
gllo
ovve
ess a
an
nd
d p
prro
o--
tte
eccttiivve
e g
ge
ea
arr a
an
nd
d tta
akke
e cca
arre
e tto
o a
avvo
oiid
d ssp
plla
assh
hiin
ng
g..
1
13
3))
Return empty filter drain pan to fryer and press “✓” button. Display then shows
“VAT EMTY” “YES NO”.
1
14
4))
Once vat is empty, press “✓” button and display shows “SCRUB VAT
COMPLETE” “YES NO”. Use brush and scour pad to clean vat, if needed. The
drain will open automatically.
NOTICE:
• Do not use steel wool, other abrasive cleaners, or cleaners/sanitizers containing
chlorine, bromine, iodine, or ammonia chemicals as these will deteriorate the
stainless steel material and shorten the life of the unit.
• Do not use a water jet (pressure sprayer) to clean unit or component damage could
result.
1
15
5))
Once vat is clean, press “✓” button and display shows “RINSE VAT”.
1
16
6))
Pour clean water and approximately 8 oz. (0.24 liters) of distilled vinegar
solution into vat to rinse vat and allow rinse water to drain into drain pan. Rinse
at least 3 times, but be careful not to overfill the drain pan. Display now shows
“RINSE COMPLETE” “YES NO”.
1
17
7))
Once vat is completely rinsed, press “✓” button and display shows “CLEAR
SOLUTION FROM OIL LINES” “✓=PUMP” “X=DONE”. To make sure no
cleaning solution remains in the oil lines, press and hold “✓” button for a few
seconds. Once lines are clear, press “X” button and display shows VAT DRY?”
“YES NO”. Press “✓” button and the drain closes.
Содержание Wendy's Evolution Elite EEG-251
Страница 2: ......
Страница 5: ...Contents iii...
Страница 14: ...Introduction 2...
Страница 19: ...Installation 7 Figure 2 1 Flexible Gas Line Cable Restraint Installation...
Страница 22: ...Figure 2 2 1 Well Dimensions Figure 2 3 2 Well Dimensions Installation 10...
Страница 23: ...Figure 2 4 3 Well Dimensions Figure 2 5 4 Well Dimensions Installation 11...
Страница 24: ...Installation 12...
Страница 51: ...Operation 37...
Страница 62: ...Operation 48...
Страница 68: ...Information Mode 54...
Страница 72: ...Product Program Mode 58...
Страница 87: ...Troubleshooting 73...
Страница 88: ...Troubleshooting 74...
Страница 89: ...blank page...


