background image

Connecting

Nexscan F 4100/F 4200 – Operation

2–1

ABC

2 Connecting

Installation

After you have unpacked and moved your 
Nexscan F 4100/F 4200 to its intended position, it 
must be installed.

The following steps are required:

0

Connecting the Nexscan F 4100/F 4200 to the 
workstation.

0

Connecting the Nexscan F 4100/F 4200 to the 
power supply.

0

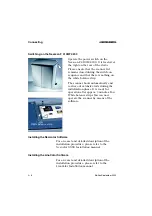
Switching on the Nexscan F 4100/F 4200.

0

Installing the software.

0

Install the calibration data.

Note: Any additional information on installation 
can be obtained via the following Internet 
address: 

http://www.heidelberg.com/


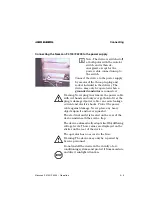
Connecting the Nexscan F 4100/F 4200 to the workstation

Warning: The connection cable must be attached 
in a voltage-free state. Only connect the power 
cables 

after

 connecting the connection cables. 

This protects you against fatal electric shocks in 
the case of a short circuit on one of the devices 
and it protects the electronics system against 
failure caused by voltage impulses during 
potential differences.

Attention: Screened data cables with screened 
plugs must be used, to adhere to radio 
interference suppression regulations. Only use 
connection cables and adapters approved by 
Heidelberg.

2

3

3

1

Содержание Nexscan F 4100

Страница 1: ...ABC Nexscan F 4100 F 4200 Operation Nexscan F 4100 F 4200 Operation Edition September 2000 Order No 05573483 ...

Страница 2: ... trademarks not expressly mentioned in this manual are trademarks or registered trademarks of the corresponding manufacturers and fall within the regulations regarding the protection of trademarks Important notice We are dedicated to improving and enhancing our products For this reason we reserve the right to make changes without notice Heidelberger Druckmaschinen AG assumes no responsibility for ...

Страница 3: ...Online XII 1 Unpacking and Installing Dear Customer 1 1 Power connection 1 1 Scope of Delivery 1 1 Unpacking and Installing 1 2 2 Connecting Installation 2 1 Connecting the Nexscan F 4100 F 4200 to the workstation 2 1 Connecting the Nexscan F 4100 F 4200 to the power supply 2 3 Switching on the Nexscan F 4100 F 4200 2 6 Installing the Newcolor Software 2 6 Installing the LinoColor Software 2 6 Ins...

Страница 4: ...the Tray 4 2 Positioning the Originals 4 2 On the Glass Plate in the Device 4 2 On the Universal Tray 4 3 Securing the Originals 4 4 Inserting the Tray 4 4 Close Scanner Lid 4 5 Scanning Process 4 6 Scanning Three Dimensional Objects 4 8 Placing Objects 4 8 Selecting Reflection Scanning Mode 4 8 Selecting the Quality 4 9 Mounting with Oil Film Cleaner or Gel 4 9 Mounting Procedure 4 10 Mounting Se...

Страница 5: ...Change for Transparency Scanning 6 5 Lamp Change for the Illumination of Originals 6 7 Replacing the Glass Plate 6 8 Cleaning the Nexscan F 4100 F 4200 6 9 Removing Dust in the Lid 6 10 Cleaning the Glass Surface Universal Tray 6 11 Checking the Cleanliness of the Tray 6 11 Cleaning Preparation 6 11 Liquids 6 13 Dry Finger Prints Adhesive Tape Residue Smudges Except for Acetone Rings Refer to Clea...

Страница 6: ...echnical Data and Accessories Technical Data 7 1 Accessories 7 2 Consumables 7 3 Minimum Configuration for the PC 7 4 Minimum Configuration for the Power Macintosh 7 4 Scanner System 7 5 Scanner Signal Resolutions 7 5 Type of Original 7 5 Power connection 7 6 Fuses 7 6 Light Conditions 7 6 Device Emissions 7 6 Standards 7 7 General 7 7 Mechanical Safety 7 7 Electrical Safety 7 7 Electromagnetic co...

Страница 7: ... Materials 7 10 Dismantling 7 11 Pollutants 7 13 Materials Plastics 7 14 Dismantling 1 7 15 Dismantling 2 7 16 Dismantling 3 7 17 EU Declaration of Conformity Safety Labels 8 Quality Assurance Quality Assurance 8 1 Central Call Desk 8 1 Problem Report for Customers and Service Technicians 8 1 Index ...

Страница 8: ......

Страница 9: ...or liquids on the unit The ventilation outlets must be kept clear at all times General Environmental conditions must be observed when setting up the Nexscan F 4100 F 4200 Warning Unauthorized opening of the unit s housing and improper repairs not expressly described in the operating instructions can lead to considerable danger for the user Servicing work may only be performed by authorized special...

Страница 10: ...r Installation Newcopix User s Guide Reference Newcopix Installation 0 Online Helps Reference For Linocolor 0 Printed documentation Linocolor Installation Linocolor Introduction incl Color Images Linocolor User s Guide Nexscan F 4100 F 4200 Copix Operation 0 After installing LinoColor you will find further documentation in the documentation folder on your computer such as Linocolor Reference GeoAs...

Страница 11: ... in blue on the screen and are underlined Example See Abschnitt Conventions Used in This Manual 0 Italics are used to indicate menus names of functions hardware conditions switch settings and system messages Example Move the switch to off 0 Menus functions and sub functions are separated with by Example Choose File Open 0 A plus sign is used to indicate that several keys have to be pressed at the ...

Страница 12: ...s which must be fulfilled before the steps which follow can be performed Influence of Magnetic Fields on the Monitors Strong magnetic fields may influence your monitor screen for example they might make the edges of the screen unsteady or images flicker This could be caused by the 50 Hz magnetic field coming from the power cables routed along your floors or in the wall The following corrective mea...

Страница 13: ...these to us at the following e mail address documentation prepress de heidelberg com It would help us if you could write your comments in English or German Important Please do not use this e mail address for improvement suggestions for the product Nexscan F 4100 F 4200 only for tips corrections criticism and suggestions with regard to the relevant documentation If you have comments which you would...

Страница 14: ... XII Edition September 2000 ABC HEIDELBERG Online Do you have questions concerning our products Do you want to improve your workflows Pay us a visit at our Internet home page You will find us at http www heidelberg com ...

Страница 15: ...lowing unpacking and installation instructions once you have removed the cardboard box or foil Power connection Read the chapter on unpacking and installing be fore you connect the device to the power source Scope of Delivery The scope of delivery for your Nexscan F 4100 F 4200 comprises the following parts 0 1 SCSI cable 0 3 Power cable 0 1 Calibration CD 0 1 Universal tray 0 1 Mounting rail 0 1 ...

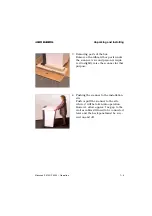
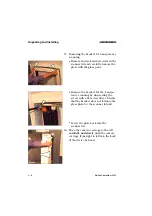
Страница 16: ...in the vicinity of air conditioning systems and protect it from moisture and direct sunlight So far you have proceeded according to the unpacking instructions stuck to the outside of the box You have taken this documentation out of the accessories box Further unpacking and installation procedure 1 Removing the plastic foil Remove the plastic foil that surrounds the scanner 2 Cutting open the box C...

Страница 17: ...scanner A second person is requi red to slightly raise the scanner for this purpose 4 Pushing the scanner to the installation site Push or pull the scanner to the site where it will be taken into operation However allow approx 1 m gap to the wall as cables still need to be connected later and the back panel must be scre wed on and off ...

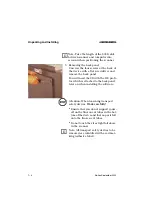
Страница 18: ...l You will need the CD with the ICC profi les which is attached to the back panel later on when installing the software Attention When loosening transport safety devices Work carefully 0 Ensure that you do not support yours elf on the fluorescent tubes in the bot tom of the device and that no parts fall onto the fluorescent tubes 0 Do not touch the stray light foil above in the scanner Note All tr...

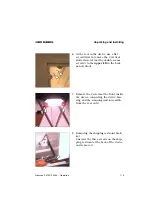
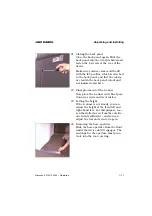
Страница 19: ... screws not the double seams screws to the upper left in the back panel cutout 7 Remove the 2 screws at the front inside the device connecting the device hou sing and the scanning unit accessible from the rear only 8 Removing the shipping restraint brak ket Unscrew the three screws on the ship ping restraint at the back of the device and remove it ...

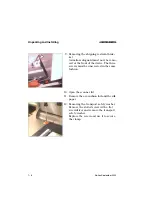
Страница 20: ... ved at the front of the device The three screws must be unscrewed in the same fashion 10 Open the scanner lid 11 Remove the air cushion foil and the silk paper 12 Removing the transport safety washer Remove the slotted screw with a flat screwdriver and remove the transport safety washer Replace the screw and use it to secure the clamp ...

Страница 21: ...front left glass plate with a flat screwdriver Remove the clamp element 0 Unscrew and remove the now visible screw 0 Replace the clamp element and fasten it with the screw Ensure that you have inserted the clamp element the right way round so that the glass pane does not break 14 Removing the clamping pads Remove the two clamping pads for the knurled screws ...

Страница 22: ... with the glass pane 0 Remove the bracket for the transpa rency scanning by unscrewing the screw with a flat screwdriver Ensure that the bracket does not fall onto the glass plate for the scanner lid unit 0 Screw the plate back into the scanner lid 16 Move the camera carriage to the left carefully and slowly push the camera carriage from right to left into the back of the device by hand ...

Страница 23: ...e Note The camera carriage can not be pushed back again by hand It must can be left in this position The software will move the carriage back to its required position 17 Removing the restraining pins Remove the screws on the shipping res traints with a flat screwdriver Now pull out the long screws and the pins 1 2 ...

Страница 24: ...ide 19 Connect the power cable and the SCSI cable to the lower back of the device 20 Setting the SCSI address Set the correct SCSI address at the lower back in the device On delivery the scanner is set to SCSI address num ber 5 If this address is occupied select another number between 1 and 7 Please note that if an internal CD ROM drive is connected in the computer address 3 can be used for this d...

Страница 25: ...utout and not jammed anywhere 22 Final placement of the scanner Now place the scanner in its final posi tion on a secure and level surface 23 Setting the height If the scanner is not steady you can adjust the height of the front left and right hand feet For this purpose loo sen the slotted screw from the outside one turn is sufficient and you can adjust the foot and secure it again 24 Removing the...

Страница 26: ...September 2000 ABC Note Keep all transport safety devices in a safe place so that they can be re used if the device needs to be transpor ted again Attention Transportation without transport safety devices can cause damage to the device 2 1 ...

Страница 27: ...tion can be obtained via the following Internet address http www heidelberg com Connecting the Nexscan F 4100 F 4200 to the workstation Warning The connection cable must be attached in a voltage free state Only connect the power cables after connecting the connection cables This protects you against fatal electric shocks in the case of a short circuit on one of the devices and it protects the elec...

Страница 28: ...to any other SCSI device which has an SCSI connection by means of the connection cable observe the length of the cable when setting up the system Connect the SCSI cable for the Nexscan F 4100 F 4200 to the SCSI port of your computer If in addition to the Nexscan F 4100 F 4200 and the operating unit other SCSI devices are connected to the SCSI bus the Nexscan F 4100 F 4200 must always be the last l...

Страница 29: ...le with wet hands and only ever get hold of it at the plug A damaged power cable can cause leakage current and electric shocks Protect the power cable against damage Never place any heavy objects upon it and never squash it The electrical outlet is located on the rear of the device underneath the service flap The device automatically adapts itself for differing voltage levels These values are disp...

Страница 30: ...e of the power cables provided appropriate to the supply available to connect the device to the power supply The local national regulations must be observed when connecting the device using power cables which were not provided by Heidelberg Prepress or when using connector adapters Cable types used in USA and Canada must correspond to the type SJT or better Attention Notes regarding the power cabl...

Страница 31: ...V 10A 100 V JIS C3102 UL 817 CSA C22 2 No 21 JIS C3102 UL Listed CSSA Certified Type SJT 18AWG Europe 250V 10 16A 230 V IEC 83 HAR H05VV F United Kingdom 250V 10 16A 220 240 V B S 1363 IEC 83 IEC 127 HAR H05VV F Australia 240V 10A 240 250 V A S C112 HAR H05VV F North America 250V 10A 240 V ANSI C 73 11 NEMA 6 15 P IEC 83 UL 198 6 UL Listed CSA Certified Type SJT 18AWG Japan 250V 10A 200 V JIS C 31...

Страница 32: ...ts automatically and carries out extensive tests during the initialization phase It is ready for operation after approx 3 minutes You White balance strips You can now operate the scanner by means of the software Installing the Newcolor Software For an exact and detailed description of the installation procedure please refer to the Newcolor XXXX Installation manual Installing the LinoColor Software...

Страница 33: ...Linocolor it is attached to the back panel of the scanner Attention Keep the CD in a safe place For Newcolor The CD is requested during the installation of Newcolor XXXX and the ICC profiles are transferred into the program You can create new ICC profiles yourself by means of the program For Linocolor If you wish to load the ICC profiles for your scanner click on ICC Profiles for Nexscan F4000 fro...

Страница 34: ......

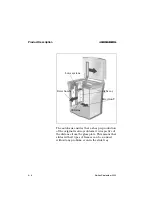
Страница 35: ...Product Description Nexscan F 4100 F 4200 Operation 3 1 ABC 3 Product Description General view Nexscan F 4100 F 4200 Power switch Scanner lid Pilot Lamp Back panel Gliding feet behind base aperture ...

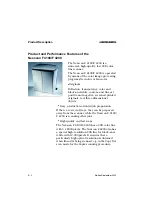
Страница 36: ...nd negative screened printed originals real three dimensional objects 0 Easy production oriented job preparation If there are several trays they can be prepared away from the scanner while the Nexscan F 4100 F 4200 is scanning other jobs 0 High quality and fast scans The Nexscan F 4100 F 4200 has a CCD color line with 3 x 8000 pixels The Nexscan F 4200 also has a special high resolution CCD line f...

Страница 37: ... the user are calculated precisely The digital scan processor can calculate scales from 20 up to 2500 0 Faster post editing through precise image rotation by the software 0 The Nexscan F 4100 F 4200is able to process jobs quickly due to the JobAssistant batch program 0 Color format conversions and on the fly calculation of color corrections during scanning 0 Automatic focus 0 Automatic selection o...

Страница 38: ...an archived screened originals or to scan finished lithos for a digital output The digital data is used for subsequent filmless post editing e g in a layout program or on a computer to plate production line Overall configuration The system environment consists of an operating unit operating software and the output devices For ease of operation work with 2 monitors one to display the software user ...

Страница 39: ...e original is also projected directly onto the lens and from there onto the CCD lines 0 xyVariLens Optical System The X Y scanning principle ensures a high resolution across the entire scanning area The originals can therefore be positioned anywhere upon the scanning surface The lens system and the CCD lines are mounted on sliding rails and can be positioned as required In this way a lens is produ...

Страница 40: ...s that a sharp reproduction of the original is always obtained irrespective of the distance from the glass plate This means that slides with all types of frames can be scanned without any problem even in the slide tray Direction X Direction Y CCD line Light ray Lens system ...

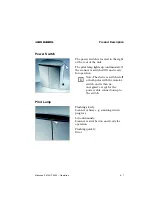
Страница 41: ...ously if the scanner is switched ON and ready for operation Note The device is switched off at both poles with the isolator switch and is then de energized except for the power cable connection up to the switch Pilot Lamp Flashing slowly Scanner is busy e g scanning run in progress Lit continuously Scanner is switched on and ready for operation Flashing quickly Error 2 ...

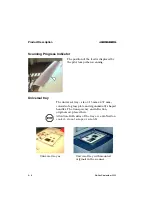
Страница 42: ...hen scanning Universal tray The universal tray size 315 mm x 457 mm consists of a glass plate and ergonomically shaped handles The transparency and reflection originals are placed here Attention Both sides of the tray are anti Newton coated do not scrape or scratch 1 Universal tray as Universal tray with mounted originals in the scanner ...

Страница 43: ...canner in 2 restraining pins It helps to fix the universal tray Copix films the slide tray the passepartout Scanning Area Formats Reflection 315 mm x 457 mm 12 4 x 18 Transparency 315 mm x 457 mm 12 4 x 18 Screens 24 to 80 screen Scales Scale 20 to 2500 Line art 50 to 2500 B W contone 20 to 2500 Color 20 to 2500 ...

Страница 44: ...ng mode Size of original Scale Screen Quality chosen Capacity of the workstation Illumination of originals The scanning area is illuminated from below to enable a visual inspection of the mounted transparency originals Through this the mounting procedure in the unit is simplified as well The originals are automatically illuminated when the scanner is switched on ...

Страница 45: ...y insertion 7 Original is Flat 8 Close Scanner Lid 9 Perform the scan If you wish to obtain precise geometric accuracy for both pre scan and fine scan then you should notremovetheuniversaltraybetweenthesetworuns Preparation for Production 0 Operate the on off switch on the device 0 Wait for the warm up period of approx 3 minutes The pilot lamp is illuminated constantly and indicates that the devic...

Страница 46: ...white balance can not be carried out On the Glass Plate in the Device 0 Transparency Open the scanner lid The originals can be placed as needed on the glass plate The film coating must be against the glass plate profile view Attention Mounting originals with liquids such as oil gel or film cleaner may only be carried out outside the device on the universal tray 0 Reflection Place the original with...

Страница 47: ...the scanner Both sides of the tray have an anti Newton coating do not scrape or scratch TIP Place the tray onto a screen film and align the originals according to this film 0 Reflection Take the tray out of the scanner and rotate it Now mount the originals with the motif facing upwards and the reverse facing the glass plate on the tray The originals can be positioned anywhere Now place the tray th...

Страница 48: ...ing a mirroring in the software Such mirroring does not cause any loss in quality To obtain the bestpossible contrast and the highest density you should use passepartouts which cover up the parts of the image outside the scanning area when carrying out transparency scanning The Passepartout frames should be at least 25 mm wide Inserting the Tray Insert the mounting rail into the scanner guide pins...

Страница 49: ...Working with the Nexscan F 4100 F 4200 Nexscan F 4100 F 4200 Operation 4 5 ABC Close Scanner Lid Close the scanner lid and make all further settings in the software ...

Страница 50: ...erence For Linocolor Note The most important settings for the First fast scan can be found in the documentation 0 LinoColor User s Guide chapter 2 For further information refer to 0 Linocolor Reference For information on batch processing scheduling jobs in the print queue etc refer to 0 JobAssistant Operation Both latter mentioned documents are available on your target volume in the documentation ...

Страница 51: ...efer to the respective documentation Note The Nexscan F 4100 F 4200 is a high precision device which reproduces originals with a resolution of up to 5 1000 of a mm For this reason you should not mess around with the unit during the scanning sequence knock against it place objects on it or remove objects 2 ...

Страница 52: ...nic parts fabric carpet or wallpaper patterns etc Do not scan wet or dusty objects The objects may not be heavier than 5 kg Placing Objects Place the objects on the glass surface with the visible front side facing downwards The feed is very smooth therefore you do not need to secure the objects Prepare a background to cover the objects with Recommendation Cardboard or fabric which match the color ...

Страница 53: ...which should be retouched Mounting with Oil Film Cleaner or Gel Attention Mounting originals with liquids such as oil gel or film cleaner must only be carried out outside the device on the universal tray If the originals are damaged or if they are of poor quality use a Film cleaner or gel This makes scratches film damage and other flaws invisible We especially recommend the use of Film cleaner as ...

Страница 54: ...Place the original in such a way that it can later be completely covered with foil 0 Apply some Film cleaner oil or gel to the glass plate The amount used depends on the size of the original experimental value 0 Fold the original onto the glass plate screened with Film cleaner oil or gel so that the film layer comes in contact with the screened plate 0 Lightly press the original down onto the drop...

Страница 55: ...el to the original The amount used depends on the size of the original experimental value 0 Fold and press the mounting foil onto the original 0 Remove any air bubbles by smoothing over the original with your fingers from the middle to the edges By doing this you spread the liquid 0 Insert the tray into the scanner ...

Страница 56: ...ill find the selection options in the Scan tray window under Direct Select 0 Direct if you want to mount directly into the scanner and not use the tray 0 Standard if you want to work with the Universal tray 0 Slide if you want to work with the slide tray 0 Passepartout if you want to work with a passepartout ...

Страница 57: ...ed In the scanning area you can select the different sorts of mounting with which you would like to scan under Mounting Select 0 Direct if you want to mount directly into the scanner and not use the tray 0 Universal if you want to work with the Universal tray 0 Copix if you want to redigitalize separation films in Copix mode 0 Slide if you want to work with the slide tray 0 Passepartout if you wan...

Страница 58: ...g normal originals Tips to avoid the message 1 The message also appears when switching between transparency and reflection illumination Unnecessary switching over of the illumination modes should therefore be avoided Process all transparency scans first and then the reflection scans or vice versa 2 As reflection lamps switch off quicker than transparency lamps the reflection scans should be proces...

Страница 59: ...00 F 4200 Operation 4 15 ABC Special scanner functions Reloading the Scanner Software for Newcolor This procedure must be performed e g when you have changed scanner software from Linocolor to Newcolor Select the menu item Scan Special scanner functions ...

Страница 60: ...Working with the Nexscan F 4100 F 4200 4 16 Edition September 2000 ABC Reload scanner software Click Reload scanner software The following message appears Click OK ...

Страница 61: ...not have to be repeated It is possible that a base level adjustment becomes necessary as part of an installation procedure or that a particular error message at the monitor requires it In these cases proceed as follows Remove the scanning tray from the Scanner Clean the glass surface It must be absolutely clean especially the white balance strip Select the menu item Scan Special scanner functions ...

Страница 62: ...Working with the Nexscan F 4100 F 4200 4 18 Edition September 2000 ABC Base level adjust Click on Base level adjust The following message appears Click OK ...

Страница 63: ...evel adjustment becomes necessary as part of an installation procedure or that a particular error message at the monitor requires it In these cases proceed as follows Remove the scanning tray from the Scanner Clean the glass surface It must be absolutely clean especially the white balance strip You have selected Import Source Nexscan F4000 menu in Linocolor Select the menu item Special scanner fun...

Страница 64: ...h the Nexscan F 4100 F 4200 4 20 Edition September 2000 ABC Click on Base level adjustment Click OK The adjustment procedure takes about 60 minutes The Nexscan F 4100 F 4200 is automatically initialized after this ...

Страница 65: ...ere may be different reasons for having to reset the scanner there is an error message the scanner is not working a new operating software has to be loaded In these cases proceed as follows You have selected Import Source Nexscan F4000 menu in Linocolor Select the menu item Special scanner functions in the Import menu ...

Страница 66: ...Working with the Nexscan F 4100 F 4200 4 22 Edition September 2000 ABC The following dialog window appears Click Boot Scanner Finally click OK The scanner is reset and initialized ...

Страница 67: ...for Linocolor This function is essential if you should have any problems with a Linocolor version and want to use another version Proceed as follows You have selected the other version in the Import Source Nexscan F4000 menu in Linocolor Select the menu item Special scanner functions in the Import menu ...

Страница 68: ...Working with the Nexscan F 4100 F 4200 4 24 Edition September 2000 ABC The following dialog window appears Click Update Scanner Click OK The scanner program is updated ...

Страница 69: ... must be placed into the dowel pins for the mounting rail so that the white balance strips are not covered The scan software automatically recognizes in which recess the slides are located and if they have been inserted in portrait or landscape format For Newcolor 0 Prior to scanning click Job Preparation and adjust the settings under Scan Setup that you want to apply to all inserted slides e g na...

Страница 70: ...are created and it is automatically detected whether the slides have been inserted in landscape or portrait format 0 You can now select the frames from which you want to create low resolution or high resolution scans If you are performing low resolution scans you may be able to perform further settings for the subsequent high resolution scans Then perform the high resolution scans 0 Another possib...

Страница 71: ... change the name e g for a certain customer This should be done before scanning If the count for a certain name does not start at 01 a frame of this name and number already exists This can also be in a different scanner tray presentation e g not in Slide but in Universal More information about name allocation can be found in the Linocolor documentation 0 You can perform different scanning options ...

Страница 72: ...ct the Save after every fine scan option under Edit Presettings However if you select Import Fine Scan as the fine scan is also performed and saved but not displayed on the monitor 0 Another possibility is to process the jobs by means of JobAssistant To do this you perform an overview scan and set the necessary parameters in Linocolor Then select all jobs by pressing Apple key a and schedule them ...

Страница 73: ...are used for the simple mounting of standard originals The use of passepartouts avoids stray light They consist of black foil with punched cut outs 0 There are 5 different passepartouts Universal passepartout 24 x 36 mm 54 cut outs 6 cm x 6 cm 20 cut outs 6 cm x 7 cm 15 cut outs 4 x 5 6 cut outs ...

Страница 74: ... the slide tray refer to Chapter 4 Register Pin Row The register pin row is used for the true to register mounting of Copix originals color separations It is secured to the light table and the register strips can subsequently be inserted and the separation film glued into place The register pin row does not need to be used for punched films ...

Страница 75: ...Copix originals color separations It is inserted into the register strip using the Bacher punching system the original must then be glued onto the strip The strip with the original is subsequently inserted into the scanner Copix Tray The Copix tray is used to weight the originals in the scanner so that they lie flat on the glass surface ...

Страница 76: ......

Страница 77: ...edures described in the operating instructions under all circumstances Warning The unauthorized opening of housing parts not expressly described in the operating instructions and improper repairs can lead to considerable danger for the user Service work may only be carried out by persons authorized by Heidelberg The respective accident prevention regulations must be observed at all times 3 ...

Страница 78: ...te sufficiently or are defective the corresponding fluorescent lamp must be replaced It is imperative that you only use clean fluorescent lamps If necessary clean the lamp before installation Finger prints should likewise be avoided as the grease can reduce the length of operation 11 watt fluorescent lamps are used for the illumination of reflection or transparent originals in the Nexscan F 4100 F...

Страница 79: ... for the glass plate in the scanner Remove the three mounting posts in which the screws are located The mounting post at the rear left does not have to be loosened 4 Remove the glass plate Carefully remove the glass plate by putting your fingers into the cutouts for the front mounting post and raising the glass plate 5 Remove the black protective profile for the fluorescent lamps To do this use yo...

Страница 80: ...ation 7 Place the new fluorescent lamp into the mounting post in such a way that it makes good contact 8 Latch the black protective profile into the lamp carrier 9 Carefully reinsert the glass pane Carefully slide the pane against the stop pins to the rear and left Screw the 3 mounting posts into place When doing so make absolutely certain that the mounting posts are inserted the right way round t...

Страница 81: ...g The ends of the fluorescent lamps can heat up to 100 C when switched on 2 Open the scanner lid 3 Loosen both knurled screws in the cover 4 Carefully fold the plate with the glass pane downwards 5 Remove the two slotted screws for the black reflection profile of the fluorescent lamps Remove the reflection profile The fluorescent lamps are now accessible 3 ...

Страница 82: ...f its mounting post Note It is imperative that you only use clean fluorescent lamps If necessary clean the lamp before installation Finger prints should likewise be avoided as the grease can reduce the length of operation 7 Place the new fluorescent lamp into the mounting post in such a way that it makes good contact 8 Screw the reflection profile back into place and secure it in the inner part of...

Страница 83: ...e rear of the device 3 Remove the back panel 4 Lift the defective fluorescent lamp out of its mounting post Note It is imperative that you only use clean fluorescent lamps If necessary clean the lamp before installation Finger prints should likewise be avoided as the grease can reduce the length of operation 5 Place the new fluorescent lamp into the mounting post in such a way that it makes good c...

Страница 84: ...ear right for the glass plate in the scanner Remove the three mounting posts in which the screws are located The mounting post at the rear left does not have to be loosened 4 Remove the glass plate Carefully remove the glass plate by putting your fingers into the cutouts for the front mounting post and raising the glass plate 5 Carefully insert the new glass pane Carefully slide the pane against t...

Страница 85: ...ection plug before cleaning with a damp cloth Pollutants When using cleaning agents or lubricants pay attention to manufacturer s instructions and national regulations as well as safety data sheets Clean the surfaces of the device with a dry cloth If the device is very dirty clean with a damp cloth which has been dipped in dish washing liquid and well wrung Make sure that no liquid enters the devi...

Страница 86: ...nning Proceed as follows 1 Switch off the device Warning Pull out the power plug The ends of the fluorescent lamps can heat up to 100 C when switched on 2 Open the scanner lid 3 Loosen both knurled screws in the cover 4 Carefully fold the plate with the glass pane downwards 5 Wipe the glass pane with a lint free cloth 6 Screw the inner part of the lid into place 7 Reconnect the device and switch i...

Страница 87: ...old the tray against a dark background and then against a light background Holding the glass plate up against the light look at it from different angles and distances to determine whether the glass is dirty or not and on which surface Cleaning Preparation Avoid electrostatic charges e g by grounding Put on lint free gloves Put the tray down on a pad with the dirty side up Maintain a small distance...

Страница 88: ... Compressed air 67 Messrs Kontakt Chemie RASTATT Order No 02065436 Antistatic brush grounded Antistatic brush CW 101 SW 141 Messrs Kinetronics Antistatic unit Antistatic unit 1212 Messrs Kinetronics Ethanol spectroscopically pure Chemical suppliers Foam cleaner Specialist dealer Acetic acid Specialist dealer Acetone Specialist dealer Foam cleaner Messrs Röbel u Fiedler Chemische Fabrik GmbH 77955 ...

Страница 89: ...cleaning 0 Avoid electrostatic discharges 0 Only use cleaning agents drop by drop to exclude the danger of deflagration Warning Before using cleaning agents be sure to observe the manufacturer s notes and the current safety data sheets from the relevant manufacturer Liquids Dab the area using a lint free cloth then continue cleaning with glass or foam cleaner 3 3 ...

Страница 90: ...vice 0 Apply or spray the glass or foam cleaner onto the glass surface For foam cleaning Shake the foam cleaner before use spray it onto the glass plate and apply it using a cloth Wait until the foam has had time to work 0 Using a lint free cloth remove the foam or glass cleaner by wiping the cloth in the same direction applying a little bit of pressure Use several cloths if necessary 0 Subsequent...

Страница 91: ...pplying a little bit of pressure A thin film of alcohol which will evaporate should be left on the surface Note Cleaning is successful if the film of alcohol does not form any drops and evaporates without leaving any streaks Repeat the procedure if necessary Dust To Be Removed Directly Before Scanning Remove dust from the glass plate using a grounded antistatic brush and oil free compressed air No...

Страница 92: ... Attention Never dampen the frame of the tray Ensure that no liquids enter the interior of the device Wait until the acetone has had time to work Remove the liquid using a lint free cloth The acetone should not have evaporated Apply again if necessary Repeat the procedure but using diluted acetic acid 25 concentrate instead of acetone Repeat the procedure using acetone and diluted acetic acid alte...

Страница 93: ...d if so the nature of the stain Observe reflection originals in front of a light background from different angles and distances Determine whether the original is dirty or not and if so the nature of the stain Preparing the Originals for Cleaning Avoid electrostatic charges e g by grounding Switch on the antistatic device Wait for approx one minute and then move a pin through the brush in order to ...

Страница 94: ...ads approx 5OO mm x 5OO mm Black cloth Lint free gloves Polyester gloves MAB 02 Messrs Basan FRANKFURT Absorbent lint free cloths Kleenex Professional Wipes Code 7107 Kimberly Clark Order No 02336154 Oil free compressed air Compressed air 67 Messrs Kontakt Chemie RASTATT Order No 02065436 Antistatic brush grounded Antistatic brush CW 101 SW 141 Messrs Kinetronics Antistatic unit Antistatic unit 12...

Страница 95: ... notes and the current safety data sheets from the relevant manufacturer Liquids Dab the area using a lint free cloth then clean with ethanol Dry Finger Prints Adhesive Tape Residue Dry Smudges 0 Cleaning with ethanol Refer to safety instructions on Seite 6 18 Spray or sprinkle the entire surface to be cleaned with ethanol use sparingly 3 ...

Страница 96: ...ot form any drops and evaporates without leaving any streaks Repeat the procedure if necessary If you also wish to clean the other side of the original lift the original and wipe the glass plate dry Then clean as described above Subsequently clean off the dust Dust Carefully pull the original through the antistatic device Remove dust from the original using a grounded antistatic brush and oil free...

Страница 97: ...tion to ethanol Experiment for best results If you use other agents you should always finish off cleaning with ethanol Dust That Could Not Be Removed Following The Normal Procedure Removing Dust with an Adhesive Roller Place the original flat on a clean smooth and even plate with the surface to be cleaned facing up Continuously roll the adhesive roller over it Note The original is electro statical...

Страница 98: ...n when performing any cleaning procedures Do not allow the cleaning liquids to run over the surface to be cleaned Only mount dry clean originals If possible avoid using Anti Newton oil When cleaning avoid using Silicone based domestic cleaners Tap water this leaves mineral deposits Antistatic cloths this leaves a residue Methylated spirits Methylated spirit PCBs and semi conductor modules should r...

Страница 99: ...645 5080 dpi for the entire scanning area 902 7040 dpi for Copy Dot F4200 only Interpolated resolutions 10 800 dpi Scale range 20 2500 Max thickness of originals Transparency 20 mm reflection unlimited Standard interface SCSI image data and communication SCSI address 5 preset Dimensions width x height x depth 855 x 990 x 710 mm 1 545 mm height with scanner lid open Power supply 100V 120V 200V 240V...

Страница 100: ...x 36 mm 10 items 05401658 Passepartout set 6 x 6 cm 10 items 05401674 Passepartout set 6 x 7 cm 10 items 05401704 Passepartout set 4 x 5 10 items 05394201 Fluorescent lamp 230V 11W Color temperature 6000K 05226112 Slide tray 05401607 Register pin row Copix Bacher metal 05401771 Register pin row Copix Bacher plastic 12 items 05392683 Glass plate for scanner 05355036 Tweezers 04160770 Rubber blower ...

Страница 101: ...Messrs Neumann and Partner Billeweg 20 22851 Norderstedt Tel 040 5249143 Fax 040 5245526 0 WALKISOFT cloth perforated roller 60 g m2 20 x 14 cm Use film cleaner type DC 2001 Kami Vertriebs GmbH Lübener Str 90471 Nürnberg Tel 0911 803694 Fax 0911 807757 0 Cloth 30 x 36 cm Part No 7262 60 Tenca Chemische Union Betriebshygiene 0 Mounting foil Chronar Clean Film C 42 300 x 400 mm Available through Agf...

Страница 102: ...delivery 0 16 bit video card 24 bit recommended 0 19 inch color monitor with a resolution of at least 800 x 600 pixels Minimum Configuration for the Power Macintosh The minimum configuration depends on the respective Linocolor software Computer Power Macintosh Operating system 8 5 or higher Keyboard and mouse Apple Extended keyboard Memory 32 MB RAM recommended 64 MB RAM Hard disk 300 M RAM intern...

Страница 103: ...ower Macintosh Interface Standard SCSI interface Connection for diagnostics RS232 interface Scanner Signal Resolutions RGB color mode 16 bits per pixel and color converted to 8 bits via CIELAB transformation Monochrome mode 16 bits per pixel and color converted to 8 bits via CIELAB transformation Line mode 1 bit per pixel Maximum density 4 0 D Type of Original Originals Reflection and transparency...

Страница 104: ...al defect which can only be eliminated by Service personnel Power cables must be connected in accordance with the regulations of the respective country Fuses The operator has no access to the device fuse The device may only be serviced by Service personnel The in house electrical outlet to which the power cable is connected must be fused with a maximum value of 10 A Light Conditions Operational co...

Страница 105: ...92 Europe Electrical Safety 73 23 EWG Low Voltage Directive Europe EN 60950 Europe IEC 950 International UL 1950 USA CSA C22 2 No 950 Canada Electromagnetic compatibility EMC EMVG Gesetz über elektromagnetische Verträglichkeit Germany 89 336 EWG EMC Directive Europe Emission of Noise Radio Interference and Noise Voltage EN 55022 threshold value B Europe CISPR 22 mod threshold value B International...

Страница 106: ... correct manner Additional electrical equipment must be installed and serviced according to the manufacturers instructions to adhere to the radio interference suppression regulations Adherence to radio interference suppression regulations can be assumed when the additional device in question is marked with the European Union mark of conformity CE and the instructions for installation operation and...

Страница 107: ... in Kiel Pollutants Parts containing pollutants and therefore requiring separate disposal processing are listed in the following table You can identify the parts with the help of their designation in the following diagram Polyvinyl chloride could be contained in the cable covering The electronic modules are protected by flame retarders Thanks to state of the art technology thermal processing in ap...

Страница 108: ...terials The large plastic parts can be identified in the following diagram with the help of their designation Polystyrene has been used almost throughout Name Material Front panel back panel operating flap service flap lid PS Styron 6335 varnished with 2k PUR Alexit Struckturlack Z421 Messrs Manckiewicz no flame retardant Roller 2x PA 6 Foot 2x PC varnished with 2k PUR Alexit Struckturlack Z421 Me...

Страница 109: ...led by a recognized waste disposal company these dismantling instructions do not apply for the customer Work step Note 1 Remove the glass plate from the lid 2 Open the transparencies lighting in the lid remove two fluorescent lamps 3 Detach the lid 4 items 6 socket screws on the lower rails 2 hexagon socket screws on the upper rails 4 Unscrew the fluorescent lamp ballasts in the lid from the rear ...

Страница 110: ...remove the electronics PCBs Loosen 2 lateral screws the lid of the maxi board can then be pulled to one side to give access to the PCBs 11 Loosen the unions for the plastic housing front and back panel from the inside unscrew the plate from the inside 6 screws in plastic more at the base 12 Unscrew the feet 2x 13 Open the lamp cover on the top of the camera carriage inside of device Press the plat...

Страница 111: ... Accessories Nexscan F 4100 F 4200 Operation 7 13 ABC Pollutants Fluorescent lamp 1x Flourescent lamp ballast Fluorescent lamp 2x Fluoresent Fluorescent lamp 2x Fluoresent lamp ballast 2x Electronic pcbs lamp ballast 2x ...

Страница 112: ...Technical Data and Accessories 7 14 Edition September 2000 ABC Materials Plastics Light outlet Lid Cover flap Back panel Service flap of the LED Front panel Gliding feet Stray light foil Base ...

Страница 113: ...ories Nexscan F 4100 F 4200 Operation 7 15 ABC Dismantling 1 Remove the glass plate from the lid plate step 1 Open reflection scanner remove fluorescent lamp step 2 Loosen ballast from above step 4 plate from the housing step 3 ...

Страница 114: ...ccessories 7 16 Edition September 2000 ABC Dismantling 2 Loosen original glass plate 5 screws step 5 Remove service flap step 6 Release device carriage cast alu and raise up out of the device Back panel panel step 7 step 8 ...

Страница 115: ...100 F 4200 Operation 7 17 ABC Dismantling 3 Flourescent lamp ballast Flourescent lamp Illumination of originals illumination step 9 Loosen the union for the plastic housing step 11 Remove feet step 12 Remove maxi board electronics PCB s step 10 ...

Страница 116: ......

Страница 117: ...EU Declaration of Conformity Nexscan F 4100 F 4200 Operation ABC 8 EU Declaration of Conformity ...

Страница 118: ...EU Declaration of Conformity Edition September 2000 ABC ...

Страница 119: ...ng two conditions 1 This device may not cause harmful interference and 2 this device must accept any interference received including interference that may cause undesired operation This Class A digital apparatus meets all requirements of the Canadian Interference Causing Equipment Regulation Cet appareil numérique de la classe A respecte toutes les exigences du Réglement sur le matériel brouilleur...

Страница 120: ......
Страница 121: ... service control room For customers outside of Germany please contact your Heidelberg representative The Central Call Desk is open Monday through Friday 7 a m to 18 p m Your queries will be dealt with here immediately Answering any user queries after the guarantee period is a service which can be applied for exclusively on purchasing a Heidelberg Infoline Box This also applies for telephonic advic...

Страница 122: ...ervice number attached to the unit on which problems or faults in production occur Specify the exact names of the products unit description software and version Only describe one problem per form State the exact conditions under which the problem occurred e g error messages serial or service number of the unit modifications software used and its version etc Specify your complete address your custo...

Страница 123: ...Dimensions width x height x depth 7 1 Dust 6 15 6 20 6 21 E Effective format 7 1 F Fast scans 3 2 File sizes 3 3 Film cleaner mounting 4 9 Film coating 4 2 4 3 Finger prints 6 14 6 15 6 19 First fast scan 4 6 Foam cleaner 6 14 Focus 7 1 Focusing 3 3 Formats 3 9 Fuse 2 3 G General remarks on maintenance 6 22 H High quality 3 2 Housing 2 4 I ICC profiles 3 3 4 6 Illumination of originals 3 10 Image ...

Страница 124: ...y 4 9 R Rated current 7 1 Reflection scanning mode 4 8 Repairs 2 3 Resetting the scanner 4 21 Residues of adhesive tape 6 14 6 19 Resolution 3 3 S Scale 3 9 Scale range 7 1 Scan area 4 8 Scanner settings 4 25 4 27 Scanner signal resolutions 7 5 Scanner system 7 5 Scanning area 3 9 Scanning mode 7 1 Scanning options 4 27 Scanning principle 3 5 Scanning process 4 6 Scanning speeds 3 10 Scanning thre...

Отзывы: