Heatrae Sadia Multipoint 30 Скачать руководство пользователя страница 3

3

1.1 IMPORTANT POINTS

1.1.1 

 The Multipoint unvented water heater is factory fitted with a           

Temperature/Pressure Relief Valve. The factory fitted Temperature/ 

Pressure Relief Valve must not be removed, blocked or restricted in 

any way. FAILURE TO PROVIDE ADEQUATE TEMPERATURE AND  

PRESSURE RELIEF WILL INVALIDATE ANY GUARANTEE AND 

LEAD TO A DANGEROUS INSTALLATION

1.1.2  Expansion must be accommodated within the system. Use of the 

Expansion Vessel and Check Valve provided in the Installation Kit will 

fulfill this function.

1.1.3  The installation of this water heater is covered by Building Regulation 

G3. In order to fulfill the requirements of this Regulation, the heater 

should be installed in accordance with these instructions by a  

competent installer (i.e. an installer trained in the installation of  

unvented water heating systems). All the control and safety valves  

provided in the Installation Kit must be used and plumbed in     

accordance with Figure 01.

1.1.4 The installation must be carried out in accordance with the relevant 

         requirements of:    


• The appropriate Building Regulations either The Building 


Regulations, The Building Regulations (Scotland) or Building  


Regulations (Northern Ireland). 


• The Water Fittings Regulations or Water Byelaws in Scotland.

WARNING: IF WATER FLOWS FROM THE PRESSURE RELIEF VALVE 

OR TEMPERATURE/PRESSURE RELIEF VALVE, THE ELECTRICITY 

SUPPLY MUST BE SWITCHED OFF IMMEDIATELY. CONTACT THE 

HEATRAE SADIA SERVICE TEAM (Tel: 0844 8711535) OR AN 

APPROVED INSTALLER.

1.2 PACK CONTENTS

Before commencing installation check that all the following components 

have been supplied in the Installation Kit :


•  Expansion Vessel ¾” BSP male, precharge pressure 0.32 MPa      

  (3.5 bar) c/w wall mounting bracket


•  Combined Pressure Reducing Valve/Strainer ½” BSP female, 


factory set at 0.35 MPa (3.5 bar)


•  Single Check Valve 15mm x 15mm compression


•  Pressure (expansion) Relief Valve ½” BSP male inlet, ½” BSP    

  female discharge factory set at 0.6 MPa (6 bar). 


•  Tundish ½” BSP male inlet, ¾” BSP female outlet 


•  Wall mounting bracket set 


•  Self adhesive Levelling Feet (2 off)  


•  Moulded plastic spacer

Содержание Multipoint 30

Страница 1: ...1 Installation and User Instructions MULTIPOINT 30 50 Litre ...

Страница 2: ...aintained Sections 6 0 by a competent person only Please read and understand these instructions prior to installing your Multipoint unvented water heater Particular attention should be paid to the section headed IMPORTANT INSTALLATION POINTS Following installation and commissioning the operation of the heater should be explained to the user Section 5 0 and these instructions left with them for fut...

Страница 3: ...in accordance with Figure 01 1 1 4 The installation must be carried out in accordance with the relevant requirements of The appropriate Building Regulations either The Building Regulations The Building Regulations Scotland or Building Regulations Northern Ireland The Water Fittings Regulations or Water Byelaws in Scotland WARNING IF WATER FLOWS FROM THE PRESSURE RELIEF VALVE OR TEMPERATURE PRESSUR...

Страница 4: ...Operating pressure 0 35 MPa 3 5 bar Rated pressure 0 6 MPa 6 0 bar Expansion vessel charge pressure 0 35 MPa 3 5 bar Expansion relief valve setting 0 6 MPa 6 0 bar Minimum supply pressure 0 08 MPa 0 8 bar Maximum supply pressure to PRV 1 6 MPa 16 0 bar Temperature Pressure Relief Valve 90 C 0 7 MPa 7 0 bar 50 Litre 30 Litre Dimension 888 616 A 937 665 B 1060 788 C 778 506 D ...

Страница 5: ...no hidden services electricity gas or water below the surface of the wall 3 1 6 DO NOT install where the unit may freeze 3 1 7 Using Figure 01 and the Dimensions Table as a guide mark the position of the wall mounting bracket and lower location point Drill and plug the wall with suitable fixings fix the wall bracket to the wall 3 1 8 Fit the heater wall bracket to the rear of the unit using the sc...

Страница 6: ...lder joints as this will damage the heater and may prevent servicing under warranty 3 2 3 The INLET is marked BLUE the OUTLET is marked RED Several hot outlets via conventional taps can be served however individual site demands should be considered when choosing capacity and the number of outlets to be served 3 2 4 It is recommended that a WRAS Listed isolating valve is fitted on the cold water su...

Страница 7: ...ater discharged from safety devices is safely conveyed to where it is visible but will not cause danger to persons in or about the building 3 3 1 Discharge pipe MUST terminate in a SAFE VISIBLE position 3 3 2 Water may drip from the discharge pipe of the pressure relief device and that this pipe must be left open to the atmosphere 3 3 3 The pressure relief device is to be operated regularly to rem...

Страница 8: ...on E2 and table 21 3 Have a vertical section of pipe at least 300mm long below the tundish before any elbows or bends in the pipework 4 Be installed with a continuous fall 5 Have discharges visible at both the tundish and the final point of discharge but where this is not possible or is practically difficult there should be clear visibility at one or other of these locations Examples of acceptable...

Страница 9: ...int of discharge From Table 1 below Maximum resistance allowed for a straight length of 22mm copper discharge pipe D2 from a G temperature relief valve is 9 0m Subtract the resistance for 4 No 22mm elbows at 0 8m each 3 2m Therefore the permitted length equates to 5 8m 5 8m is less than the actual length of 7m therefore calculate the next largest size Maximum resistance allowed for a straight leng...

Страница 10: ...mp for a 1kW model and be via a double pole isolating switch with a contact separation of at least 3mm in both poles Refer to the schematic wiring diagram below 3 4 2 The wires are colour coded as follows Green and Yellow EARTH Brown LIVE L Blue NEUTRAL N Fixed grating Discharge below Building Regulation G3 section 3 9d gives alternative points of discharge Trapped gully Discharge pipe D2 from tun...

Страница 11: ...11 FIGURE 05 WIRING DIAGRAM ...

Страница 12: ...ossible to lock the thermostat knob in either the mid range or a hot position by following the procedures in 7 9 or 7 10 below Always switch off the electrical supply before removing the terminal cover 4 2 3 Setting the mid range position Rotate the thermostat knob to the mid position Remove the terminal cover by using a large flat bladed screwdriver to depress the four snap lugs located in the fo...

Страница 13: ...er is not in use for long periods during the winter months do not switch off the electrical supply and set the thermostat to its minimum position N b This will not protect other system pipework 14 2 The thermostat can also be locked in either the mid range or a hot recommended when using in conjunction with a Thermostatic Blending Valve position To lock the thermostat position the instructions giv...

Страница 14: ...ver by using a large flat bladed screwdriver to depress the 4 snap lugs located in the 4 rectangular depressions on the bottom cover 6 4 Disconnect the electrical terminations to the element Disconnect earth links to the earthing stud Withdraw the thermostat and thermal cut out capillary tubes from the pocket on the element plate 6 5 Remove the element plate assembly by unscrewing the five securin...

Страница 15: ...he strainer will be removed with the cap Wash any particulate matter from the strainer under clean running water Replace the cap assembly ensuring the sealing ring is correctly fitted Do not use any other type of sealant Close hot tap open mains stop cock and check for leaks The Expansion Vessel should have a precharge pressure of 0 35 MPa 3 5 bar This can reduce over time and eventually require r...

Страница 16: ...ossible INSTALLATION POINTS intermittently 2 Mains pressure exceeds 2 Fit Packs U1 and U2 0 41 Mpa 4 1 bar 3 Pack U1 fitted without 3 Fit Pack U2 when using Pack Pack U2 U2 4 Pressure Relief Valve Fault 4 Replace Pressure Relief Valve 5 Loss of pressure from 5 Check and if necessary Expansion Vessel re charge Expansion Vessel pre charge pressure see section 9 0 Discharge of water from Thermostat a...

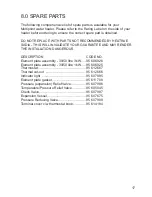
Страница 17: ...IDATE YOUR GUARANTEE AND MAY RENDER THE INSTALLATION DANGEROUS DESCRIPTION CODE NO Element plate assembly 30 50 litre 3kW 95 606 926 Element plate assembly 30 50 litre 1kW 95 606 925 Thermostat 95 612 667 Thermal cut out 95 612 666 Indicator light 95 607 995 Element plate gasket 95 611 708 Pressure expansion Relief Valve 95 607 986 Temperature Pressure Relief Valve 95 605 045 Check Valve 95 607 98...

Страница 18: ...he element and thermal controls which are guaranteed for a period of two years provided 1 The unit has been installed in accordance with these instructions and all necessary inlet controls and safety valves have been fitted correctly 2 Any valves or controls are of Heatrae Sadia recommended type 3 The unit has not been tampered with and has been regularly main tained as detailed in these instructi...

Страница 19: ...eted within the UK In the UK this product can therefore be disposed of through commercial non WEEE waste facilities Heatrae Sadia does not accept any liability under the WEEE directive This product is manufactured from many recyclable materials At the end of its useful life it should be disposed of at a Local Authority Recycling Centre to realise the full environmental benefits Insulation is by me...

Страница 20: ...exagon Business Centre Springfield Road Hayes Middlesex UB40 0TY Tel 020 8606 3567 Parts Centre Tel 0845 2709800 www partscentre co uk Newey Eyre Specialist Products Division Please contact your local branch UK Spares Ltd Unit 1155 Aztec West Almonsbury Bristol BS32 4TF Tel 01454 620500 William Wilson Ltd Unit 3A 780 South Street Whiteinch Glasgow G14 OSY Tel 0141 434 1530 Heatrae Sadia Heating Hu...

Отзывы: