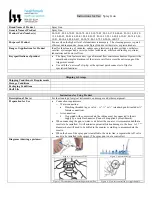
Instructions for Use: Spray Gun
Brand Name of Product
Spray Gun
Generic Name of Product
Spray Gun
Product Code Number(s)
80-10-01, 80-10-70-05, 80-10-70-38, 80-10-72-05, 80-00-17, 80-00-44, 80-10-14, 80-10-
15, 80-01-05, 80-01-06, 80-01-08, 80-01-38, 80-10-12, 80-10-40, 80-10-41, 80-10-42, 80-
10-43, 80-10-44, 80-00-013, 80-10-70, 80-10-72, 80-20-20, 14RVT
Purpose of Product
For use when the highest level of cleanliness is necessary. The cleaning process is quick,
efficient and inexpensive, because the Spray Gun uses either water or pressurized air.
Range of Applications for Product
Ideal for the cleaning of cannulas, endoscopes, glassware, pipettes, syringes, catheters,
curettes, cystoscopes and a variety of other instruments, articles used in surgery, clinics,
laboratories and doctors offices.
Key specifications of product
The Spray Gun features a new type of internal flow control mechanism. It permits the
smooth and simple adjustment of the water or air flow across the entire range of the
trigger movement.
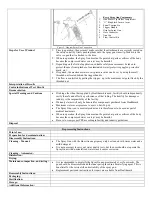
Use with the “universal” slip-tip, or the optional quick connect set of tips for
specialized functions.
Shipping & Storage
Shipping Conditions & Requirements
Storage Conditions
Packaging Conditions
Shelf Life
Instructions for Using Product
Description of Use (s)
For the cleaning of surgical instruments, endoscopes and other equipment.
Preparation for Use
Connection requirements
o
Water connection:
Plumbing threaded tap or valve –
3/8
”, ½” or ¾” (standard gun kit includes ¾”
female connection).
o
Air connection:
If operated with compressed air, the tubing must be connected to the air
supply by a suitable connector (Cannot be supplied by Healthmark).
When connecting the gun to water or air below the counter, it is recommended that a
rosette to be installed. It will minimize potential friction damage to the hose. A 1-
3/8
”
diameter hole will need to be drilled in the counter or sink top to accommodate the
rosette.
When the hose of the spray gun is installed to the water line, a separate shut off valve
needs to be installed to the spigot. (The spray gun is not a controller.)
Diagrams (drawings, pictures):
Figure 1: Quick Connect Tips
Figure 2: Specialized Tips
Figure 3: Threaded nut for controlling maximum flow
Figure 4: Flow rate controlled by trigger handle


