Special Tools
• RS232C cable (Cross)
• LAN cable (Category 5 or higher)
Jigs for adjustment of the optical axis
Item name
Application
Q't
y
Part No.
Appearance
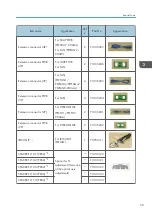
Extension connector (92P)
For LCD PANEL
(For PJ WU6181N)
3
Y0785213
Extension connector PWB
(92P)
For LCD PANEL
(For PJ WU6181N)
3
Y0785214
Extension connector (57P)
For LCD PANEL
(For PJ WX6181N /
PJ X6181N)
3
Y0785215
Extension connector PWB
(57P)
For LCD PANEL
(For PJ WX6181N /
PJ X6181N)
3
Y0785216
Extension connector (18P)
For Power supply
(PS UNIT)
(POPS : 600mm)
1
Y0135211
Extension connector PWB
(18P)
For Power supply
(PS UNIT)
1
Y0135212
Extension connector (5P)
For Power supply
(BS UNIT)
(POLM : 900mm)
1
Y0135207
Extension connector PWB
(5P)
For Power supply
(BS UNIT)
1
Y0135208
3. Replacement and Adjustment
28
Содержание Sirius-PJ2
Страница 1: ...Model Sirius PJ2 Machine Codes Y076 Y077 Y078 Field Service Manual June 2015 ...
Страница 2: ......
Страница 12: ...10 ...
Страница 13: ...1 Product Information Specifications See Appendices for the following information General Specifications 11 ...
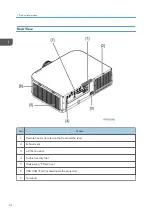
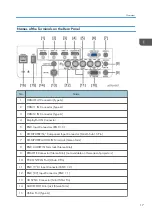
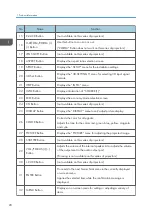
Страница 20: ...No Name 16 Ethernet Port RJ 45 Part Names of the Remote Controller 1 Product Information 18 ...
Страница 24: ...1 Product Information 22 ...
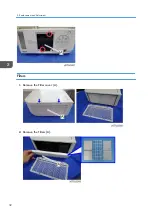
Страница 34: ...Filters 1 Remove the Filter cover A 2 Remove the Filters A 3 Replacement and Adjustment 32 ...
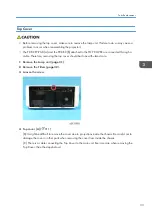
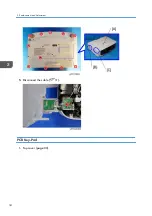
Страница 36: ...5 Disconnect the cable 1 PCB Key Pad 1 Top cover page 33 3 Replacement and Adjustment 34 ...
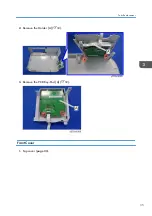
Страница 37: ...2 Remove the Holder A 2 3 Remove the PCB Key Pad A 2 Front Cover 1 Top cover page 33 Parts Replacement 35 ...
Страница 38: ...2 Front Cover A 4 3 Remove the two connectors 2 PCB SCAP 1 Front Cover page 35 3 Replacement and Adjustment 36 ...
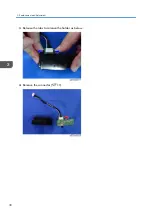
Страница 40: ...3 Release the tabs to remove the holder as below 4 Remove the connector 1 3 Replacement and Adjustment 38 ...
Страница 41: ...Lens Shift Dial 1 Remove the Lens Shift Dial A and spring Rear Panel 1 Top cover page 33 Parts Replacement 39 ...
Страница 52: ...4 Remove the bracket A 5 Remove the G LCD Fan A 2 6 Remove the cushion A 3 Replacement and Adjustment 50 ...
Страница 54: ...5 Remove the Duct Cover A 3 6 Remove the Duct Base A 3 3 Replacement and Adjustment 52 ...
Страница 67: ...3 Remove the bracket A 2 4 Remove the Power supply DC 6 Parts Replacement 65 ...
Страница 141: ...For Video Perform the following check after powering ON the projector Troubleshooting Guide 139 ...
Страница 145: ...Service Information Page 2 User mode Expert mode Service mode Display of lamp voltage added Error Log 143 ...
Страница 153: ...MEMO 151 ...
Страница 154: ...MEMO 152 EN ...
Страница 155: ...Model Sirius PJ2 Machine Codes Y076 Y077 Y078 Appendices June 2015 ...
Страница 156: ......
Страница 158: ...2 ...
Страница 172: ...MEMO 16 EN ...

