3
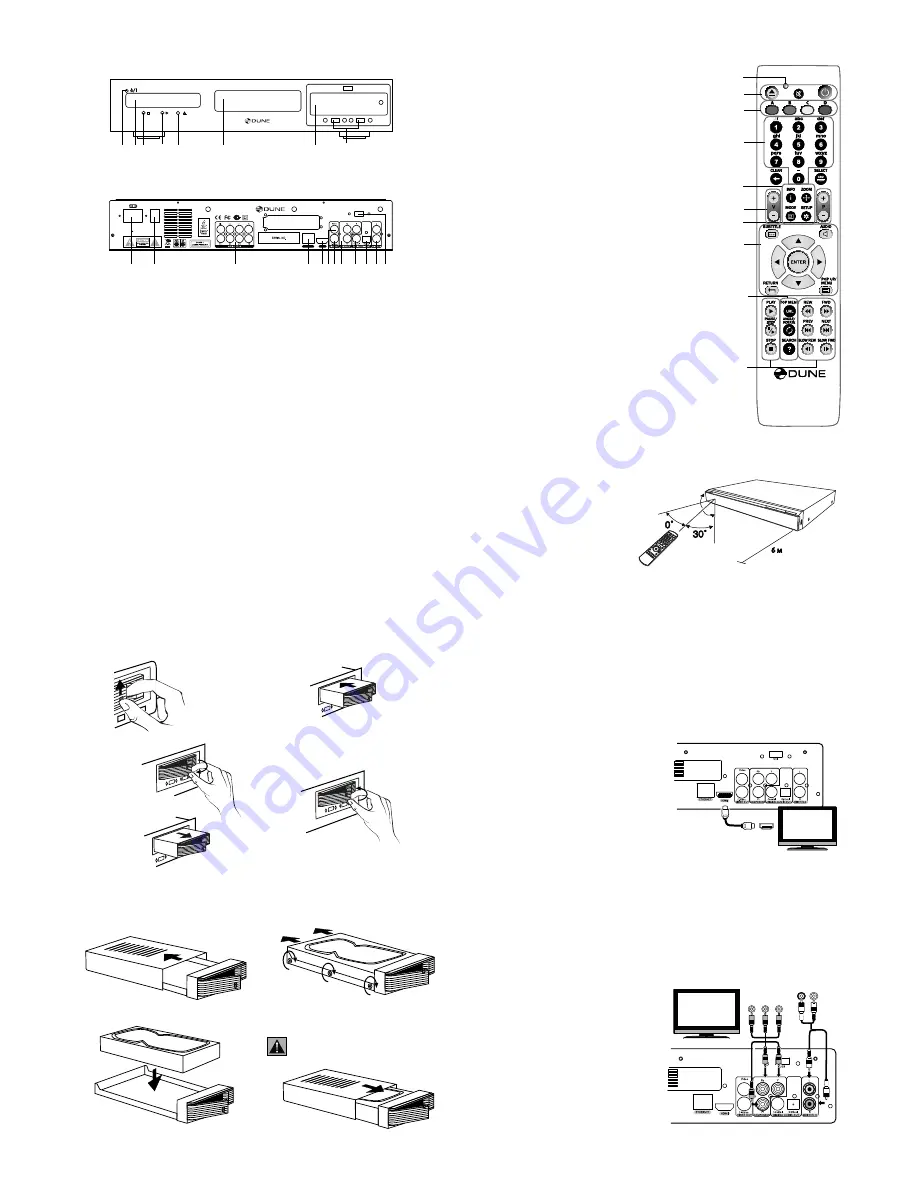
Effective distance of the remote control transmitter
Note:
●
When there is an obstacle between
the player and the transmitter, the
transmitter may not operate.
●
When direct sunlight, an incandes-
cent lamp, fluorescent lamp or any
other strong light shines on the RE-
MOTE SENSOR of the Player, the re-
mote operation may be unstable.
1) Command indicator (i.e. indicator of remote control response to but-
ton pressing)
2)
EJECT, MUTE, POWER
– opening/closing of disk tray, sound on/off
and standby mode on/off, respectively
3)
A
(Red) -
INFO
,
B
(Green) -
ZOOM
,
C
(Yelow) -
MODE
,
D
(Blue) -
SETUP
– control menu buttons for setting of internal functions, as
well as some playback modes.
4)
0 - 9
– numeric buttons. Allow controlling of player in playback mode,
as well as text entry.
5)
INFO, ZOOM, MODE, SETUP
– control menu buttons, allow setting
of internal functions, as well as some playback modes.
6)
Vol+ / Vol-
– volume adjusting
7)
Page Up / Page Down
– for scrolling up and down to see and
change settings.
8)
SUBTITLE, AUDIO, RETURN, POP UP/MENU, ENTER
and con-
trol menu buttons
UP, DOWN, RIGHT, LEFT
– to control main player
modes and cursor motions through file browser.
9)
PLAY, PAUSE, STOP, REW, FWD, PREV, NEXT, SLOW REW,
SLOW FWD
– media file playback control buttons.
10)
TOP MENU/URL, ANGLE/ROTATE, SEARCH
– control menu but-
tons, allow setting of internal functions, as well as some playback
modes.
*Some buttons may have several functions, depending on mode.
For more details visit: http://www.HDI.co.il/manuals.
Note:
●
Use alkaline AA batteries.
●
Observe polarity when inserting batteries.
●
Direct the remote control to the player. There must be no obstacles
between the RC and the player. If the player is installed inside a desk
with tinted glass, the manufacturer may not guarantee an undis-
turbed functioning of RC.
●
If RC functions only at short distances or stopped functioning, make
sure to replace batteries to new ones.
Remote Control (RC)
1
2
3
4
5
6
7
8
10
9
AC~100-240V
50/60Hz, 27W min.
USB
HDMI
ETHERNET
Manufactured under license from Dolby Laboratories. Dolby
and the double-D symbol are trademarks of Dolby Laboratories.
DTS is a registered trademark & the DTS
logos and Symbol are trademarks of DTS,
lnc. 1996-2008 DTS, lnc. All Rights Reserved.
Made in Israel
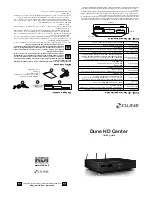
BLU-RAY DISC PLAYER
MODEL: HD Center
Do not remove covers hazard - life parts
5
C
Exterior
Front view
Rear view
1. Standby Indicator
2. Display
3. STOP Button
4. PLAY Button
5. OPEN/CLOSE
6. Blu-Ray tray
1
2 3
4
5
6
7
8
1. AC Power Jack
2. On/Off Button
3. 7.1 Channel Audio Output Jacks
4. LAN
5. HDMI 1.3 Jack
6. Video Output (CVBS) Jack
7. S-Video Output Jack
8. Component Video (Y, PB, PR) Output Jacks
9. COAXIAL Output Jack
10. OPTICAL Output Jack
11. Stereo Audio Left/Right Output Jacks
12. USB 2.0
1
2
3
4
5
7 8
9
10 11 12
6
7. Mobile rack
8. USB 2.0
Player features:
Blu-Ray discs playback
●
BD-ROM (Profile 1.1/2.0), as well as DVD and CD.
Media content playback
●
Video, Music and Pictures.
Network drive operation
●
NFS, SMB and some other HTTP clients.
Mobile rack with SATA Direct Link for fast and easy HDD exchange
●
Supports any audio and video collection on any number of hard discs w/o need to
create expensive multi-disc NAS solutions. Any 3.5" SATA HDDs can be used.
HDMI v1.3
●
Up-to-date HDMI v1.3 interface ensures peerless quality of digital video and audio
signal.
Three USB 2.0 ports
●
Three high-speed USB 2.0 ports ensure an easy-to-use playback of media content
from such external data storage devices, as USB-HDD, flash drives, cardreaders, etc.
Upgradeability
●
availability of connection of optional modules: Wi-Fi 802.11n, Ethernet 1000 Mb/s
and 2 x eSATA
How to tаke out the HDD.
Operations with HDD
How to insert the HDD
1. Shift the clamp upwards.
2. Keeping the
clamp, turn the handle
outside
3. Pull out the internal container from
a player
1. Having convinced that the container
handle is slightly opened, insert the
internal container and push it inside
all the way.
2. Turn the handle inside till the
clamp clicks.
1. Shift the top cover of the internal
container in an arrows direction.
2. Insert the HDD into the internal
container.
3. Be convinced that the HDD is dense-
ly pressed to a rear side of the con-
tainer and fixed to an emphasis.
Only such placing provides cor-
rect functioning of the device.
How to change the HDD in the internal container
4. Close the top cover
of the internal container.
Connection to a TV set with HDMI/DVI output:
Since Dune HD Center is designed first of all for playback of high definition (HD) video (up to
1080p), the best way of signal transmission from player to a TV set or projector is the HDMI
interface. In this case, video and audio streams are transmitted in digital form, without
losses, allowing enjoying excellent picture and sound. It is recommended to connect the
player to any compatible equipment using original DUNE HDMI cable (option).
If your TV set has no HDMI socket, but it is equipped with DVI one, you can use an original DUNE
HDMI-DVI adapter (to be connected to HDMI-HDMI cable) or Dune HDMI-DVI cable (no adapter
needed). In this case, transmission of audio stream is only available separately, from an analog
audio or digital optical output.
1) Make sure that the player and the TV set are
switched off. Do not switch on until the end of
connection procedure.
2) Connect the HDMI output of the player with
appropriate HDMI/DVI input of the TV set using
a HDMI-HDMI cable for HDMI input of your TV
set, or HDMI-DVI cable or HDMI-HDMI cable
with HDMI-DVI adapter, for DVI input of your
TV set.
3) Using RC of TV or projector (depending on
what you use), select required input and display
mode. For more instructions please refer to the
manual of your displaying equipment.
4) Wait until you see a picture on screen of your TV (or projection) set received from the player.
HDMI IN
Connection to a TV set with component video signal
input (Component Video, Y, Cb, Cr)
For this connection you should use a 3RCA-3RCA video cable and (optionally) a 2RCA-
2RCA audio cable for sound transmission to your TV set. Please note that video cable
shall have an impedance of 75 Ohm, i.e. specially fitted for transmission of analog video
signal.
1) Make sure that the player and TV set are
switched off. Do not switch on until the end
of connection procedure.
2) Connect the component video output of
media player with relevant TV input using a
3RCA-3RCA cable.
3) Optionally connect audio output AUDIO L
R of the player with relevant input of TV set
using a 2RCA-2 RCA cable (note: you can
use optical cable to transmit digital audio
to your A/V receiver; this way better audio
quality result may be expected).
4) Using RC of TV or projector (depending
on what you use), select required input
and display mode. For more instructions
please refer to the manual of your displaying
equipment.
AUDIO IN
R L
COMPONENT
VIDEO IN


