


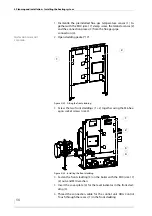

4 Planning and installation – Installing the heating system
44
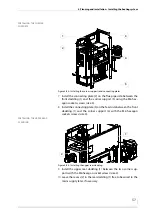
I
NSTALLING
THE
AUTOMATIC
ASH
REMOVAL
SYSTEM
HDG C
OMPACT
25/35
I
NSTALLING
THE
ASH
PLATES
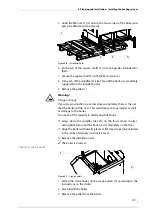
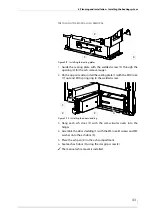
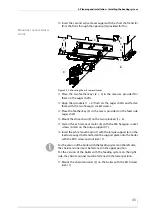
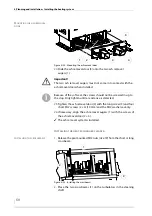
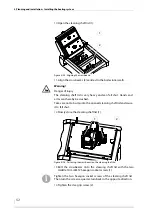
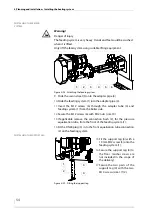
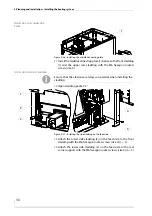
1.
Slide the ash plate (3) from the front on the feed side into the ash
compartment of the combustion chamber.
2.
Tighten the ash plate (3) with the M10 screw (size 17) (4) and M10
washer.
3.
Mount the alignment plate (2) on the ash plate (3) with the two M8
screws (size 13), but without tightening the screws.
4.
Slide the alignment plate (2) all the way to the limit of the ash
compartment wall.
5.
Remove the four M8 screws (size 13).
6.
Slide the second ash plate (5) from the front into the fly ash com-
partment.
7.
Install the adjustment plate (6) with the M8 screws and nuts (size
13) and M8 washer on the ash plate (5) and sloping plate of the ash
compartment.
8.
Tighten the adjustment plate (6) with the M8 screws and nuts (size
13) and M8 washer on the ash plate (1) and sloping plate of the ash
compartment.
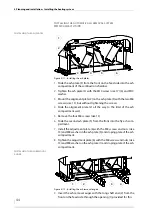
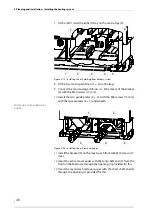
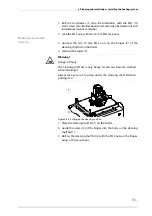
I
NSTALLING
THE
ASH
REMOVAL
AUGER
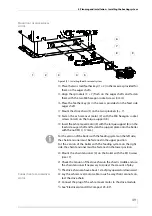
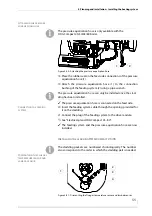
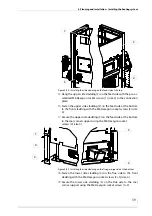
9.
Insert the ash removal auger with the long shaft end (2) from the
front on the feed side through the opening (1) provided for this.
Figure 4/11 - Installing the ash plates
1
6
5
4
3
2
Figure 4/12 - Installing the ash removal augers
1
3
2
4
Содержание Compact 25
Страница 1: ...hdg bavaria com HDG Compact 25 35 HDG Compact 45 50 65 HDG Compact 80 Operating manual ...
Страница 2: ......
Страница 6: ...Operation Manual HDG Compact 25 80 Content 6 ...
Страница 107: ......


