25
QuantumX Data Recorder CX22‐W
A3169-1.0 en/de
HBM
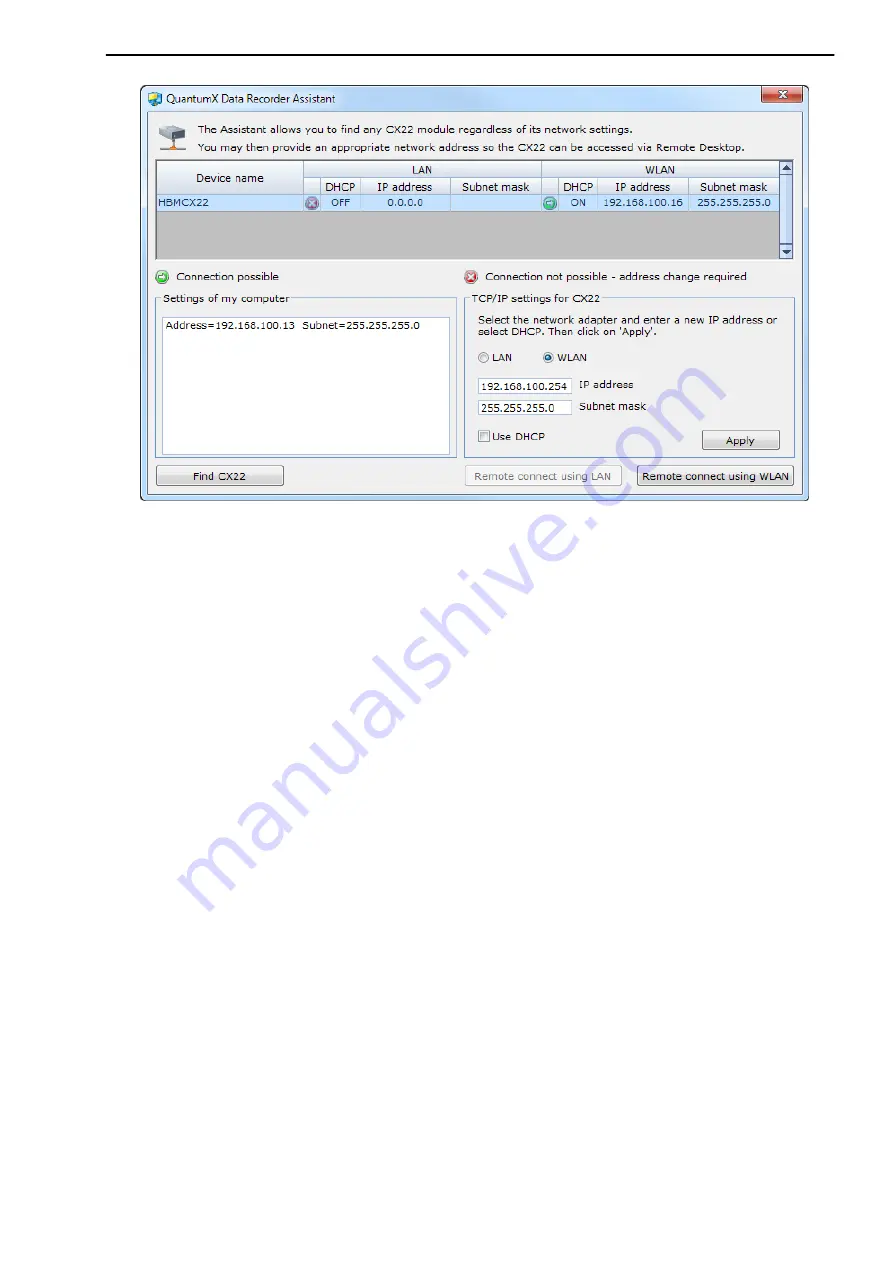
Fig. 6.2:
Display in QuantumX Data Recorder Assistant after a network search
(WLAN example)
4. Select the CX22‐W in the top list.
5. Click on
Remote desktop connection via WLAN
.
6. If Windows queries whether a connection to the remote computer should
be set up, confirm the connection. We recommend activating the option
Do not ask about connection to this computer again
. Depending on
the configuration of your Windows operating system, another query as to
whether the connection should be set up may be displayed (identity of the
remote computer). If necessary, activate the option to prevent the query.
The connection with the CX22‐W Data Recorder will now be implemented
and you must register with the device via Windows. Enter
HBMCX22
as
the
User name
and
hbm
as the
Password
. The text for the
Password
must be in lower case.
6.3.4 Preparing the CX22‐W for the Adhoc network
1. Activate Adhoc support in the
Advanced
tab:
Adhoc support 802.11n:
Enable
.
2. Exit the dialog with
OK
.
3. Call the first dialog again: Right‐click on “Wireless Network Connection”
and select
Properties
.
4. Go to the
Wireless Networks
tab.
Содержание QuantumX CX22
Страница 2: ...English Seite 3 42 Deutsch Page 43 84...
Страница 85: ...85 QuantumX Datenrekorder CX22 W A3169 1 0 en de HBM...
Страница 86: ...QuantumX Datenrekorder CX22 W 86 A3169 1 0 en de HBM...
Страница 87: ......


