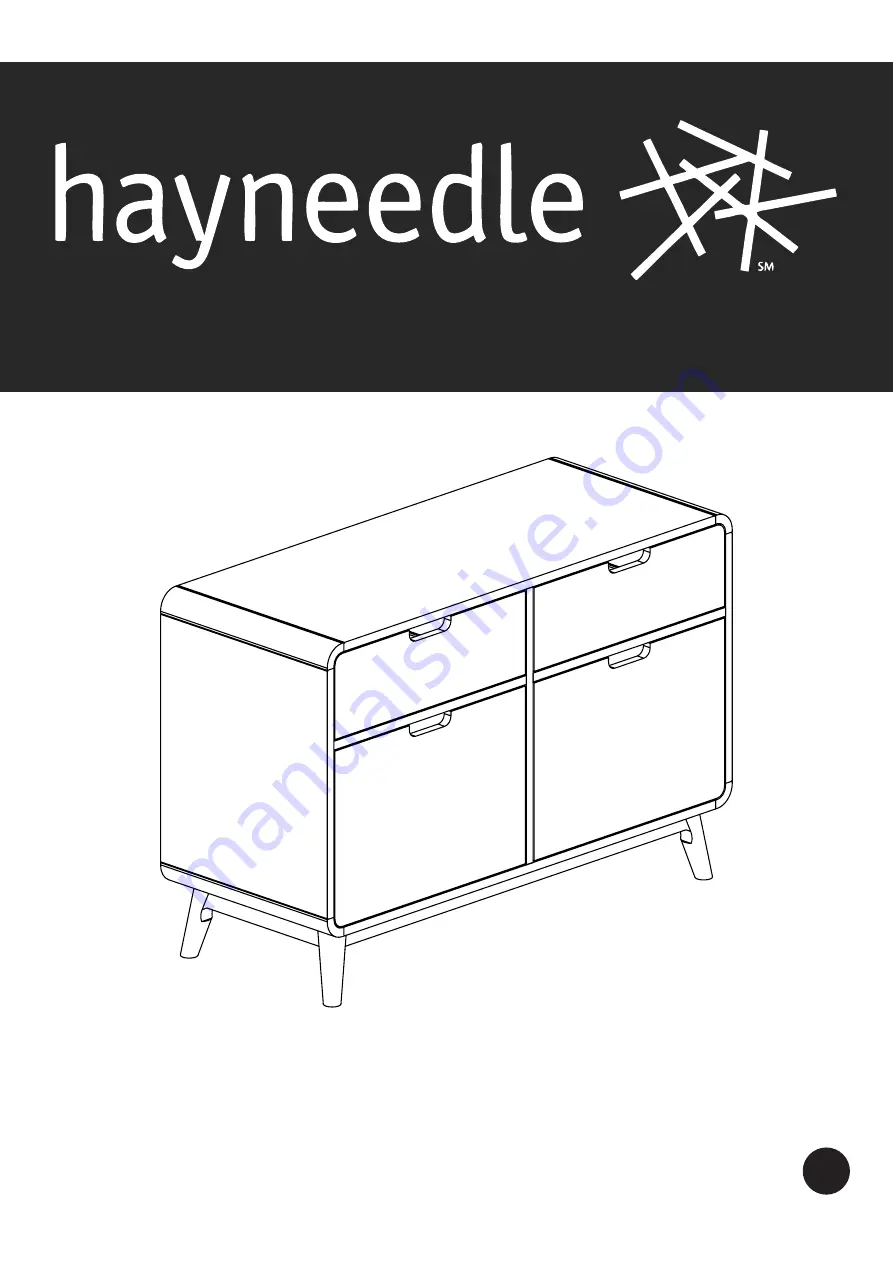
ITEM NAME: Belham Living Carter 4-Drawer File Cabinet
SKU: REDU165-1
For assistance with assembly, please contact customer service
1-888-880-4884
1/11
Страница 1: ...ITEM NAME Belham Living Carter 4 Drawer File Cabinet SKU REDU165 1 For assistance with assembly please contact customer service 1 888 880 4884 1 11...
Страница 2: ...cidentally discarding smaller parts or hardware Keep small parts and pieces away from children until fully assembled Please check for any loose screws and tighten them before you use Bottom Frame 1 Qt...
Страница 3: ...oden Dowel J Qty 24 Metal Bar K Qty 4 Qty 2 Wall Plug O Screw M Qty 2 Plastic Rope N Qty 2 Qty 32 Nut I Bracket P Qty 4 Metal Bar K Qty 4 Phillips Screwdriver not provided 423mm 338mm Drawer Bottom 16...
Страница 4: ...h Spring Washers C and Flat Washers B then tighten with Allen Key D 2 STEP 2 Insert Cam Pins F to Top Frame 2 Side Panels 4 6 and Bottom Frame 1 4 11 DETAIL STEP PLE ASE SEE THE BELOW PICTURE 1 Insert...
Страница 5: ...supplied see details as below 4 STEP4 Insert Wooden Dowels J and Cam Pins F to Bottom Frame 1 and Bars 7 8 Attach Centre Panel 5 to Bottom Frame 1 using Wooden Dowels J and Cam Locks G Attach Bars 7 8...
Страница 6: ...ht Side 6 to Bottom Frame 1 using Wooden Dowels J and Cam Locks G Attach Bars 7 9 to Right Side 6 using Wooden Dowels J and Cam Locks G Note Tighten Cam Locks with an across headed screwdriver not sup...
Страница 7: ...ls J to Left Side 4 Right Side 6 and Centre Panel 5 Attach Top Frame 2 to Left Side 4 Right Side 6 and Centre Panel 5 using Wooden Dowels J and Cam Locks G Note Tighten Cam Locks with an across headed...
Страница 8: ...H and Nuts I Note Tighten Bolts with an across headed screwdriver not supplied see details as below 10 STEP 10 Attach Drawer Sides 13 14 to Drawer Front 12 using Bolts H and Nuts i Insert Drawer Bott...
Страница 9: ...ss headed screwdriver not supplied see details as below 12 STEP 12 Attach Drawer Sides 19 20 to Drawer Front 18 using Bolts H and Nuts i Insert Drawer Bottom 18 to Drawer Sides aligning the pre drille...
Страница 10: ...nit using Screws M Use electric drill to drill two small holes on the desired location of wall insert Wall Plugs O into the holes by rubber mallet use Screws L to attach the Brackets P onto wall Then...
Страница 11: ...ood grains Check and re tighten screws blots after the product has been used for a period of time It is best to keep your furniture in a climate controlled environment Extreme temperature and humidity...