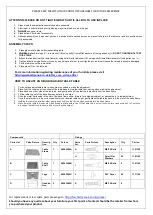
PLEASE KEEP ME WITH YOUR PROOF OF PURCHASE FOR FUTURE REFERENCE
For replacement or lost spare parts please go to
http://faq.hartmanuk.co.uk/spares/
Should you have any queries about your furniture your first point of contact should be the retailer from whom
you purchased your product
ATTENTION:PLEASE DO NOT TIGHTEN BOLTS UNTIL ALL BOLTS ARE INPLACE
1.
Please read these instructions carefully before assembly
2.
Aluminium is soft metal and over tightening may strip thread or break the part
3.
DO NOT
use power tools
4.
Please allow 30 minutes for assembly
5.
Although assembly only requires 1 person it is advised that a second person be present to help turn the table over and into position when
fully assembled
ASSEMBLY STEPS:
1.
Place glass in safe place whilst assembling table
2.
LOOSELY
attach two legs (C ) to table shelf (B) using bolts (I) small flat washers (H) using allen key (J)
DO NOT TIGHTEN BOLTS AT
THIS STAGE
3.
A
ttach two fixed button(D)to table frame(A) using bolts(K)with table shelf (E) using bolts(G)small flat washers (H) using allen key (L).
4.
Tighten all bolts using allen key (L) one by one being careful not to over tighten any as this will cause the thread to become damaged
5.
Put the table top on the table botton.
6.
Place glass (F) on the table top.
For more information regarding maintenance of your furniture please visit
http://www.hartmanuk.co.uk/after_care_videos.html
HOW TO ADJUST AN OBLIQUE ADJUSTABLE TABLE
1.
For an oblique adjustable table, two people are needed to make the adjustment.
2.
Place foot into the step at the bottom of the table base to stop the table from moving when making the adjustment.
3.
Place hands on either side of the table top, and gently pull until you feel the table unclip from the base frame.
4.
Lift the table top out of the base frame and place to one side.
5.
Slide the metal bar located in the slot of the base frame either forward for a high adjustment, or backwards for a low adjustment.
6.
Once the metal bar is in the correct position for your desired table height, gently place the table top back into the slot of the base frame.
7.
Holding the table top at either side, gently push until you feel it click back securely into the base frame.
8.
Make sure the table top is securely and evenly in place before use. If the Table top is not correctly in place, repeat steps 2 to 7 until you
are happy the table top is secure and at your desired height.
Component’s
Fixings
Parts List
Parts Picture
Descrip
tion
Q’ty
Part no
Parts
list
Parts Picture
Description
Q’ty
Part no.
A
Table
Frame
1
68283089A
G
M6*20 Bolts
4
1151162
H
Small Flat
Washers
20
1161162
B
Table
Shelf
1
68283089B
I
M6*45 Bolts
8
1181162
C
Legs
2
68283089C
J
PVC Cover
20
1171162
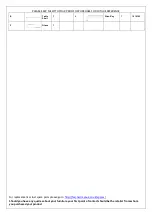
D
fixed bu
tton
2
68283089D
K
M6*35 Bolts
8


