Replacing an optical 10GbE I/O module
NOTE:
SFP transceivers are dust-sensitive. Always keep protective caps installed when a
fiber optic cable is unplugged, or when storing the SFP transceiver.
NOTE:
SFP ports are numbered 0 and 1, from left to right.
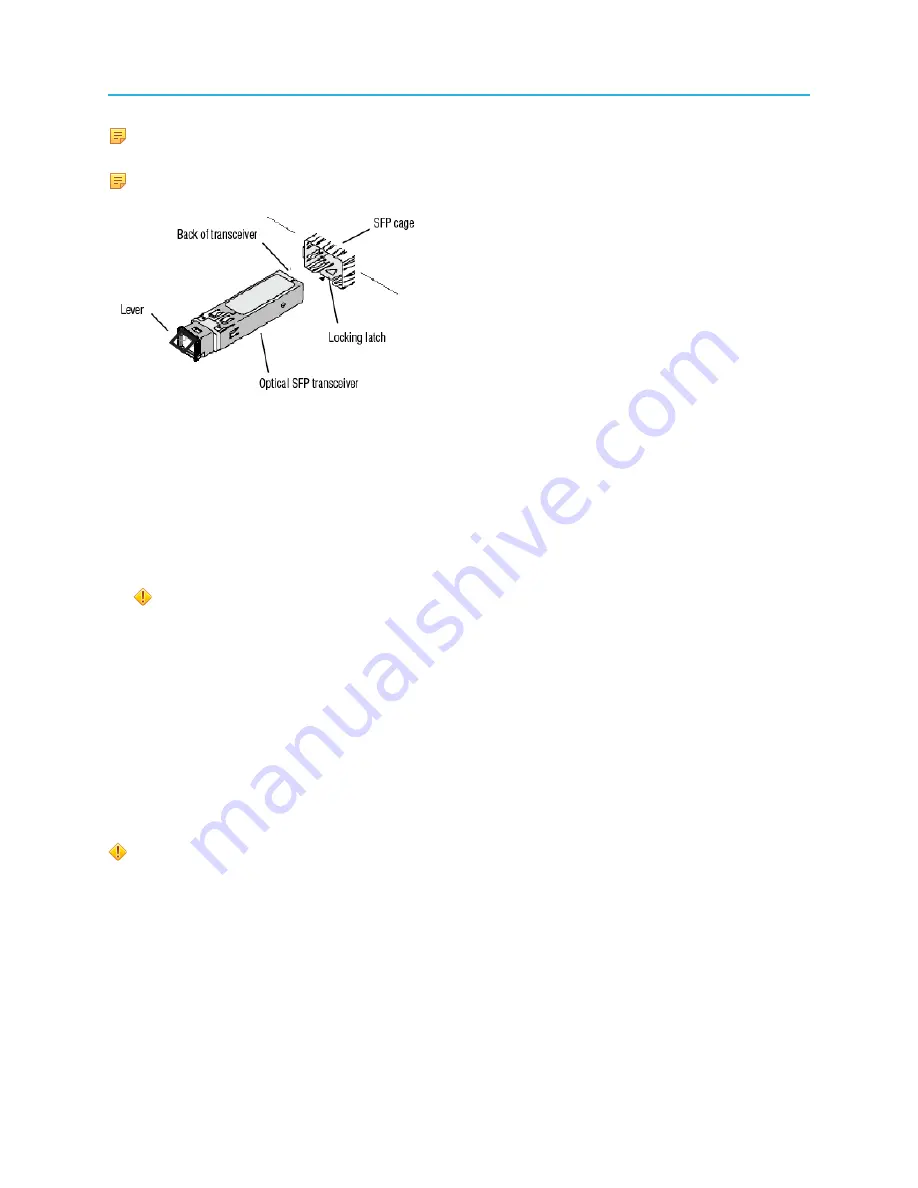
Figure 2-2: Optical SFP transceiver
Before you begin
Unpack the replacement component and visually inspect for damage. If the part is damaged, do not
continue with this procedure.
1. Remove the fiber optic cable by depressing the latch underneath the connector and pulling the cable
out.
CAUTION:
Ensure that the connector does not get damaged while the cable is
disconnected.
2. Using your forefinger, lift the lever on the front of the SFP transceiver to the up position.
3. Grasping the lever, gently pull the SFP transceiver straight out of the SFP cage.
Removing the system cover
A non-skid surface may be needed to prevent the server system from sliding on your work surface.
Before you begin
Unpack the replacement component and visually inspect for any damage. If it is damaged, call Harmonic
Technical Support and do not continue with this procedure.
CAUTION:
Power down the MediaDirector and unplug all peripheral devices and power
cables.
1. Using a screwdriver, remove the top cover screw(s).
2. Loosen the two captive thumb screws located on the back edge of the system cover.
3. Slide the cover back and lift upward.
Example:
33
MediaDirector Component Replacement Guide


