Advanced Settings
52
AMX RoomBook Scheduling Touch Panels - Instruction Manual
Manually Setting the Time Zone
1.
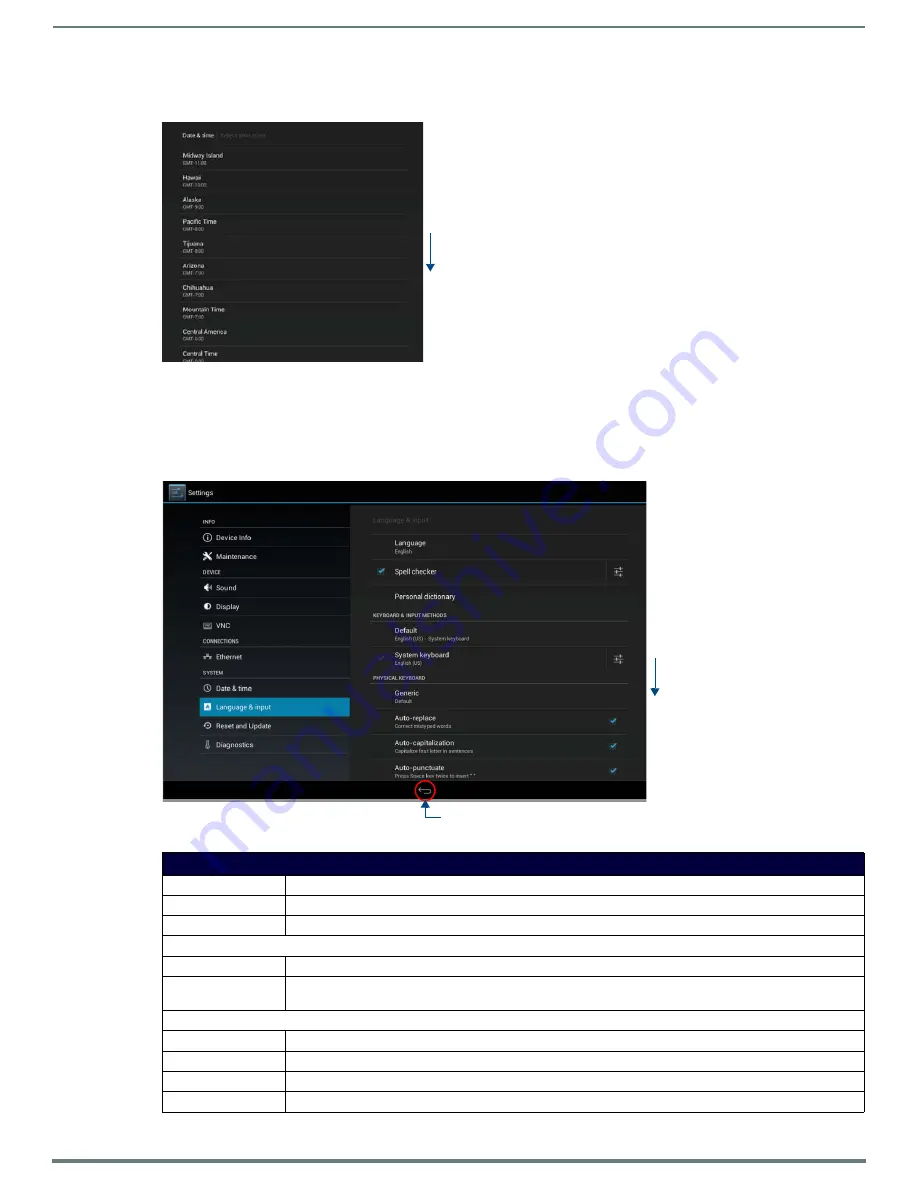
Press
Select Time Zone
to open the
Select Time Zone
window (FIG. 88).
2.
Select the time zone desired. The window will automatically close and return to the
Date & Time
page.
SYSTEM - Language & Input
The
Language & Input
page (FIG. 89) controls the language used by the
Settings
menu, as well as the keyboard input used for
Settings
menu field entries.
FIG. 88
Select Time Zone window
FIG. 89
Language & Input page
Language & Input page options
Language:
Select a language for the
Settings
menu. See
Selecting the Panel’s Language
on page 53 for details.
Spell Checker:
Enable this option to include an automatic spell checker in all
Settings
menu fields.
Personal Dictionary:
Lists all words saved in the panel’s personal dictionary file. See
on page 53 for details.
KEYBOARD & INPUT METHODS
Default:
Specify the default system keyboard. Refer to
on page 54 for details.
System Keyboard:
Choose the keyboard matching the selected panel language, or another language-format keyboard. Refer to
on page 54 for details.
PHYSICAL KEYBOARD
Generic:
Selects the format for a physical keyboard connected to the panel.
Auto-Replace:
Select this for automatic correction of commonly mistyped words.
Auto-Capitalization: Select this for automatic capitalization of the first word in a sentence.
Auto-Punctuate:
Select this for automatic addition of a period when the space key is pressed twice.
Scroll down
to see all
menu items
Scroll down
to see all
menu items
Return icon - press to jump to the previous view


