6
Receiver Front-Panel Controls
Phones
Volume
Eject
Standby
PRO LOGIC II
VIRTUAL
SPEAKER
DOLBY
DIGITAL
DOLBY
DIGITAL
Information
Display
Disc Slot
Volume Control
USB
Port
Headphone
Jack
Eject
Button
Standby
Button
Power
Indicator
TOP
FRONT
SIDE
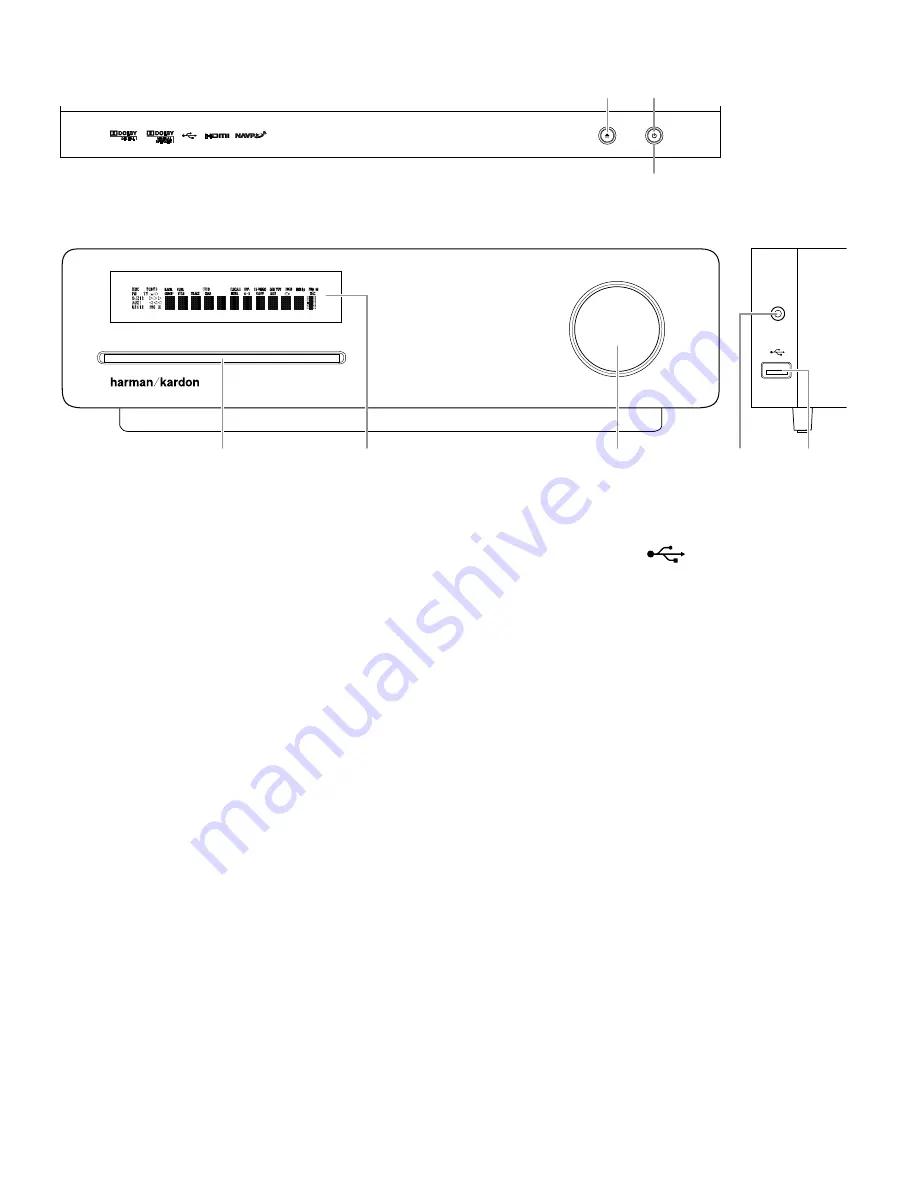
Disc Slot:
Insert a compatible disc into the slot. The HS 2X0SO/230’s
disc player will accept five-inch (12cm) and three-inch (8cm) discs.
Information Display:
Various messages appear on this display in
response to commands. In addition, a variety of indicators will light at
various times to show the current source, settings or other aspects of
the HS 2X0SO/230’s status as described throughout this manual. See
Receiver Information Display
, on page 7, for details.
Volume Control:
Rotate the disc clockwise to raise the volume; rotate
counterclockwise to lower the volume. The volume level will appear
on the Information Display and on the on-screen menu (if the menu is
enabled, see
Preferences – Volume Bar
, on page 20).
Eject Button (on top of unit):
Press this button to eject a disc from the
HS 2X0SO/230’s built-in DVD player. Before pressing this button, make
sure that no objects are blocking the disc slot. NOTE: If you do not
remove the ejected disc within 20 seconds, it will automatically re-load
back into the DVD player for protection.
Standby Button (on top of unit):
This button turns the HS 2X0SO/230
on for playback or leaves it in the Standby mode for quick turn-on
using this button or the remote control.
Power Indicator:
This LED (light-emitting diode) surrounds the Standby
switch. When the HS 2X0SO/230 is plugged into AC power, the LED
turns red to indicate that the HS 2X0SO/230 is in Standby mode (ready
to be turned on). When you turn the HS 2X0SO/230 on (by the Standby
switch or the remote control), the LED turns white.
Phones (headphones) Jack (on side of unit):
Insert the 3.5mm stereo
mini-connector from a set of headphones into this jack. NOTE: When
a plug is inserted into the Phones jack, the HS 2X0SO/230’s speaker
outputs automatically mute; the HDMI audio output, coaxial output and
line output remain active.
USB 2.0 Port (on side of unit):
Gently insert a flash drive, card reader, digital camera or other USB
device, or a USB Standard-A cable connected to a USB device, to this
port.
IMPORTANT: DO NOT connect a PC or other USB host/controller to
this port, or you may damage both the HS 2X0SO/230 and your other
device.
Orient the other device’s plug so it fits all the way into the
HS 2X0SO/230’s USB connector. You may insert or remove the
device at any time — there is no installation or ejection procedure.
The HS 2X0SO/230 can play MP3 and Windows Media
®
Audio WMA
audio files that are stored on the device. The HS 2X0SO/230 can also
display JPEG-format still-image files.
harman/kardon
HS 2X0/230 Service Manual
Page 4 of 73
Содержание HS 2X0/230 Series
Страница 12: ...harman kardon HS 2X0 230 Service Manual Page 12 of 73...
Страница 36: ...harman kardon HS 2X0 230 Service Manual Page 36 of 73...
Страница 37: ...harman kardon HS 2X0 230 Service Manual Page 37 of 73...
Страница 38: ...harman kardon HS 2X0 230 Service Manual Page 38 of 73...
Страница 39: ...harman kardon HS 2X0 230 Service Manual Page 39 of 73...
Страница 40: ...harman kardon HS 2X0 230 Service Manual Page 40 of 73...
Страница 41: ...harman kardon HS 2X0 230 Service Manual Page 41 of 73...
Страница 42: ...harman kardon HS 2X0 230 Service Manual Page 42 of 73...
Страница 43: ...harman kardon HS 2X0 230 Service Manual Page 43 of 73...
Страница 44: ...harman kardon HS 2X0 230 Service Manual Page 44 of 73...
Страница 45: ...harman kardon HS 2X0 230 Service Manual Page 45 of 73...
Страница 46: ...harman kardon HS 2X0 230 Service Manual Page 46 of 73...
Страница 47: ...harman kardon HS 2X0 230 Service Manual Page 47 of 73...
Страница 48: ...harman kardon HS 2X0 230 Service Manual Page 48 of 73...
Страница 49: ...harman kardon HS 2X0 230 Service Manual Page 49 of 73...
Страница 50: ...harman kardon HS 2X0 230 Service Manual Page 50 of 73...
Страница 51: ...harman kardon HS 2X0 230 Service Manual Page 51 of 73...


