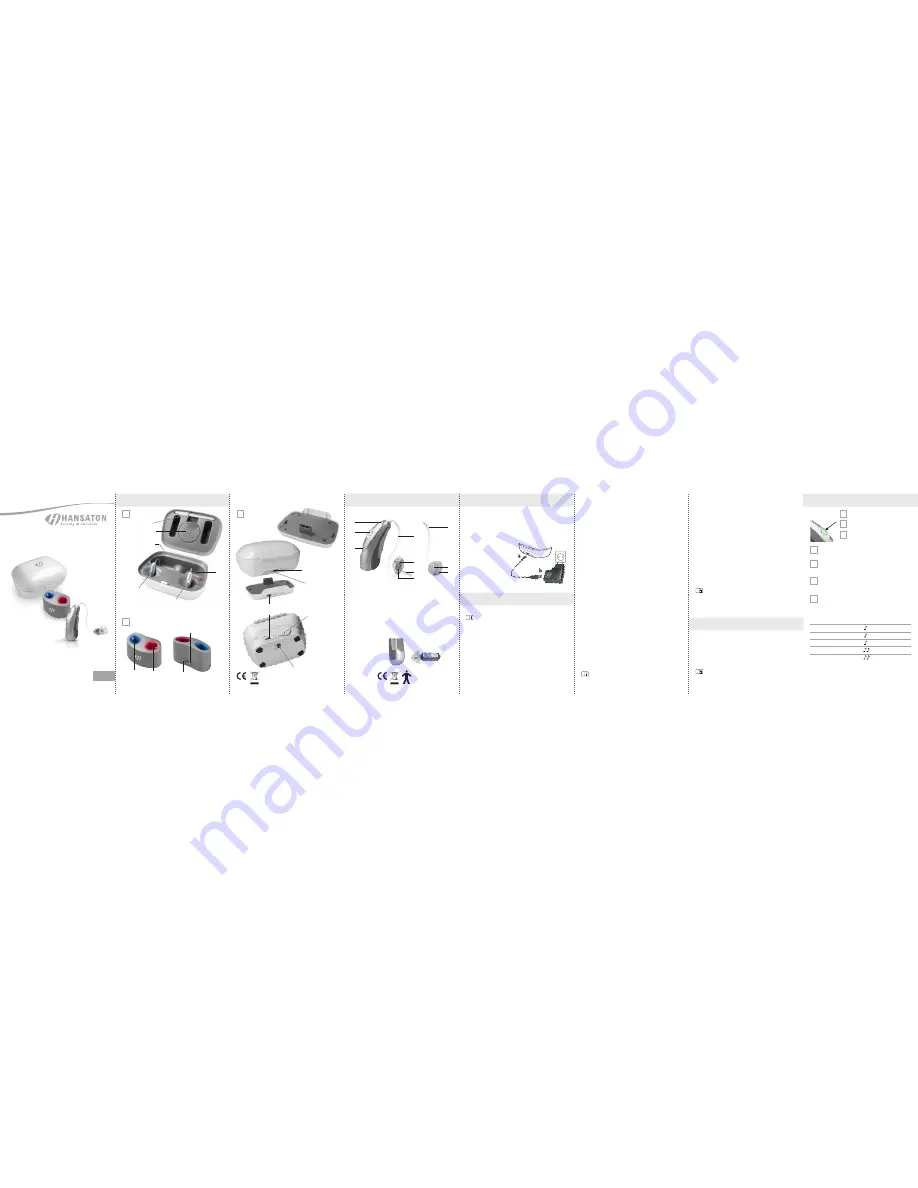
Your Charging Station.
Your Hearing System.
Connection to external power source
and charging indicator light on the
back (micro-USB)
•
The cover of the Comfort Charger can be closed during charging.
Interrupting the charging process
•
Hearing systems can be removed from the charging station or
re-inserted at any time during the charging process.
•
Removing the hearing systems from the station before they have
finished charging can shorten their running time.
The end of the charging process
•
Charging time depends on how much power is left in your hearing
systems’ batteries, up to a maximum of three hours.
•
When the hearing systems are fully charged, the charging station
will automatically end the charging process.
The LEDs on the hearing systems will stop flashing and switch to a
steady green.
Removing the hearing systems
•
Once charging finishes, you can remove your hearing systems from
the charging station.
•
Switch your hearing systems on.
•
Removing the hearing systems from the station before they have
finished charging can shorten their running time.
Charging times
100 % charge: 3 hours
50 % charge: 60 minutes
80 % charge: 90 minutes
30 % charge: 30 minutes
Using the Comfort Power Pack (optional)
The Comfort Power Pack is only usable in combination with the
Comfort Charger.
Never pull the hearing aids out of the station by the tubes,
as this can damage the tubes.
!
Comfort Charger
(charging station)
Light Charger
•
Charging stations are used to charge your hearing systems.
(AQ hearing systems are delivered already fully charged.)
•
Place the charging station on a level surface. Avoid locations with
direct sunlight or other sources of heat. Do not cover the charging
station (with a towel, for example) while it is charging.
•
To start the charging station, please insert the micro-USB plug (a)
on the cable provided into the
port on the back of the charging
station.
Then plug the USB connector (b)
end into the USB power adapter
provided
and then plug the adapter
into an electrical outlet.
•
The hearing system has a built-in lithium-ion battery.
Please only charge or use the hearing system within the
following temperature range:
0° to +40° Celsius (32° to 104° Fahrenheit)
•
Charge the hearing system for at least three hours before using for
the first time.
•
Make sure the hearing system is dry before connecting it to the
charging station.
Starting the charging process
•
When your hearing systems are situated correctly within the slots,
their LED lights will blink green. The hearing systems will be switched
off automatically as soon as they are placed in the charging station.
•
The charging process will start automatically.
Hearing system - Charging using the Comfort Charger
or Light Charger.
Cleaning tool
Space for drying
capsule
Space for
earmolds
Right hearing system
(marked in red)
Connection to external
power source and
charging indicator
light on the back
(micro-USB)
Left hearing system
(marked in blue)
4
1
5
6
7
6
1
2
2
3
AQ HD-S
Comfort Power Pack
Hearing system:
AQ HD-S
FCC-ID:
KWC-RICR
Charging slots for hearing systems:
blue = left, red = right
Charging indicator
light (green)
Connection to external power
source (micro-USB)
Battery control
button
Comfort Power Pack
lock
Charging status
display
Connection to external
power source and
charging indicator light
on the back (micro-USB)
Charging indicator
light (green)
1
Tube –
connects the hearing system to the receiver unit
2
Microphone / Microphone protector
3
Button –
Status display when positioning in charging station (LED)
–
used to select programs and/or adjust volume (depend-
ing on individual settings)
4
Dome
5
Support –
prevents dome and tube from slipping out of the ear
canal
6
External receiver
7
Earmold
Setting up / Starting the Charging Station.
Switching the Hearing System on/off.
On/Off
•
To switch a hearing system on or off, press the button with the tip of
your finger and hold it down for three seconds, until the LED begins to
blink.
1x short flash = hearing system switching on2x short flashes = hearing
system switching off
A startup melody will play when the hearing system is switched
on.
Adjusting Volume.
0124
Conformity to directive
93/42/EEC concerning
medical devices
•
0% - 29%
••
30% - 59%
•••
60% - 100%
0% - 29%
30% - 59%
60% - 100%
Instructions For Use
EN
See also ”General Warnings and
Safety Instructions“, Page 00-00
Comfort
Charger
Light
Charger
AQ HD S
D
en
F
e
•
Charge the Comfort Power Pack for at least three hours before using
for the first time.
•
The Comfort Power Pack has a built-in lithium-ion battery.
•
Connect the Comfort Charger to the Comfort Power Pack and use
the slider on the bottom to lock it into place.
•
Connect the charging cable, then plug it into an external power
source. The Comfort Power Pack and the hearing systems will be
charged at the same time.
While the Comfort Power Pack is connected to an external power
source, the charging indicator light will blink and display current
battery status.
•
When fully charged, the Comfort Power Pack can charge one pair of
hearing systems up to seven times.
To check the Comfort Power Pack’s remaining battery capacity, press
the battery control button (status indicators will otherwise remain off
in order to save power).
Please only charge or use the Comfort Charger / Light Charger
or the Comfort Power Pack within the following temperature range:
0° to +40° Celsius (32° to 104° Fahrenheit)
No function (deactivated)
Volume control: louder
Volume control: quieter
With Pushbutton
Volume control: right-hand system – louder
left-hand system – quieter
Combination: Change program – right-hand system
Volume control – left-hand system – quieter
Combination: Change program – left-hand system
Volume control – right-hand system – louder
Side marking
Red = right Blue = left
•
Refer to the remote control user guide.
With Remote Control
Volume setting
Suggested volume level
Turning volume up
Turning volume down
Maximum volume level
Minimum volume level
Beeps
1 beep
short beep
short beep
2 beeps
2 beeps


