

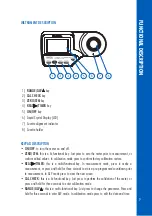
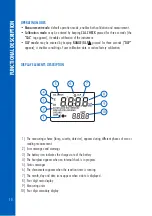
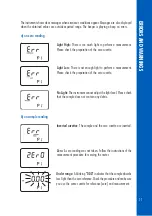
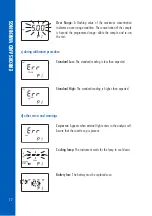


14
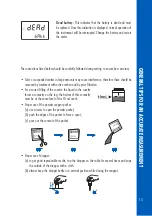
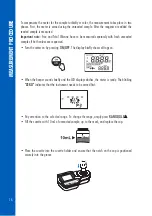
Prepare the instrument for measurement as follows:
• Unpack the instrument by removing the dust protection sleeve from the instrument cuvette
holder.
• Place the battery in the instrument as described in the “BATTERY REPLACEMENT” chapter.
• Place the instrument on a flat table.
• Do not place the instrument under direct sun light.
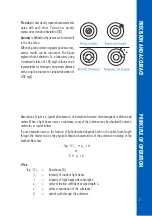
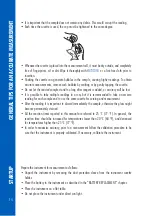
• It is important that the sample does not contain any debris. This would corrupt the reading.
• Each time the cuvette is used, the cap must be tightened to the same degree.
• Whenever the cuvette is placed into the measurement cell, it must be dry outside, and completely
free of fingerprints, oil or dirt. Wipe it thoroughly with
HI731318
or a lint‑free cloth prior to
insertion.
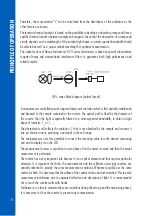
• Shaking the cuvette can generate bubbles in the sample, causing higher readings. To obtain
accurate measurements, remove such bubbles by swirling or by gently tapping the cuvette.
• Do not let the reacted sample stand too long after reagent is added, or accuracy will be lost.
• It is possible to take multiple readings in a row, but it is recommended to take a new zero
reading for each sample and to use the same cuvette for zeroing and measurement.
• After the reading it is important to discard immediately the sample, otherwise the glass might
become permanently stained.
• All the reaction times reported in this manual are referred to 25 °C (77 °F). In general, the
reaction time should be increased for temperatures lower than 20
º
C (68
º
F), and decreased
for temperatures higher than 25
º
C (77
º
F).
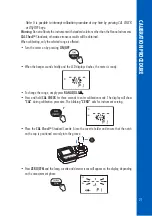
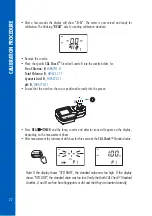
• In order to maximize accuracy, prior to a measurement follow the validation procedure to be
sure that the instrument is properly calibrated. If necessary, calibrate the instrument.
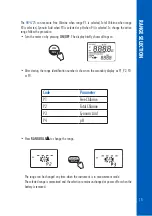
GENERAL TIPS FOR AN ACCURA
TE MEASUREMENT
ST
ARTUP