
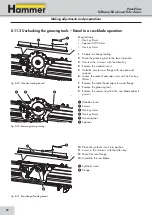

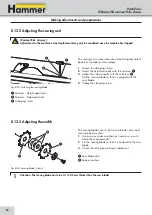


63
X/2
X
Gefaket!!
15 mm in Richtung dimetrie 1 verschoben
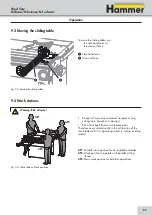
Schiebetisch, Grundbahn, Handrad Logo
"
!
#
!
Panel Saw
K3 basic/K3 winner/K3 e-classic
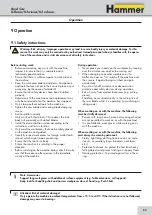
Operation
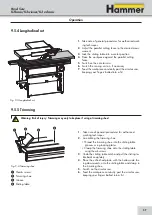
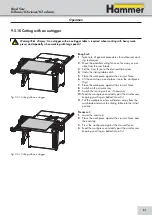
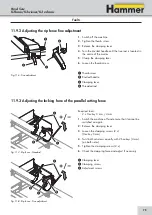
9.5.12 Working with grooving tools
Warning! Risk of injury!
• Groove cuts may only be carried out with an
overhead saw guard! Do not, under any circumstances, use a saw blade guard (guard mounted onto splitter)!
• Do not pull back the fence guiding tracks (guide) of the rip fence!
• Removing the splitter.
• Adjust the cutting angle to 90°!
1.
Take note of general procedures for authorized
working techniques.
2.
Set the rip fence to the desired measurement.
3.
Lock the sliding table into a centre position.
4.
Set the cutting height to a maximum of half of that of
the workpiece’s thickness.
5.
Always use the crosscut fence and the sliding table
when making transverse grooves (see “Cutting to
length against the rip fence”).
6.
When feeding the workpiece forward, press it hard
onto the sliding table.
Use an eccentric clamp if required. If an eccentric
clamp is used, shape the groove using the sliding
table.
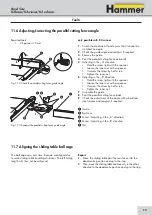
Fig. 9-17: Working with grooving tools
Fig. 9-18: Working with grooving tools
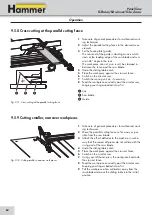
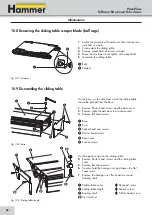
Attention! Risk of material damage!
Do not adjust the 90° angle when operating with grooving tooling!
Fasten Sawboy by means of the screw onto the parallel
fence, in the case of a thin-walled fence by means of
said screw and the nut.
Operating and adjusting:
Read individual operation instructions
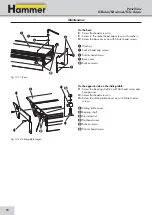
!
Sawboy
"
Fence guide
#
Special-nut
Fig. 9-19: Auxiliary fence
Note: Tenoning hood and moulding guard „Sawboy“
see: Tools and Accessories catalogue
Содержание K3 e-classic
Страница 76: ...76 Panel Saw K3 basic K3 winner K3 e classic...
Страница 77: ...77 Panel Saw K3 basic K3 winner K3 e classic...
Страница 78: ...78 Panel Saw K3 basic K3 winner K3 e classic...
Страница 79: ...79 Panel Saw K3 basic K3 winner K3 e classic...


