Installing Your Freezer
Unpacking Your Freezer
1. Remove all packaging material. This includes the foam base and all adhesive
tape holding the freezer accessories inside and outside.
2. Inspect and remove any remaining packaging, tape, or printed materials
before powering on the freezer.
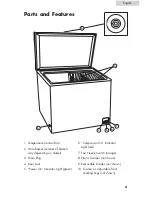
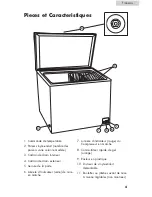
3. Check to be sure you have all accessories and parts stated in the Parts and
Features section.
Installation
• Your freezer is designed for freestanding installation only. It should not be
recessed or built-in.
• Place the freezer on a floor strong enough to support it fully loaded.
• When moving the freezer, never tilt it more than a 45-degree angle. This could
damage the compressor and the sealed system.
• If the freezer has been tilted more than 45-degrees, let it stand in an upright
position for at least 24 hours prior to plugging it into the power source. This
will allow the refrigerant to settle and reduce the possibility of a malfunction in
the cooling system.
• Plug the freezer into an exclusive, properly installed grounded wall outlet.
Do not under any circumstances cut or remove the third (grounding) prong from
the power cord. Any questions concerning power and/or grounding should be
directed toward a certified electrician or an authorized service center.
• After plugging the appliance into a wall outlet, allow the unit to cool down for
2-3 hours before placing food into the chest freezer.
Installation Limitations
• Do not install your freezer in any location that is not properly insulated
or heated (e.g. garage, etc.). Your freezer is not designed to operate in
temperatures below 55˚ Fahrenheit. Extreme cold ambient temperatures may
cause the freezer to not perform properly.
• Select a suitable location for the freezer on a hard, even surface away from
direct sunlight or heat sources (e.g. radiators, baseboard heaters, cooking
appliances, etc.). Direct sunlight may affect the coating and heat sources may
increase electrical consumption. Any floor unevenness should be corrected.
• Avoid locating the freezer in moist areas.
English
5


