31
FlexFit Pro
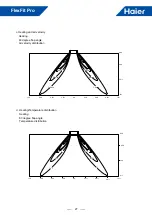
Air Delivery Clearances
Be certain to maintain proper clearances around the
Standard clearances for cassette air handlers require 5
feet of clearance in each direction. There should be 8 feet
of clearance from the face of the cassette louver to the
temperature control problems.
Service and Maintenance Clearances
Make sure there are adequate clearances for future
maintenance and service. Allow enough room to access the
condensate pump assembly and the electrical control box.
The cassette unit comes with a grey connection hose with
clamp. This hose is connected to the cassette assembly
discharge hose port. The other end of the hose is sized to
accept 3/4 ‘’ PVC piping.
here:
5 ft.
5 ft.
1 ft.
8 ft. Over
12 in. below 3-5 ft.
11 in. under
8.6 in.
8.6 in.
19.6 in. below
Step 1 - Preparation
Procedure for Selecting the Location
Required Tools for Installation
•
Drill
•
Wire Snipper
•
Hole Saw 2 3/4”
•
Vacuum pump
•
Soap-and-water solution or gas leakage
detector
•
Torque wrench
•
17mm, 22mm, 26mm
•
Tubing cutter
•
Flaring tool
•
Razor knife
•
Measuring tape
•
Level
•
Micron gauge
•
Nitrogen
•
Mini-Split AD-87 Adapter (1/4” to 5/16”)
•
A - Non-adhesive Tape
•
B - Adhesive Tape
•
C - Saddle (L.S.) with screws
•
D - Electrical wiring
•
E - Drain hose (Included)
•
F - Insulation
•
G - Piping hole cover (Included)
Note:
1) R-410A refrigerant is a safe, nontoxic and
there is a concern about a dangerous level
of refrigerant concentration in the case of
refrigerant leakage, add extra ventilation.
•
Place above the ceiling where you have
enough space to position the unit.
•
Place where the drainage pipe can be
properly positioned.
•
Place where the inlet and outlet air of the
indoor unit will not be blocked.
•
Do not install the unit in a place with
heavy oil or moisture (e.g. - kitchens and
workshops)
•
Do not install in a location with destructive
gas (such as sulfuric acid gas) or pungent
gas (thinner and gasoline) are used or
stored.
•
Choose a place solid enough to bear the
weight and vibration of the unit and where
•
Install where there are no expensive items
like a television or piano below the indoor
unit.
•
Leave enough space for maintenance.
•
Install at least 3 ft. away from televisions
and radios to avoid interference.
Содержание FlexFit Pro AL24LP2VHA
Страница 1: ...SYJS 04 2017REV B Edition 2017 04 FlexFit PRO ...
Страница 8: ...FlexFit Pro 6 ...
Страница 9: ......
Страница 10: ...AW24LP2VHA AW36LP2VHA ...
Страница 11: ......
Страница 12: ...10 ...
Страница 13: ...11 ...
Страница 14: ...12 ...
Страница 15: ...13 ...
Страница 16: ...14 ...
Страница 17: ...15 ...
Страница 18: ...16 ...
Страница 19: ...17 ...
Страница 20: ...18 ...
Страница 37: ...35 FlexFit Pro ...
Страница 53: ...49 FlexFit Pro Part 5 Outdoor Units 50 2 Dimensions 53 3 Piping 55 4 Wiring diagrams 55 5 Installation 58 ...
Страница 72: ...68 FlexFit Pro 3 Outdoor PCB PCB 0151800054B Power module 0150401824 ...
Страница 90: ...86 FlexFit Pro Fig 4 1 ...
Страница 91: ...87 FlexFit Pro Fig 4 2 ...
Страница 108: ...104 FlexFit Pro 7 Controller External View of Remote Controller 7 1 Remote Controller YR HBS01 ...
Страница 121: ...Haier Commercial Air Condition Web Http www haier com Haier reserves the right to make change without any notice ...


